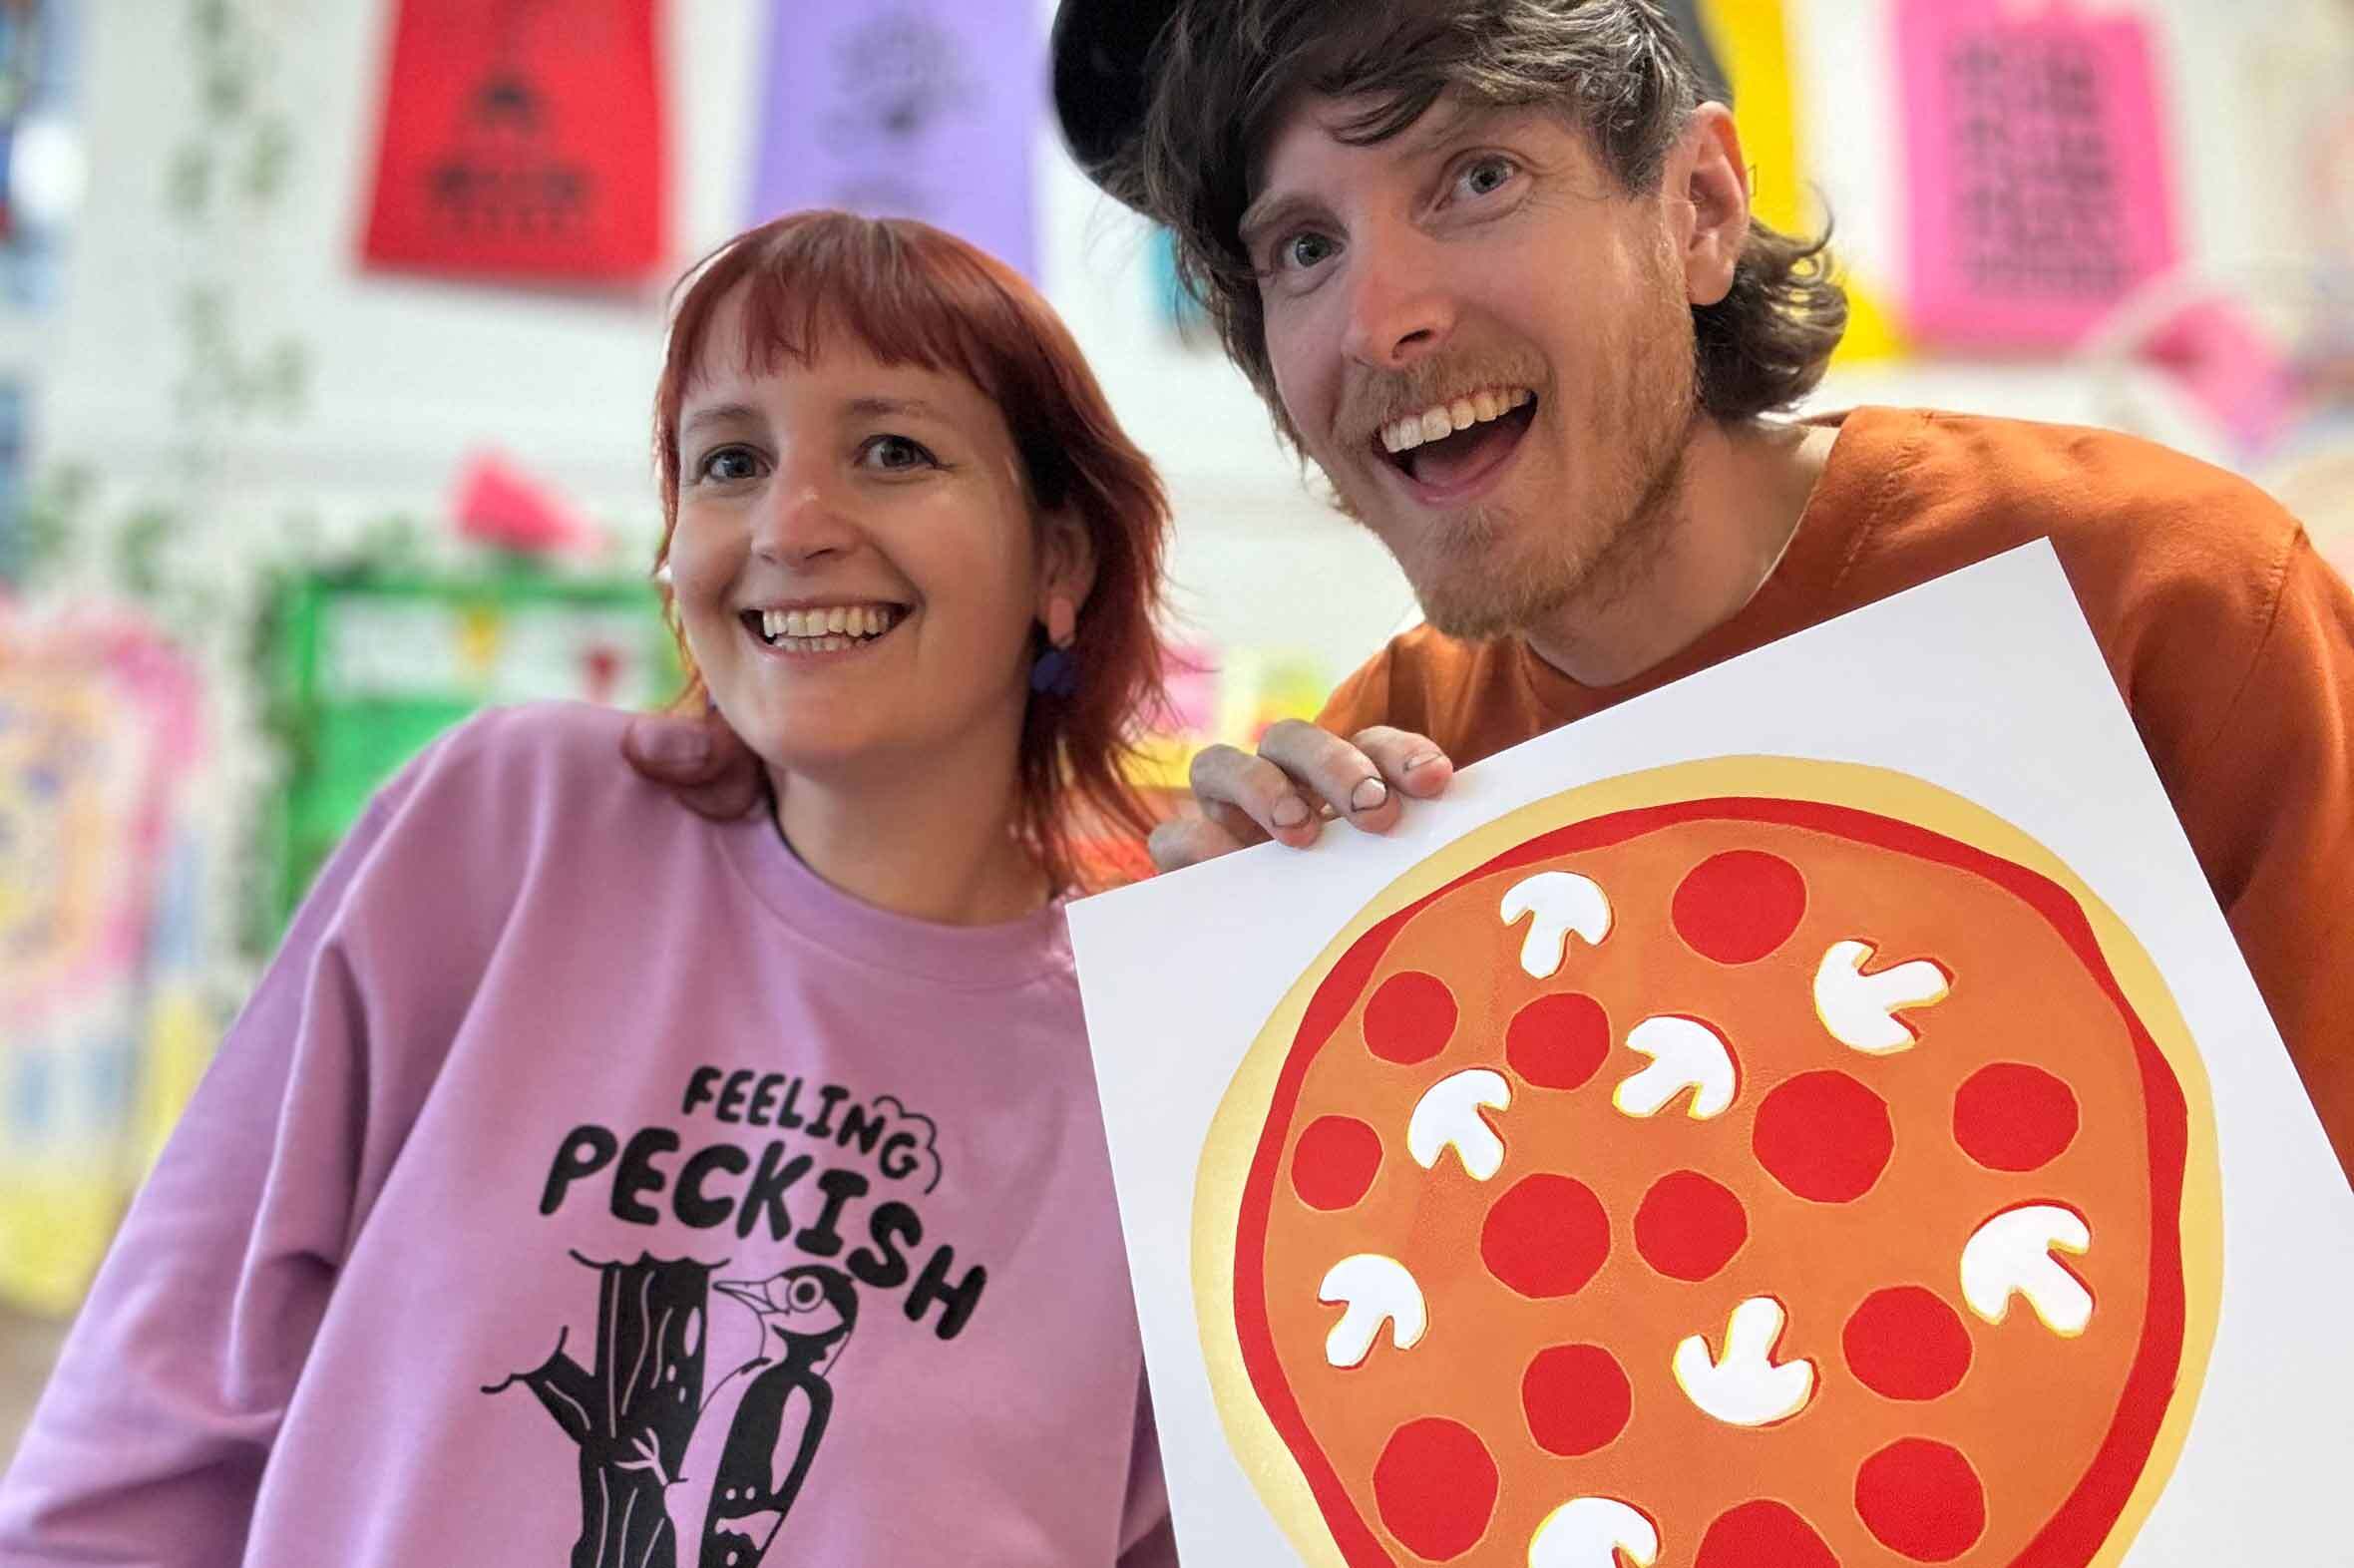
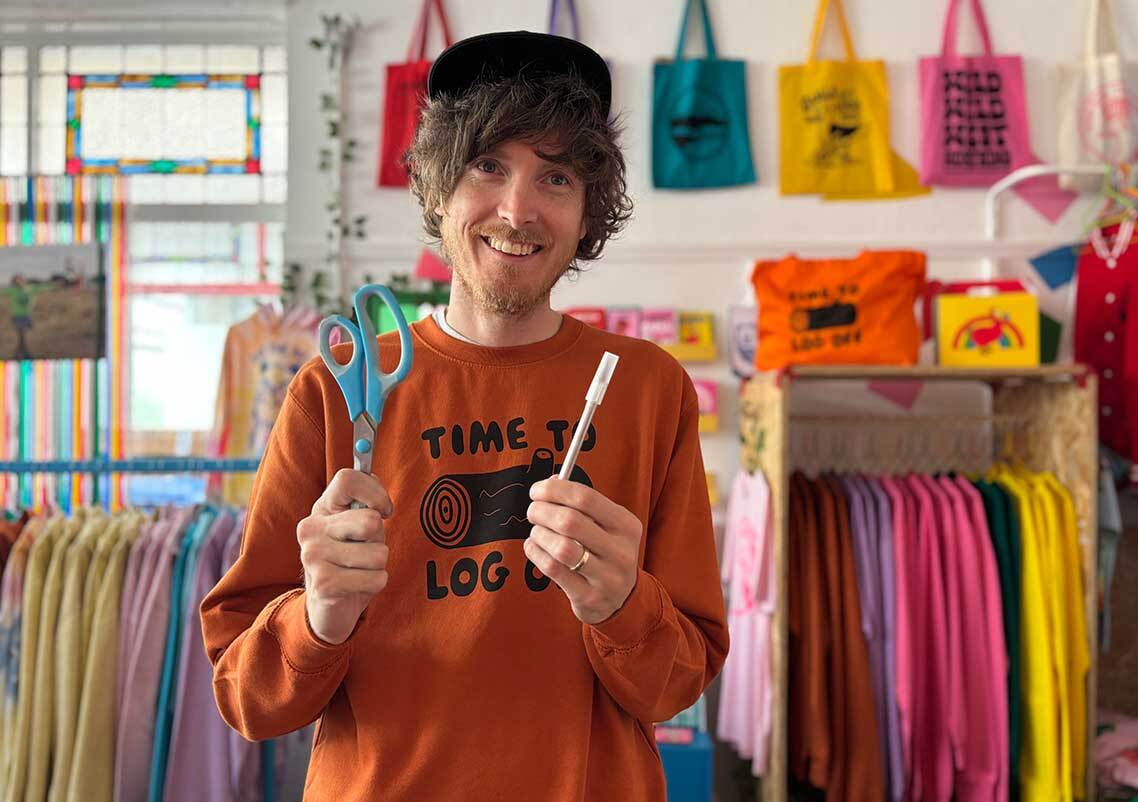
Hello! We are Ali and Jam and we run hello DODO, a fun loving creative business based in Worthing on the south coast of England. From our studio and shop we screenprint our own colourful designs on to ethically sourced clothing and homewares and also run “Squeegee Club” screenprinting workshops to inspire the next generation of printmakers!
For this Speedball tutorial we are going to demonstrate how to screenprint your very own PIZZA! This is a really fun accessible project which explores using the paper stencil technique, printing with multiple colours and the use of simple paper shapes to create overlays and negative space to make different pizza toppings. This project is easy to adapt and develop to create your own dream pizza! Perfect for your kitchen wall or to gift to a pizza loving friend.
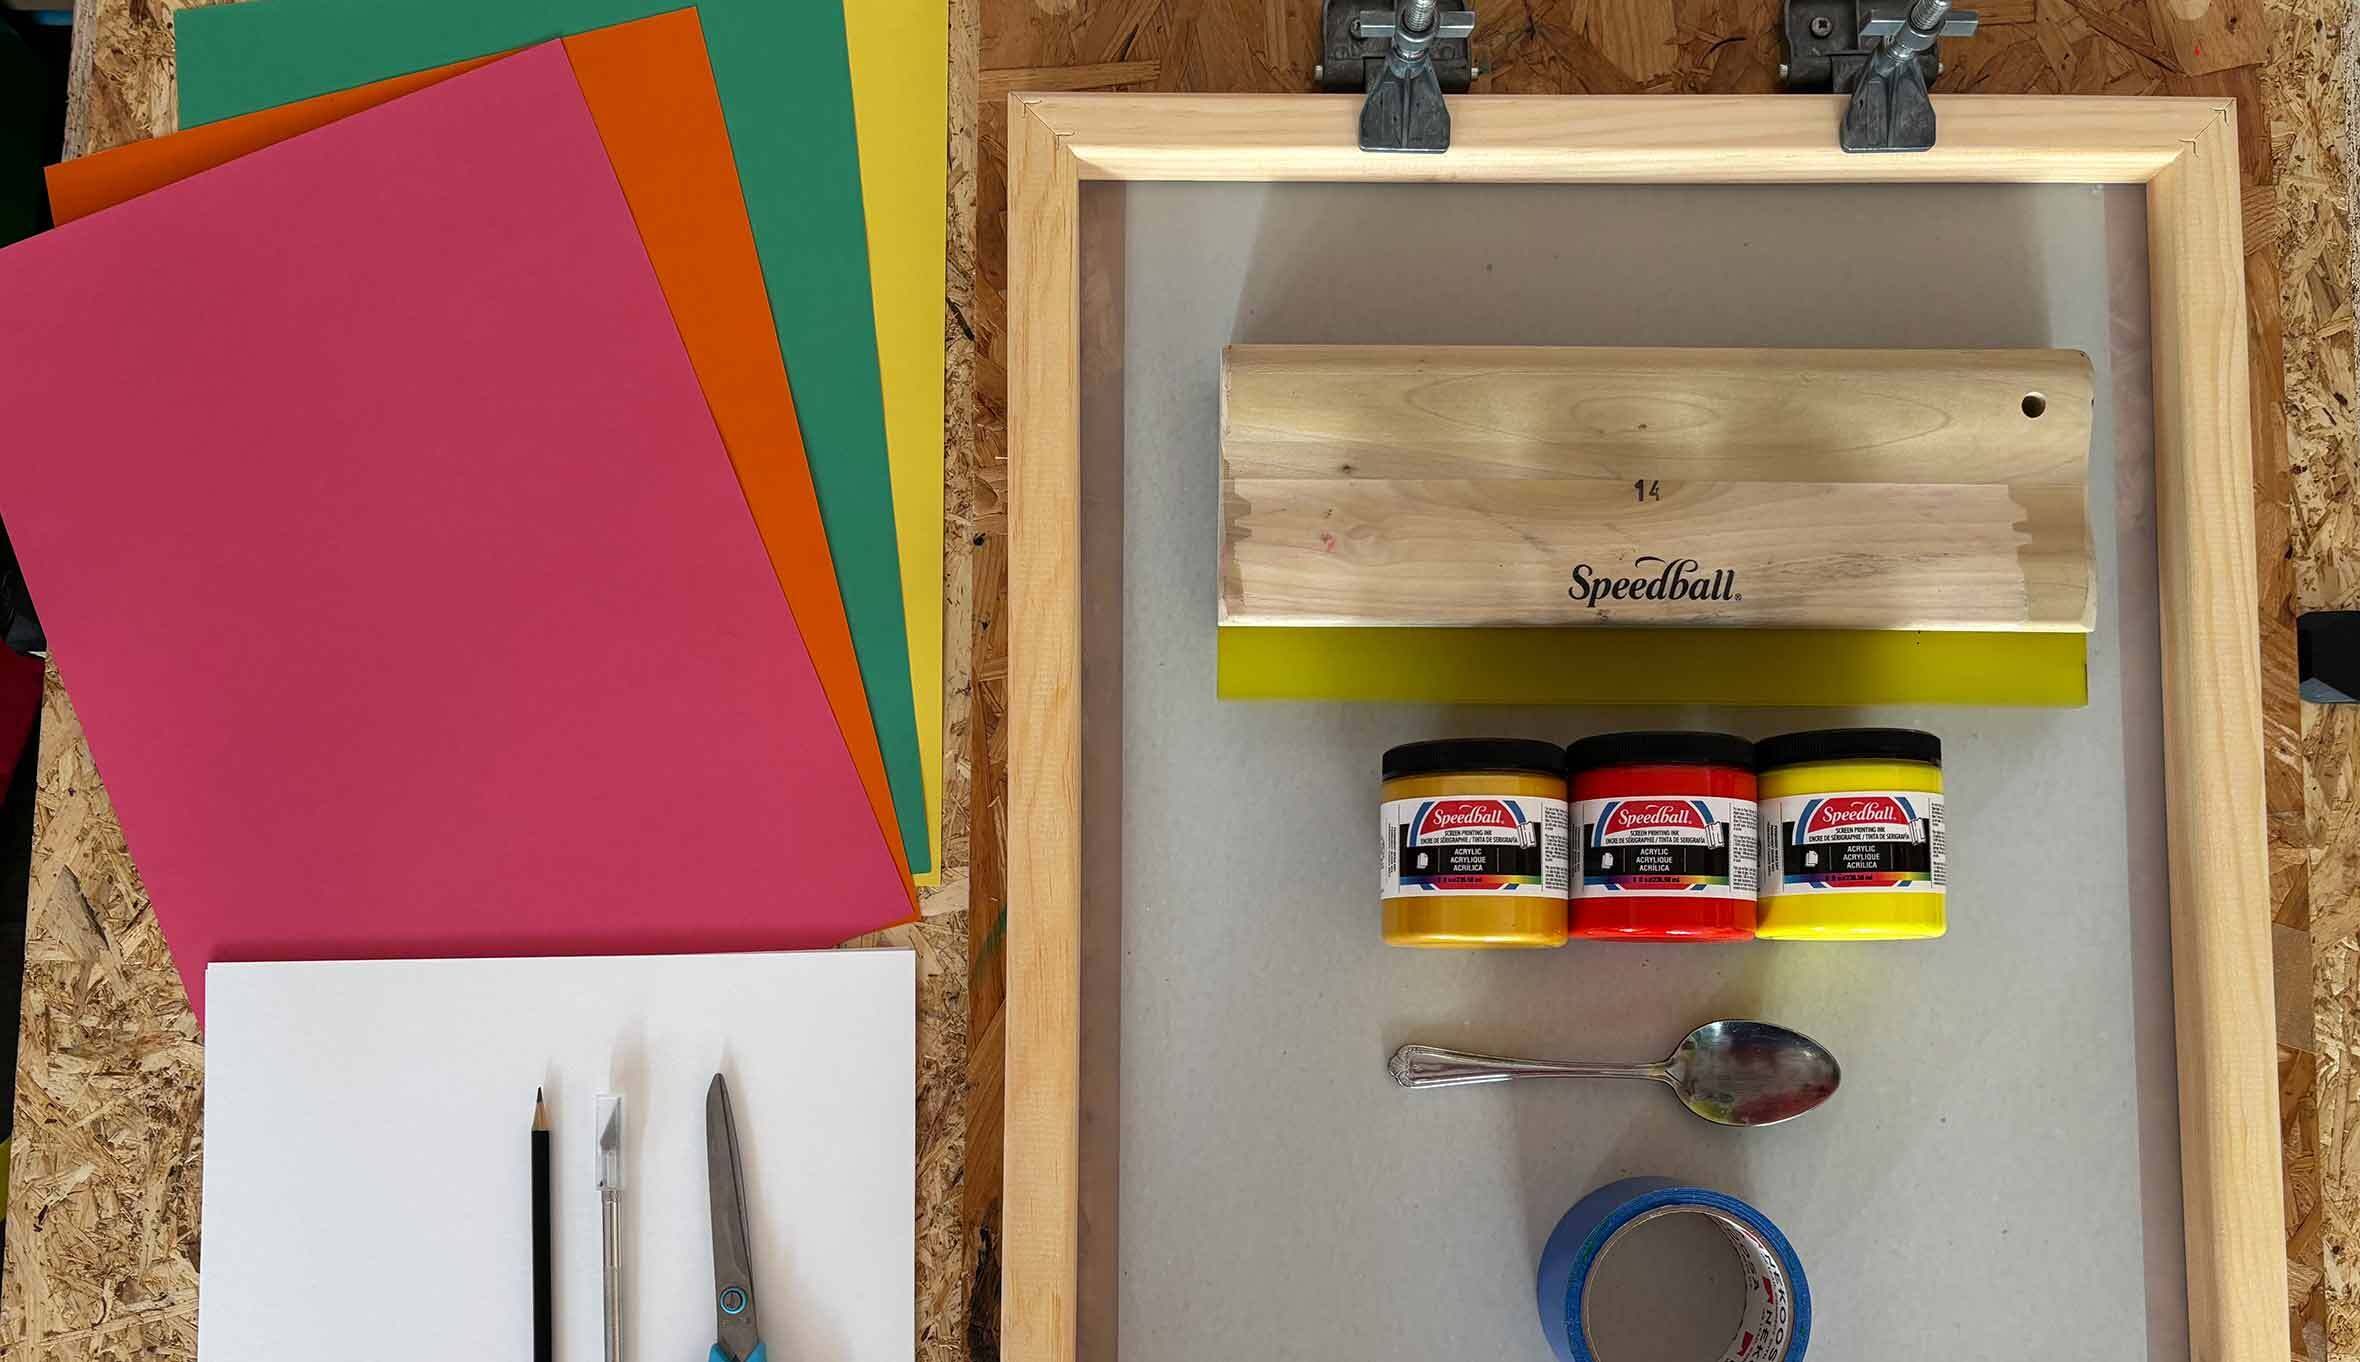
Tools needed:
- Speedball Screen - We used 110 Monofilament Screens (#004729) 18 x 24 inches (if you have 3 screens available you can create this project quicker, otherwise you can wash and fully dry your screen between print runs).
- Printing board with hinge clamps - Easy and affordable to make. You'll need a sturdy piece of flat board (MDF/OSB/Plywood will do). An ideal size is 550mmx750mm. Then attach the clamps with screws at the top, leaving enough room for the clamps to be lifted and rest on the board.
- Speedball Squeegee
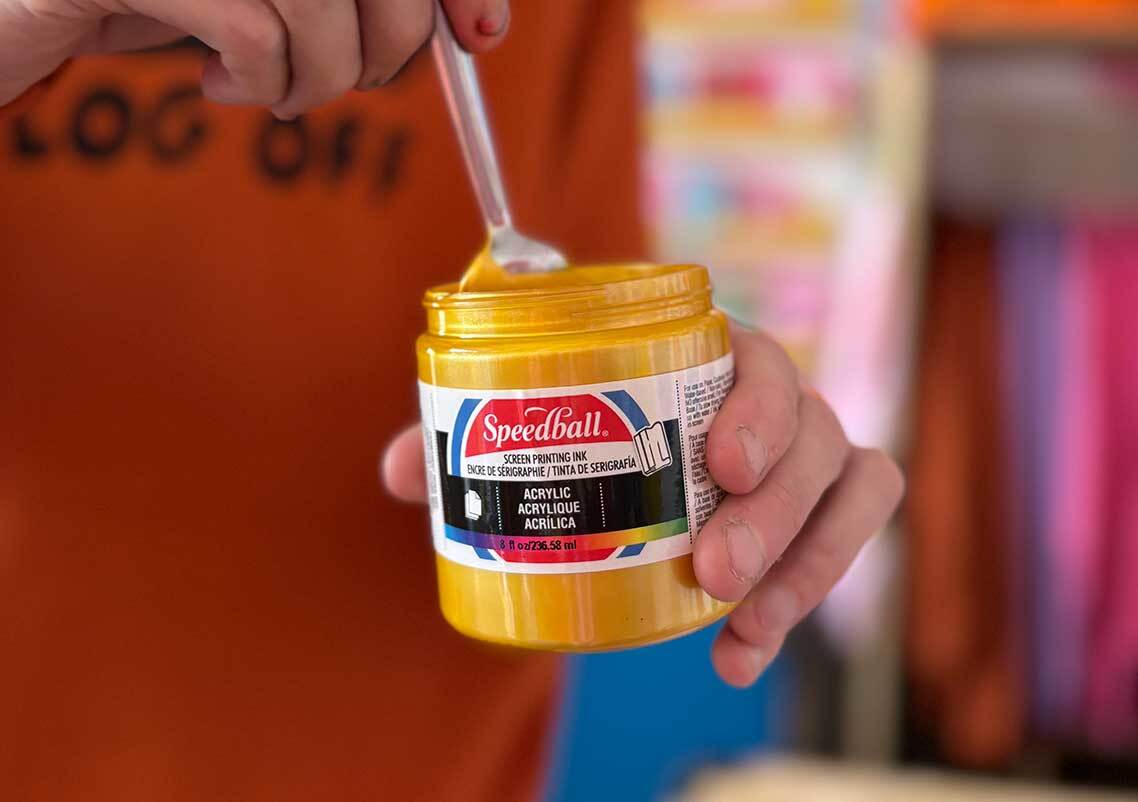
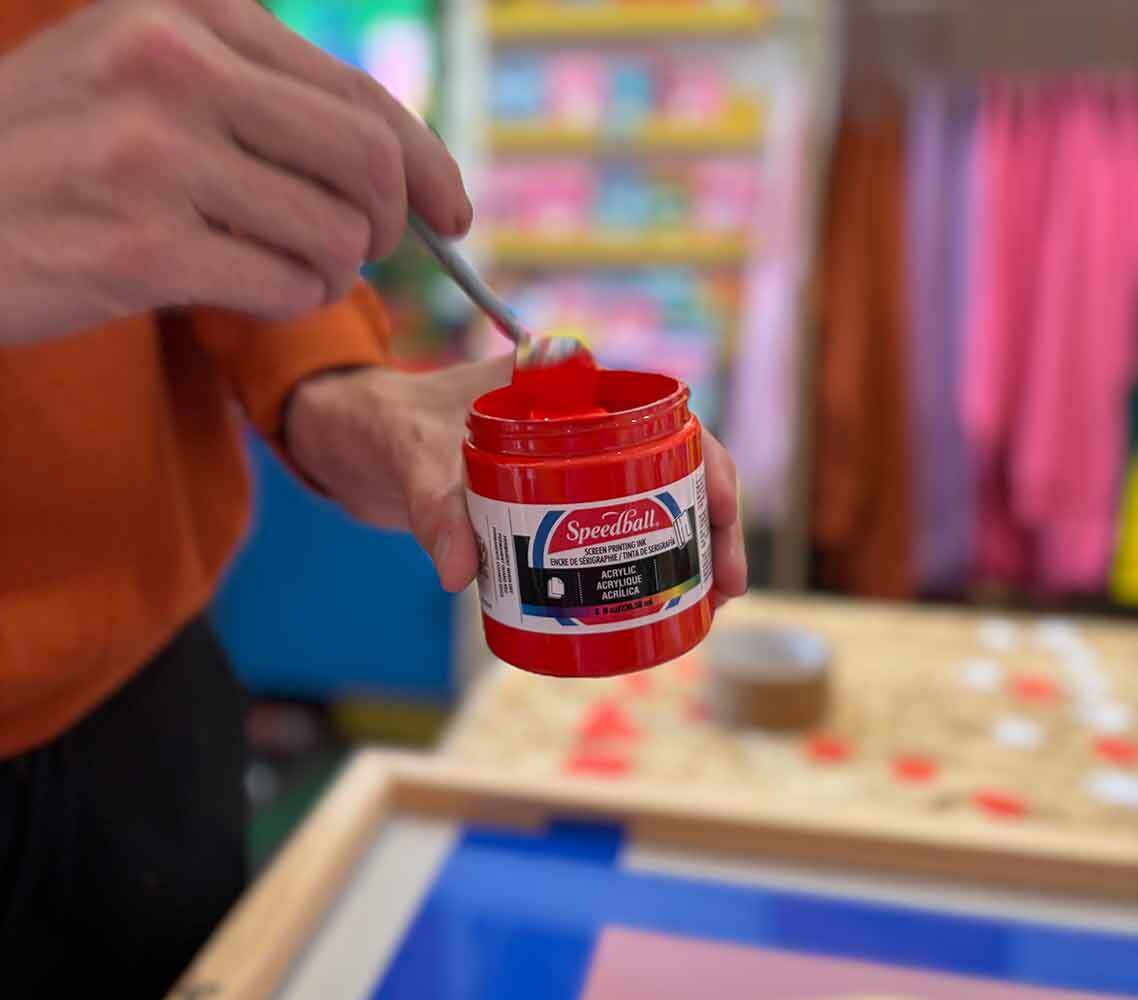
- Speedball Acrylic Paper Inks - We used 1 x Medium Red 004626, 1 x Gold 004628, 1 x Process Yellow 046212
- Spoon/Palette knife
- Roll of vinyl tape (which also doubles up as the perfect inky squeegee holder!)
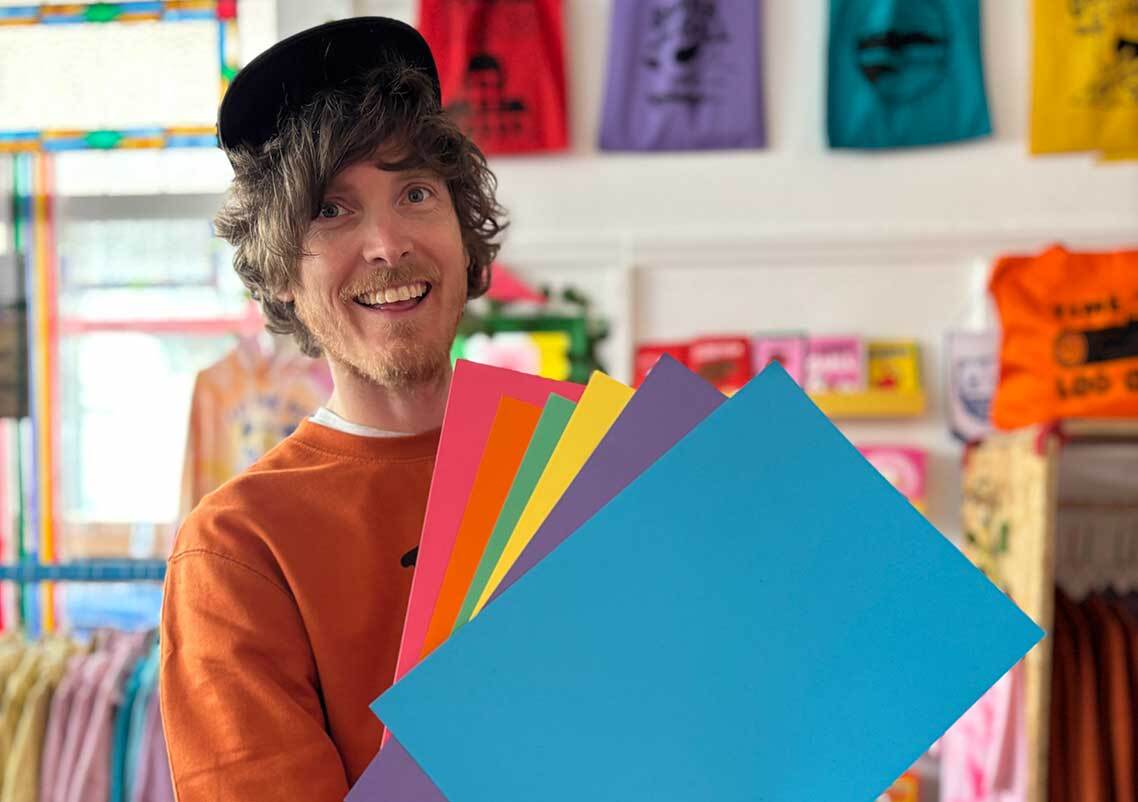
- White paper for printing on to - we used square 297mm x 297mm (easily made by trimming A3 size paper)
- Thin paper for the stencils (ideally 80-100gsm and the super smooth type is best)
- Scissors/craft knife
- Pencil
Step 1: Creating your Stencils - Pizza Base
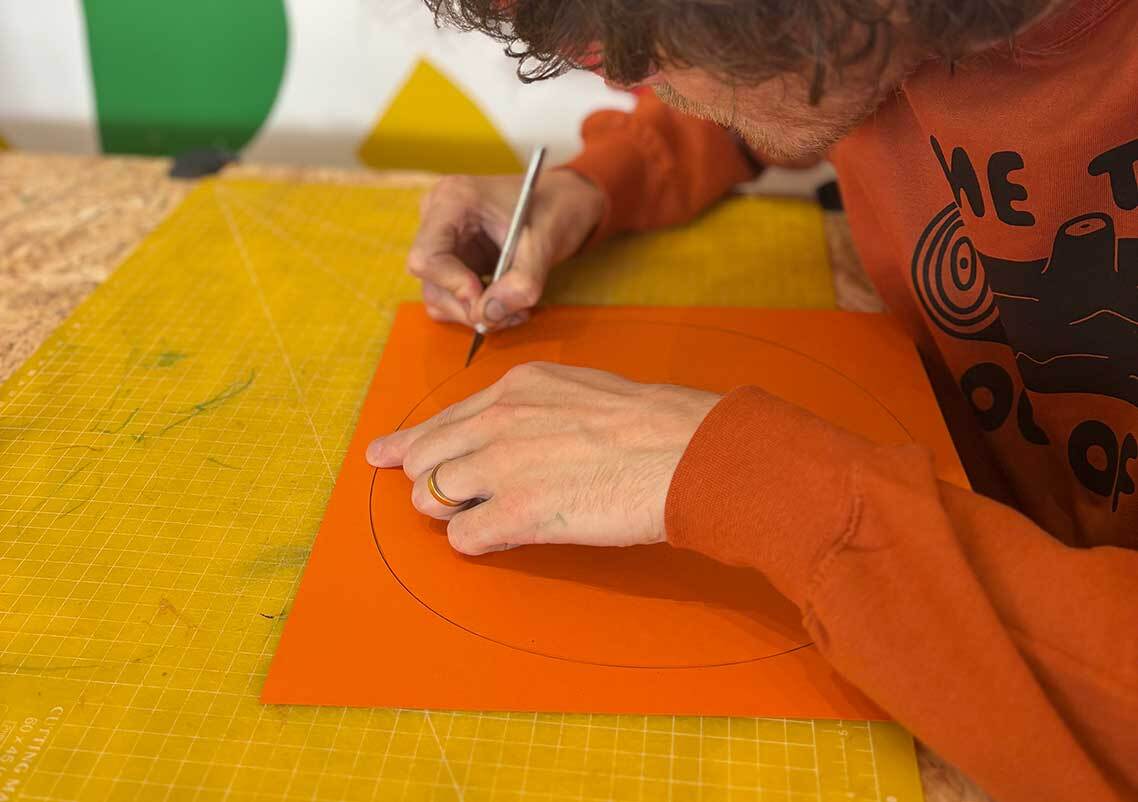
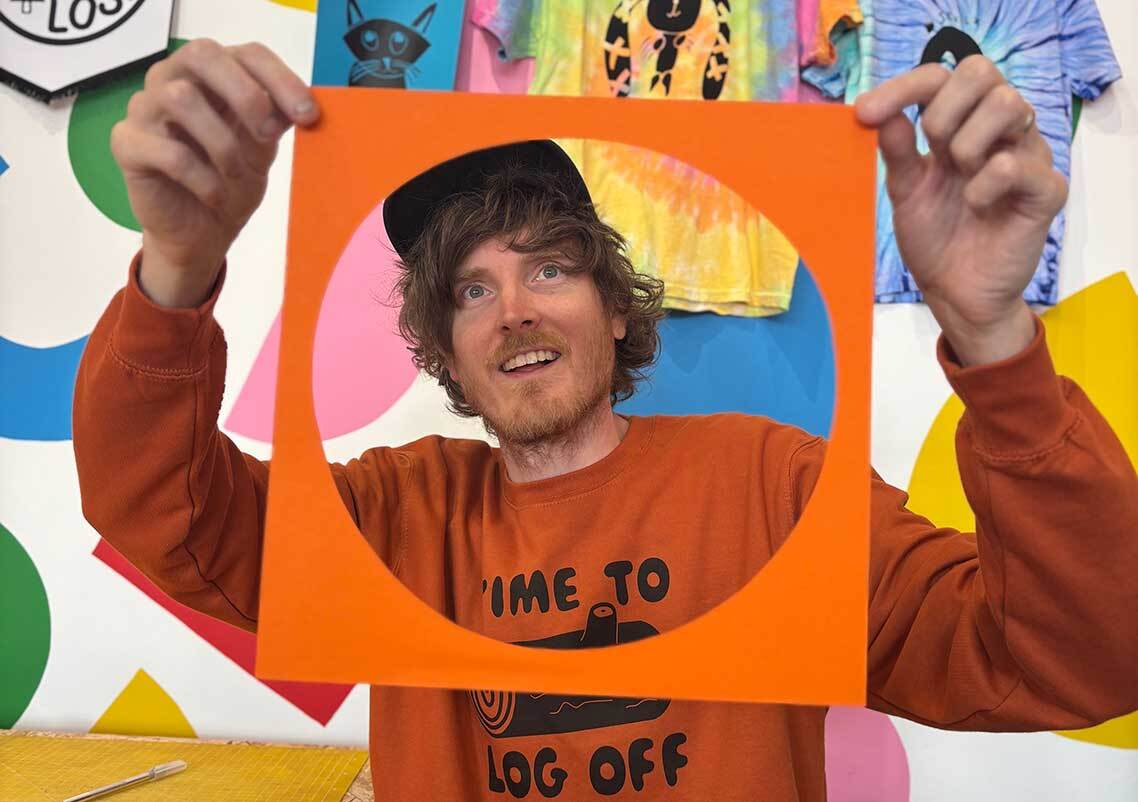
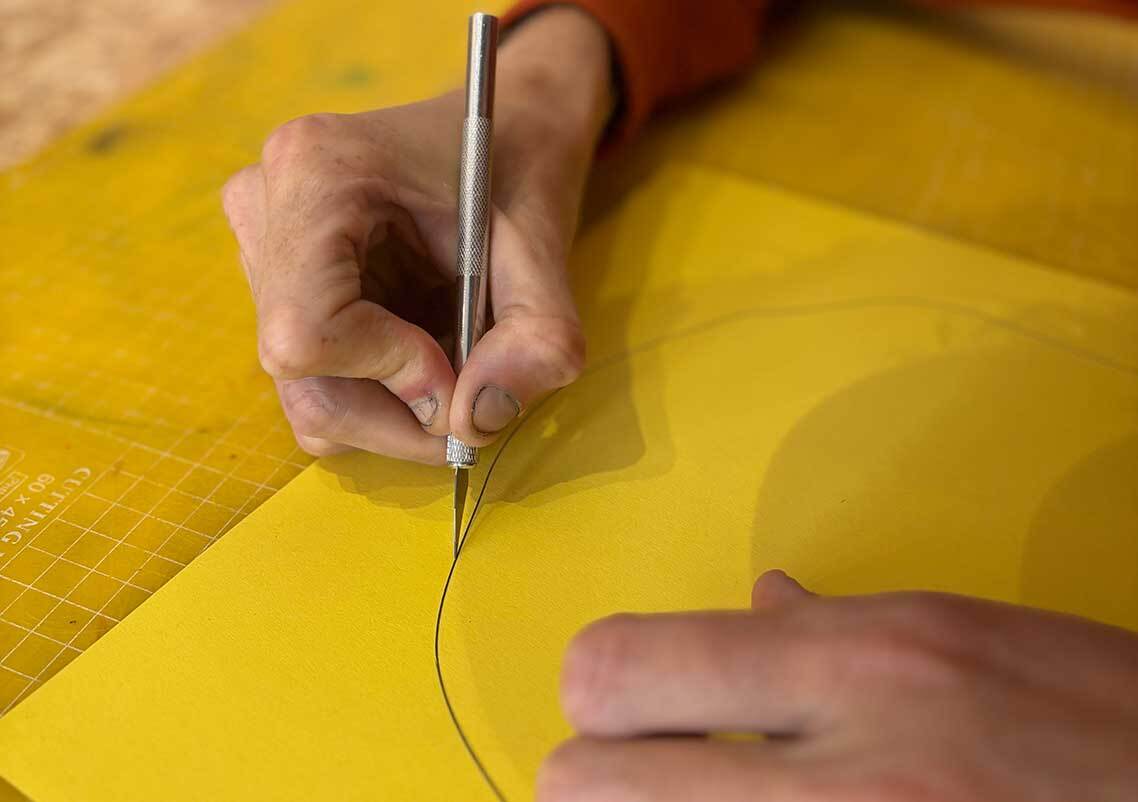
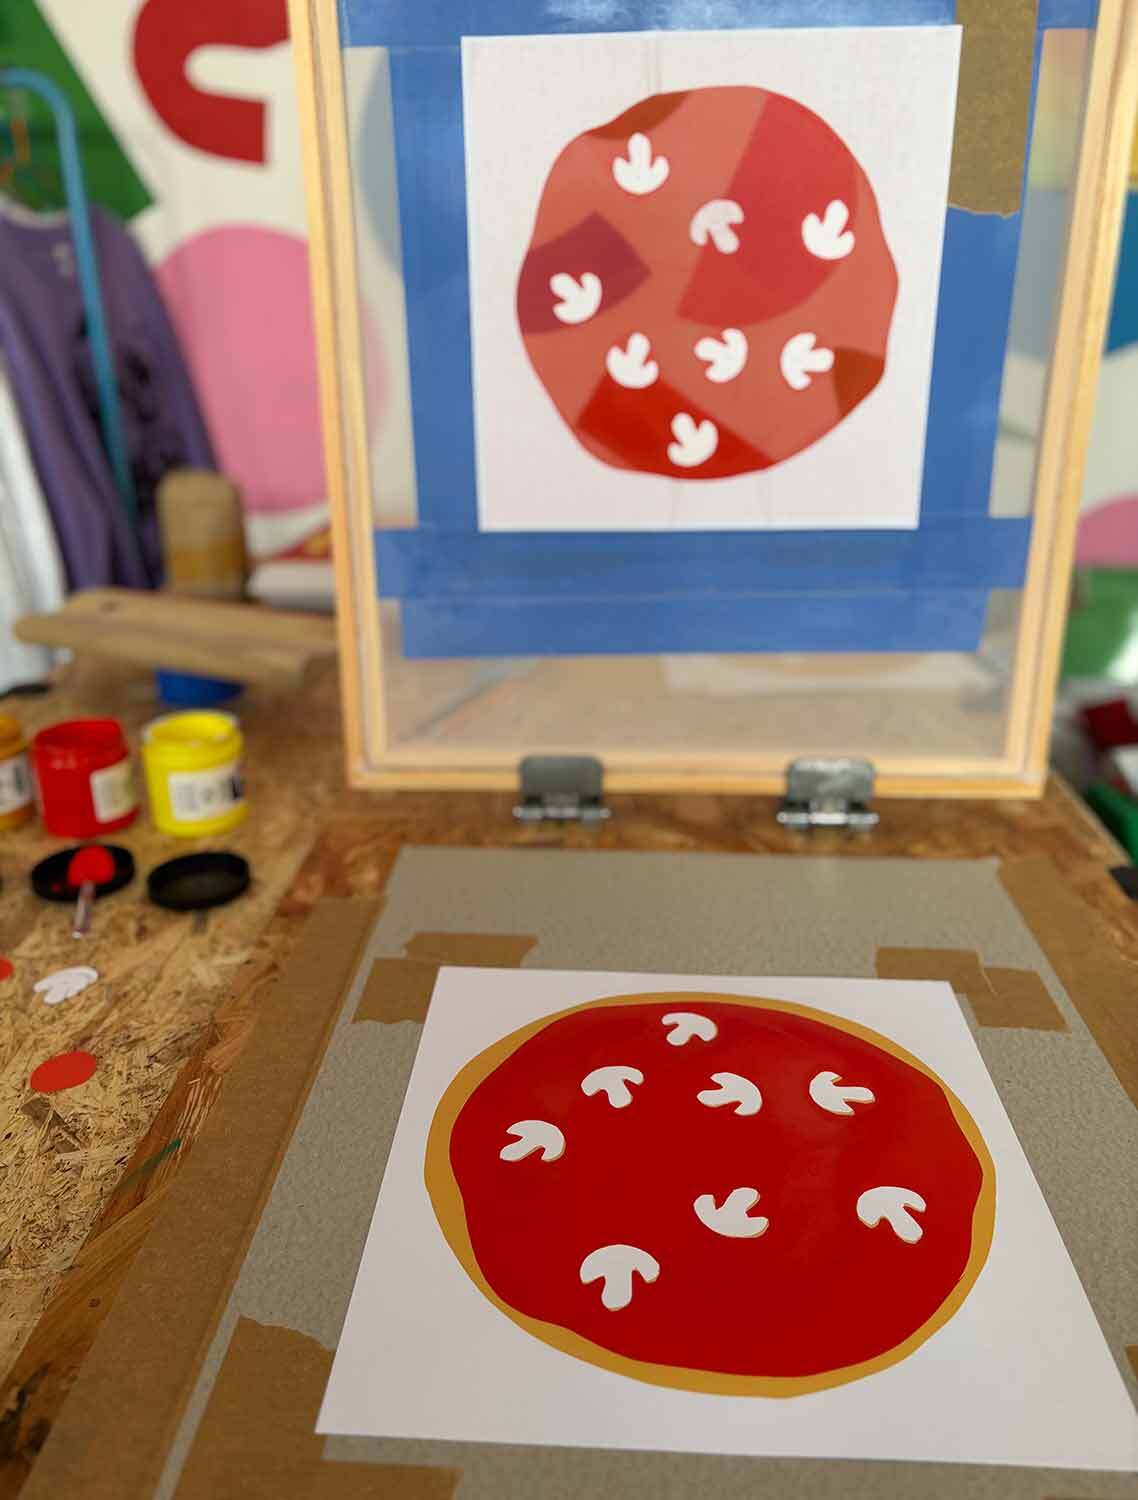
First up, take your thin stencil paper which is trimmed to be the same size as your white paper (ours is square 297mm x 297mm) and draw a large circle shape to be your pizza base. You could draw around a plate if you prefer, it doesn’t matter if it’s slightly wobbly though as this project is all about embracing those little imperfections! Cut your circle out with a craft knife or you can use scissors by cutting a straight line through the paper to the edge of the circle and then cutting neatly around until you rejoin the cut line. The piece you will be using is the paper with the hole cut out of it rather than the circle itself. We recommend cutting a few incase there’s any issues with the stencil when printing.
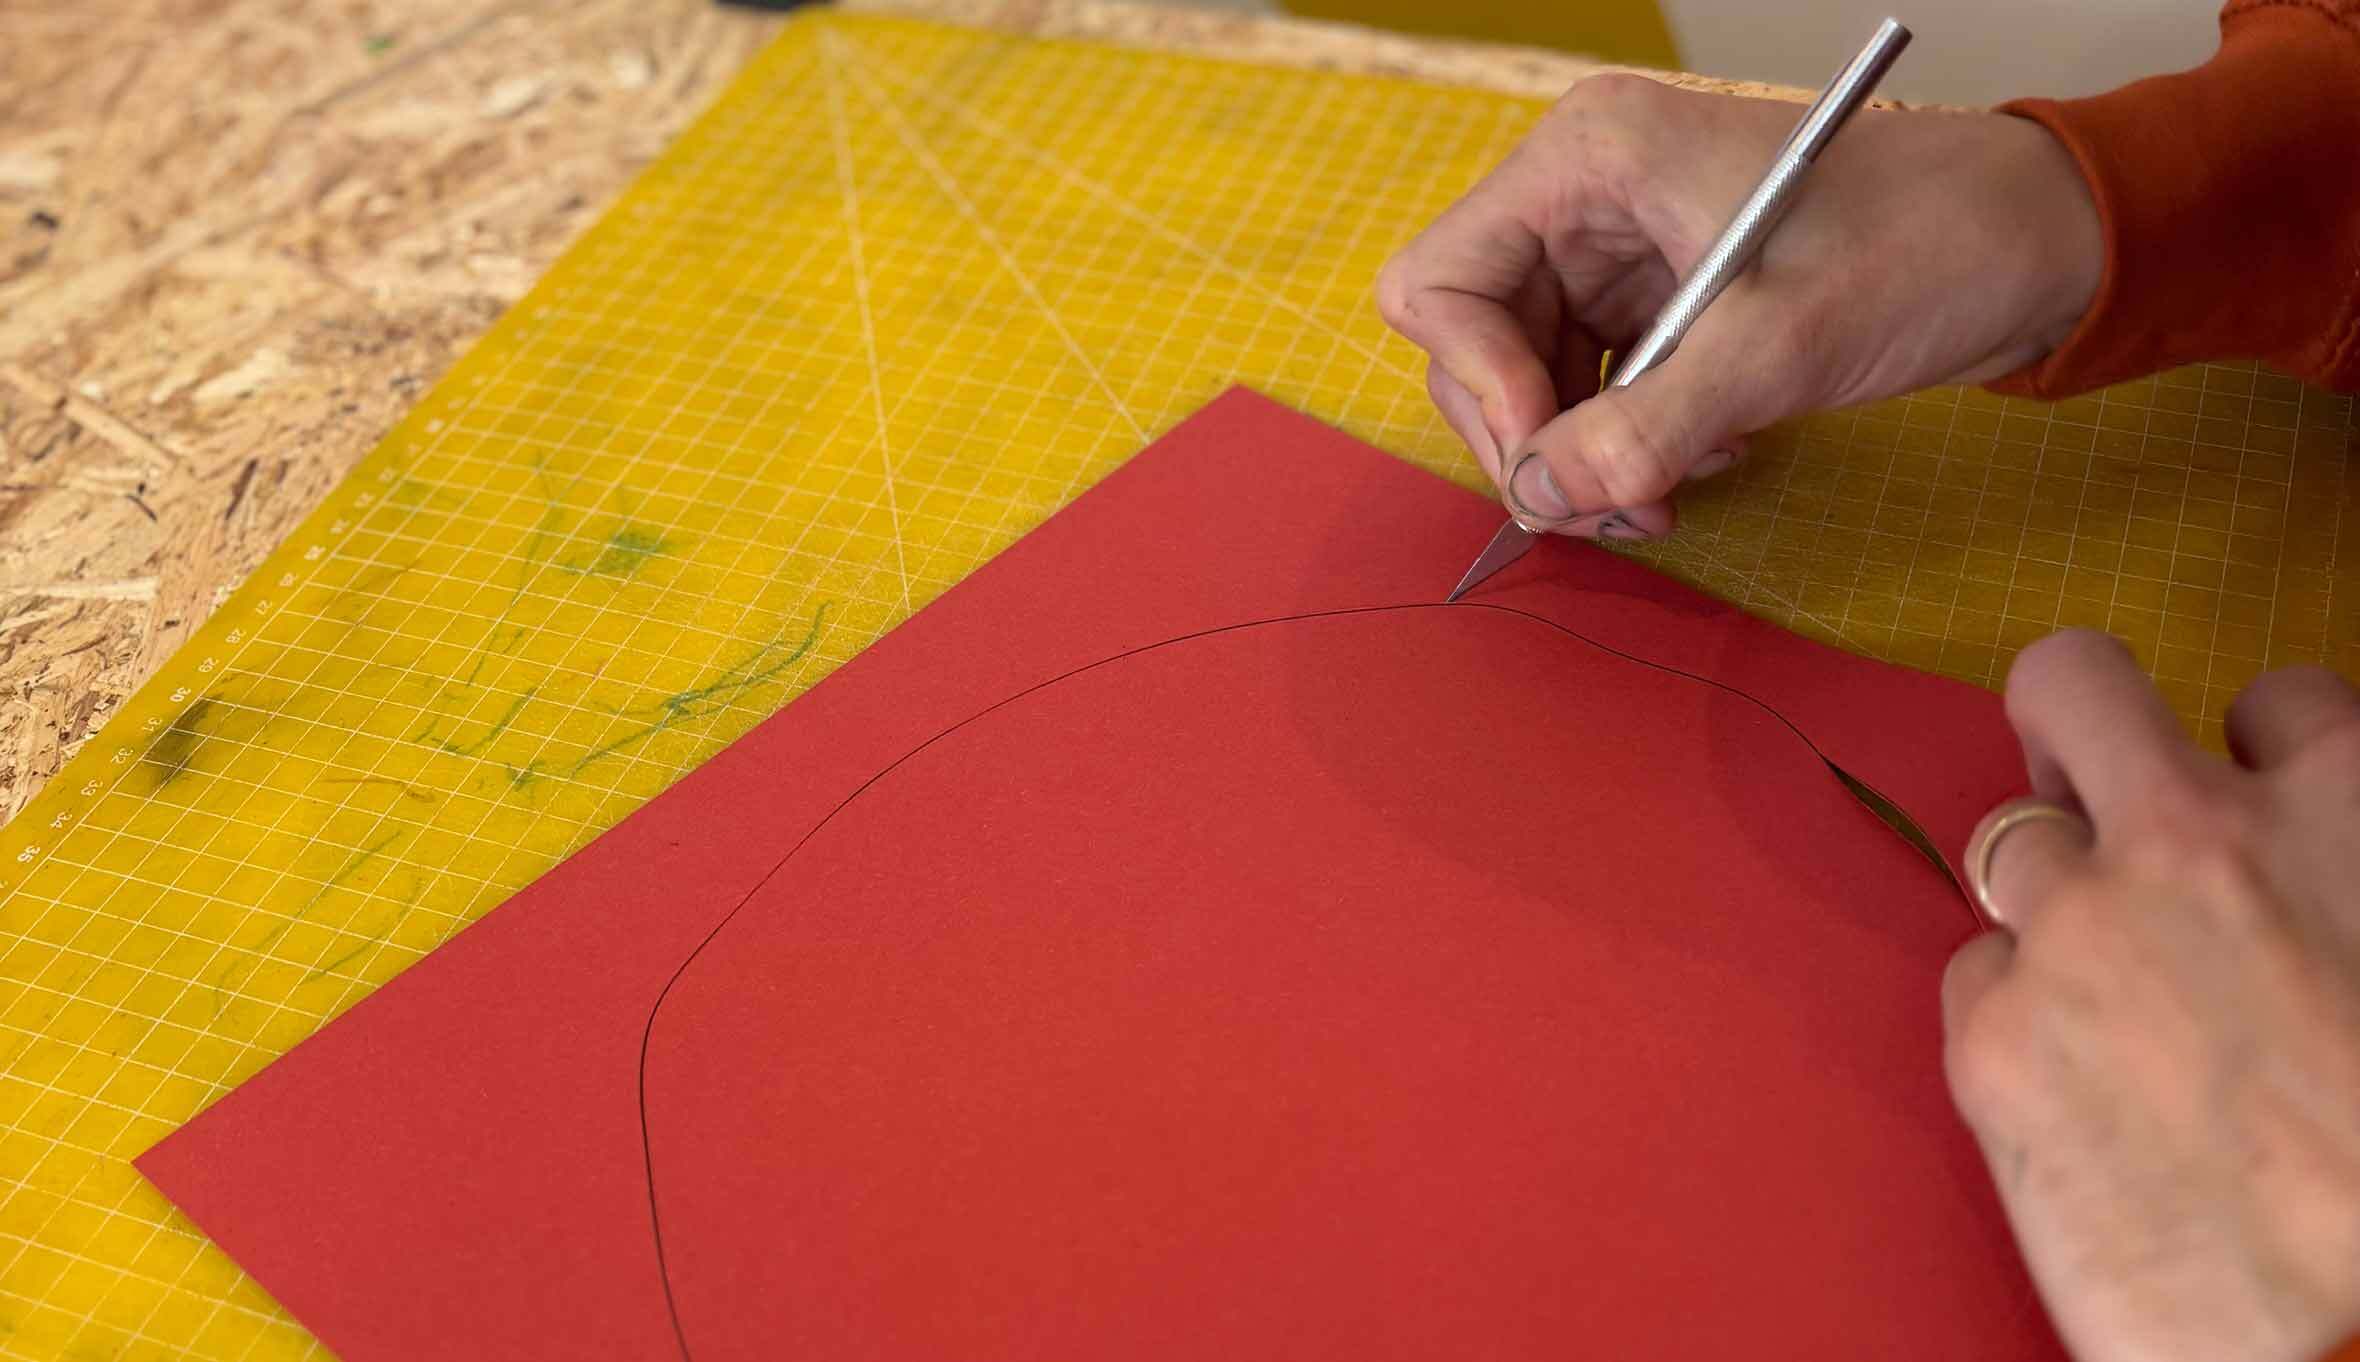
Step 2: Creating your Stencils - Tomato Sauce
Next take another piece of 297mm x 297mm thin stencil paper and draw a slightly wibbly wobbly shape a little smaller than your pizza base circle. This will be your tomato sauce stencil! Cut out this stencil in the same way, discarding the middle shape and keeping the paper with the wobbly hole cut out of it. Again, we recommend cutting a few just incase.
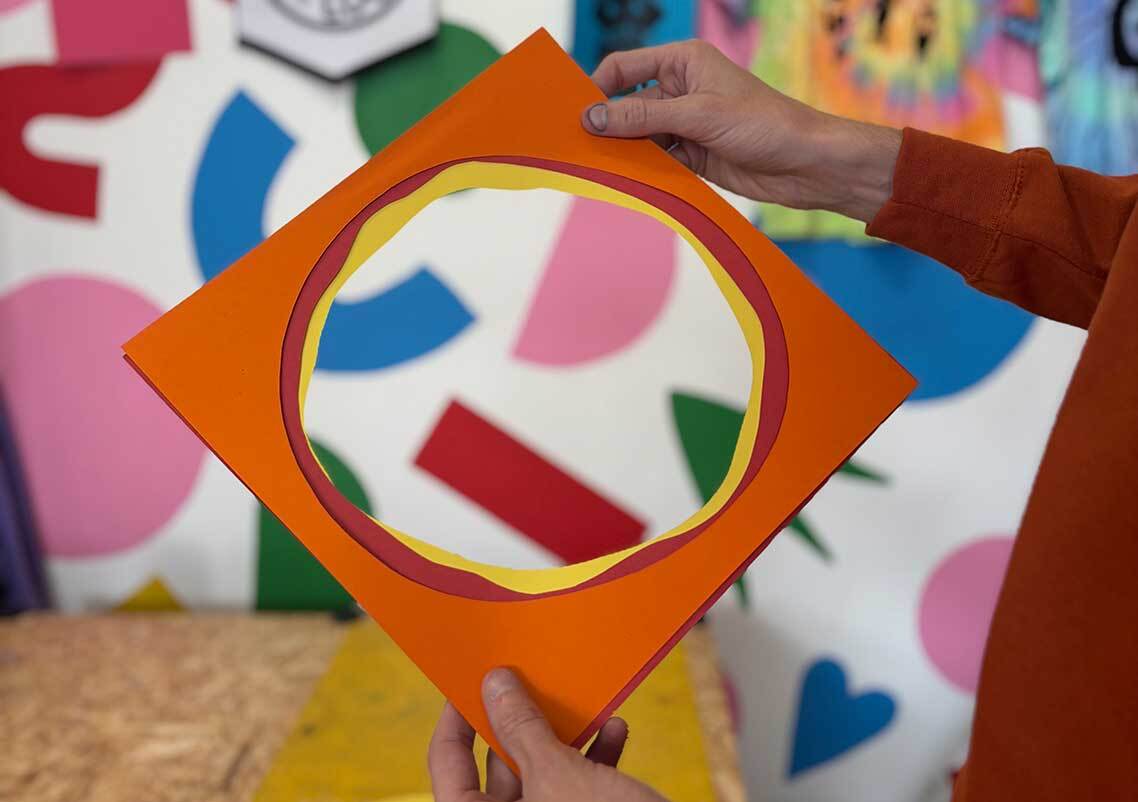
Step 3: Creating your Stencils - Cheese
Repeat step 2 by creating another slightly wobbly shape but this time make the cut out shape a little smaller than your sauce one. This will be your mozzarella cheese stencil. Again, cut a few just incase you need spares.
Step 4: Creating your Stencils - Toppings
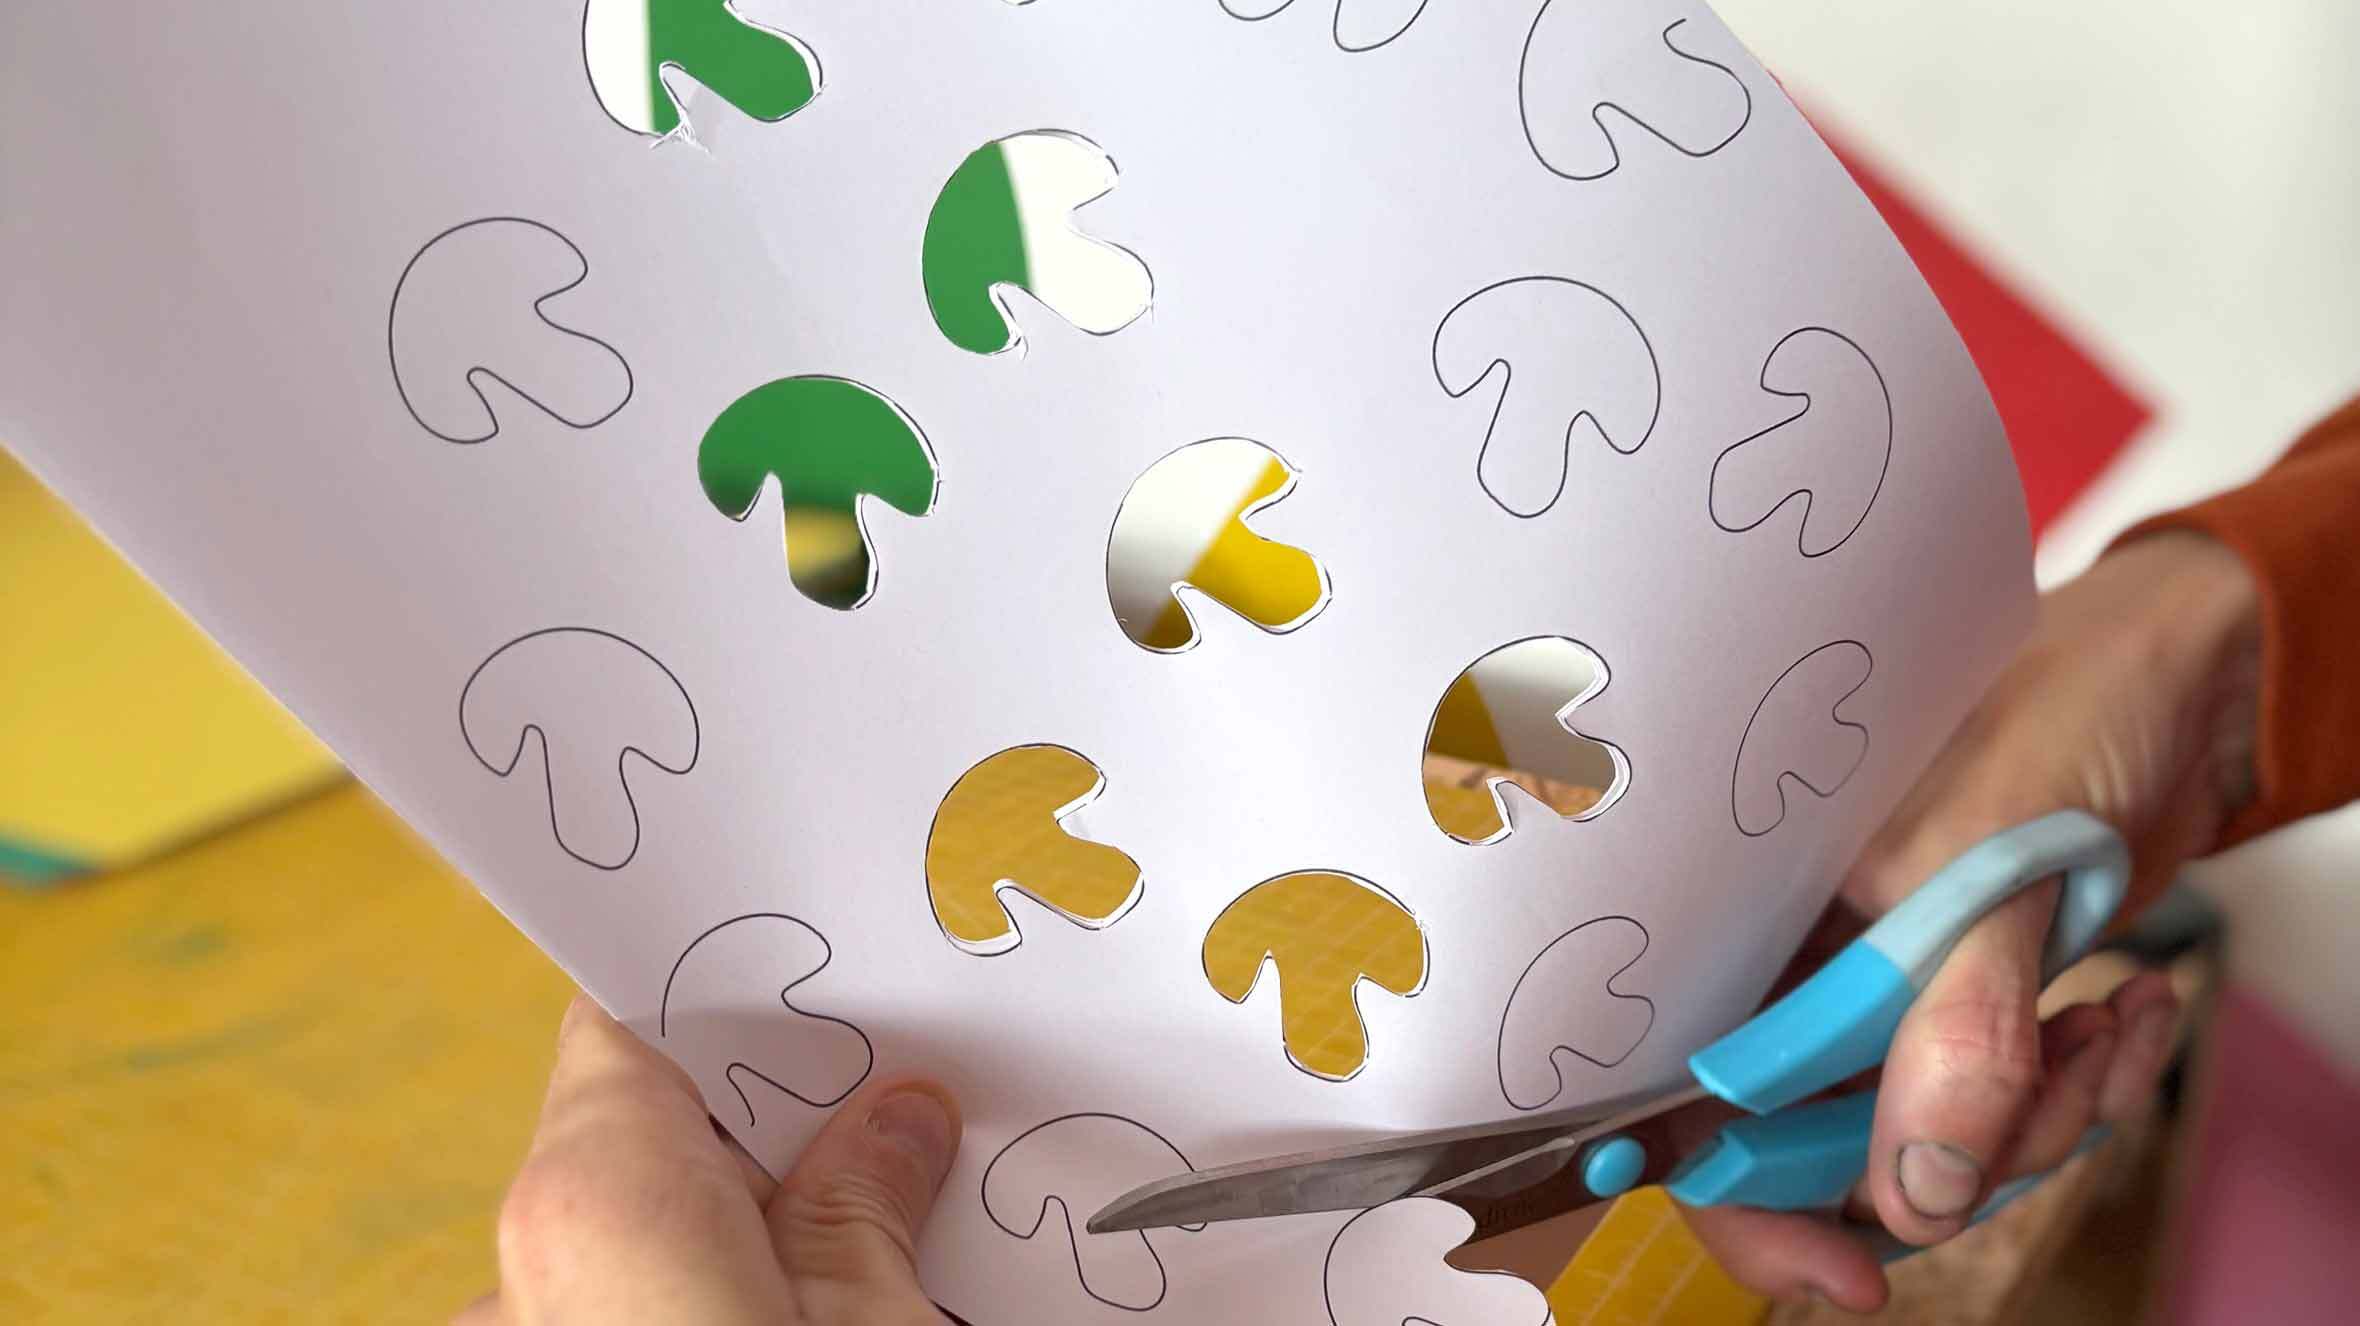
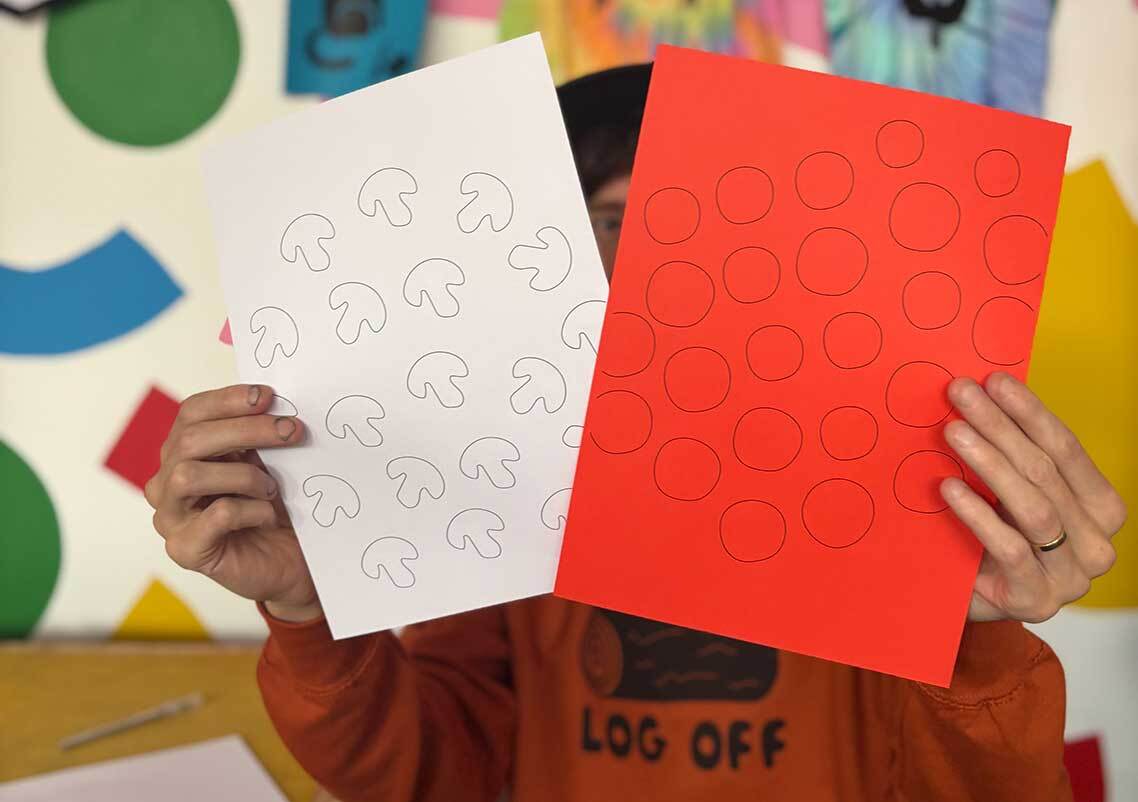
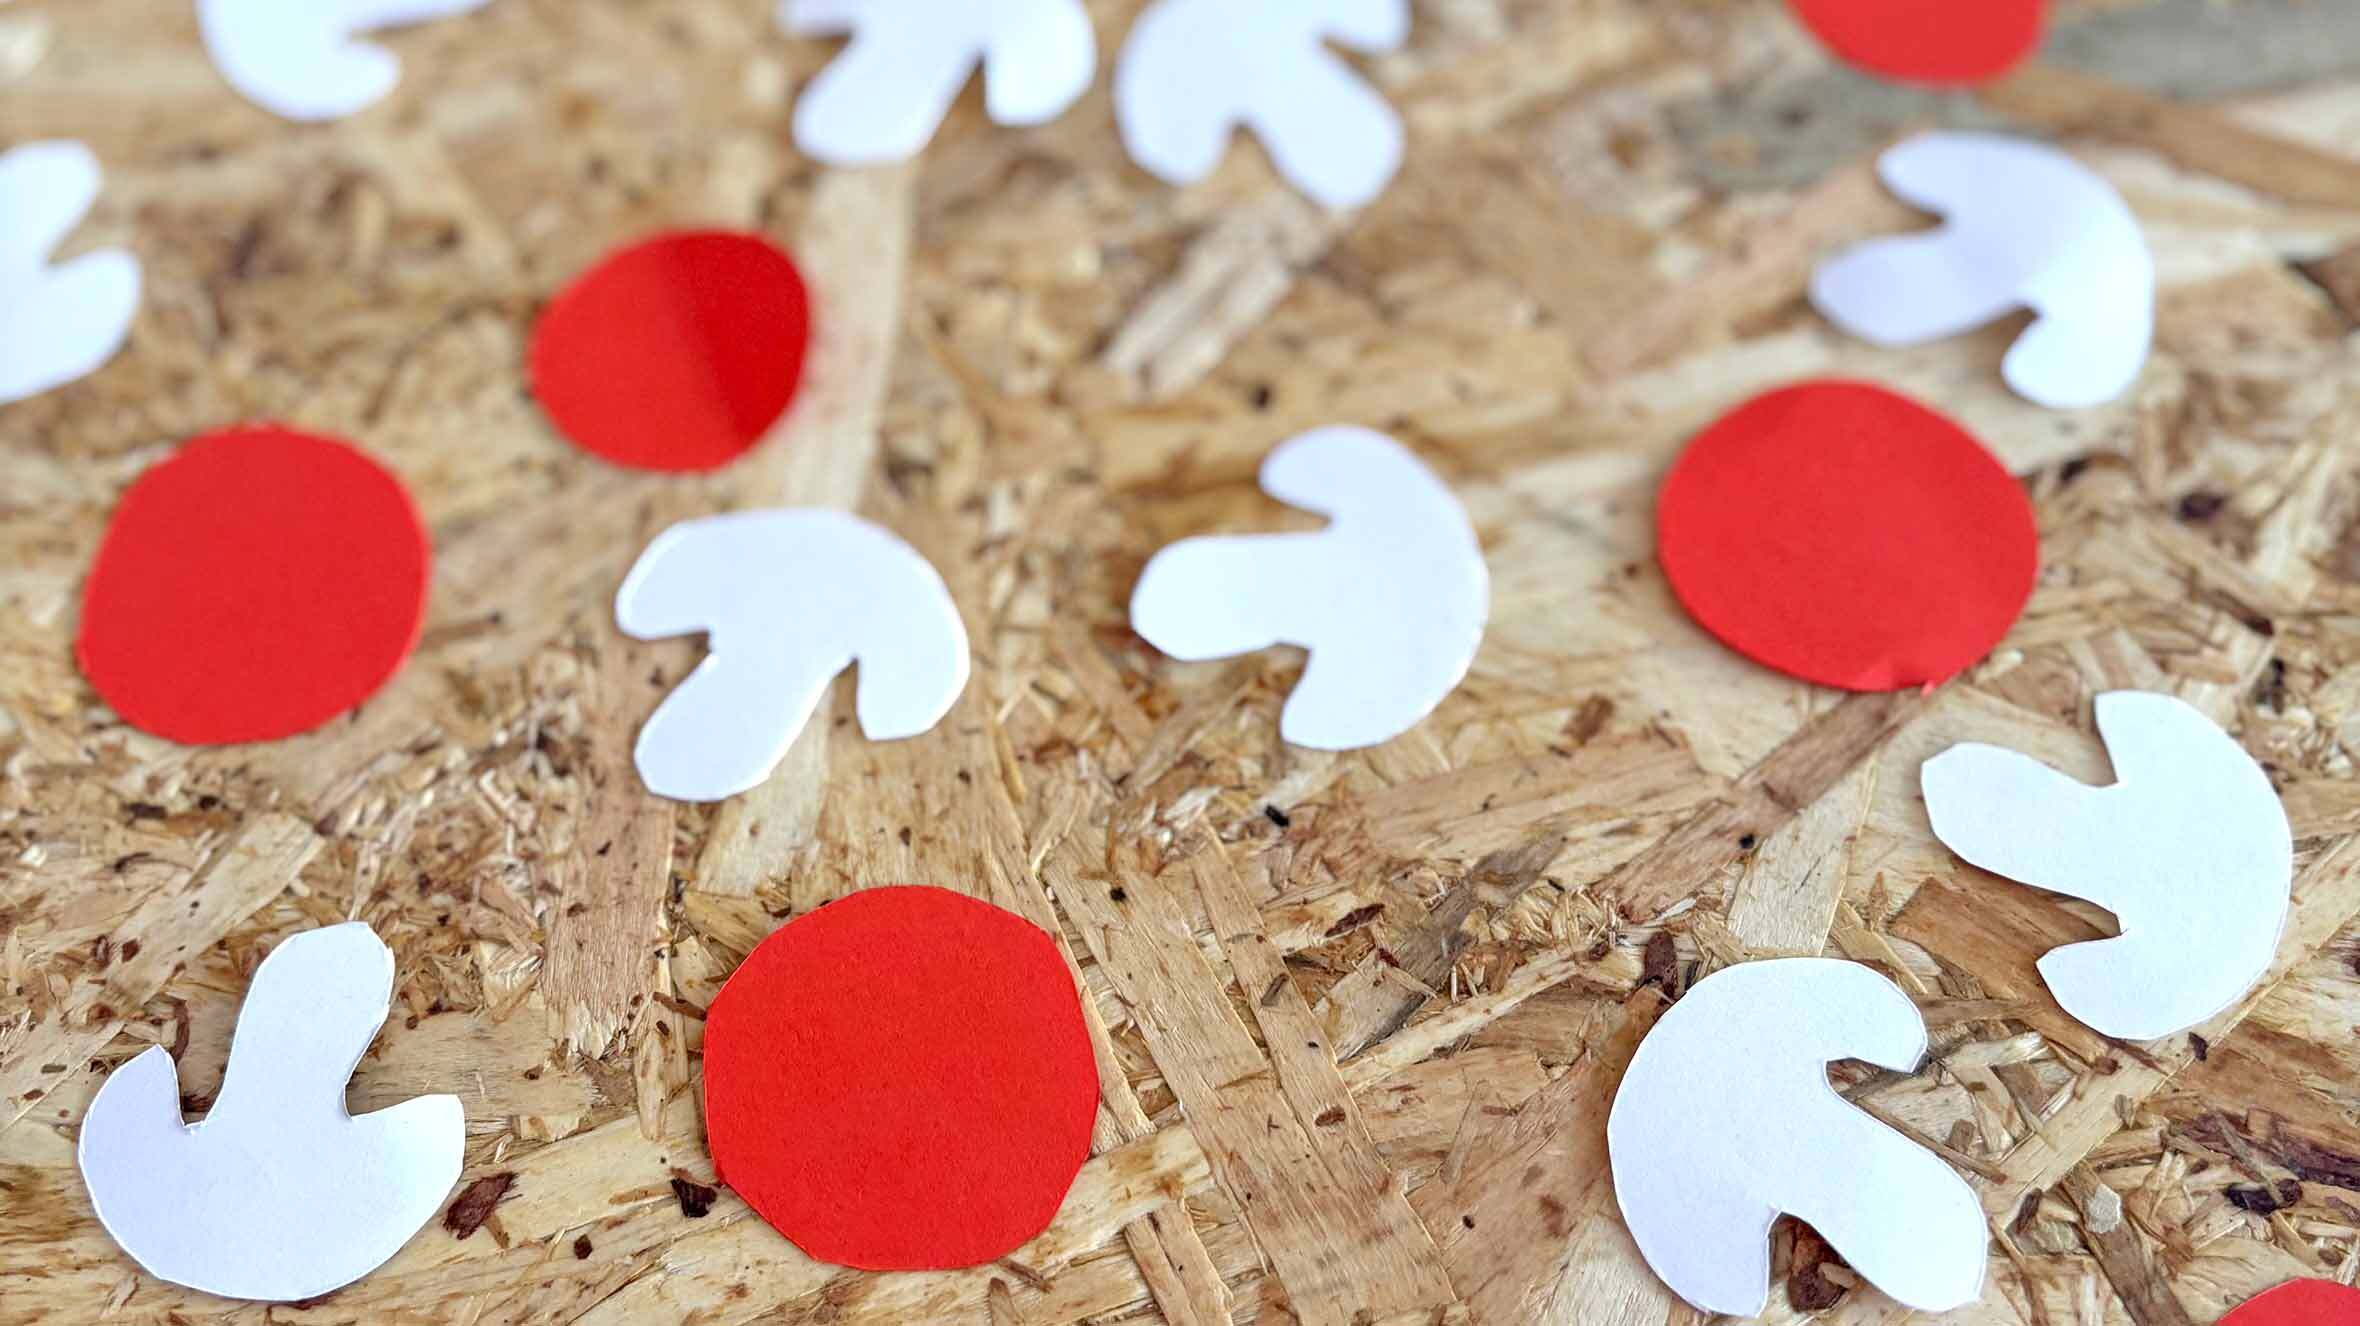
Now it’s time for toppings! For this pizza print we are using mushrooms and pepperoni as we can cleverly and simply create these toppings by using the colours we already have to hand - the white of our paper for the mushrooms and the red of the “sauce” for the pepperoni. If this doesn’t yet make sense it will when we start printing, we promise!
For these toppings to work effectively they need to be the same shape, you could create them on a computer and print them out OR you could create one mushroom shape for example and careful draw around it to create lots of shapes which are the same. For our pepperoni we created two different sizes just to add a little variation.
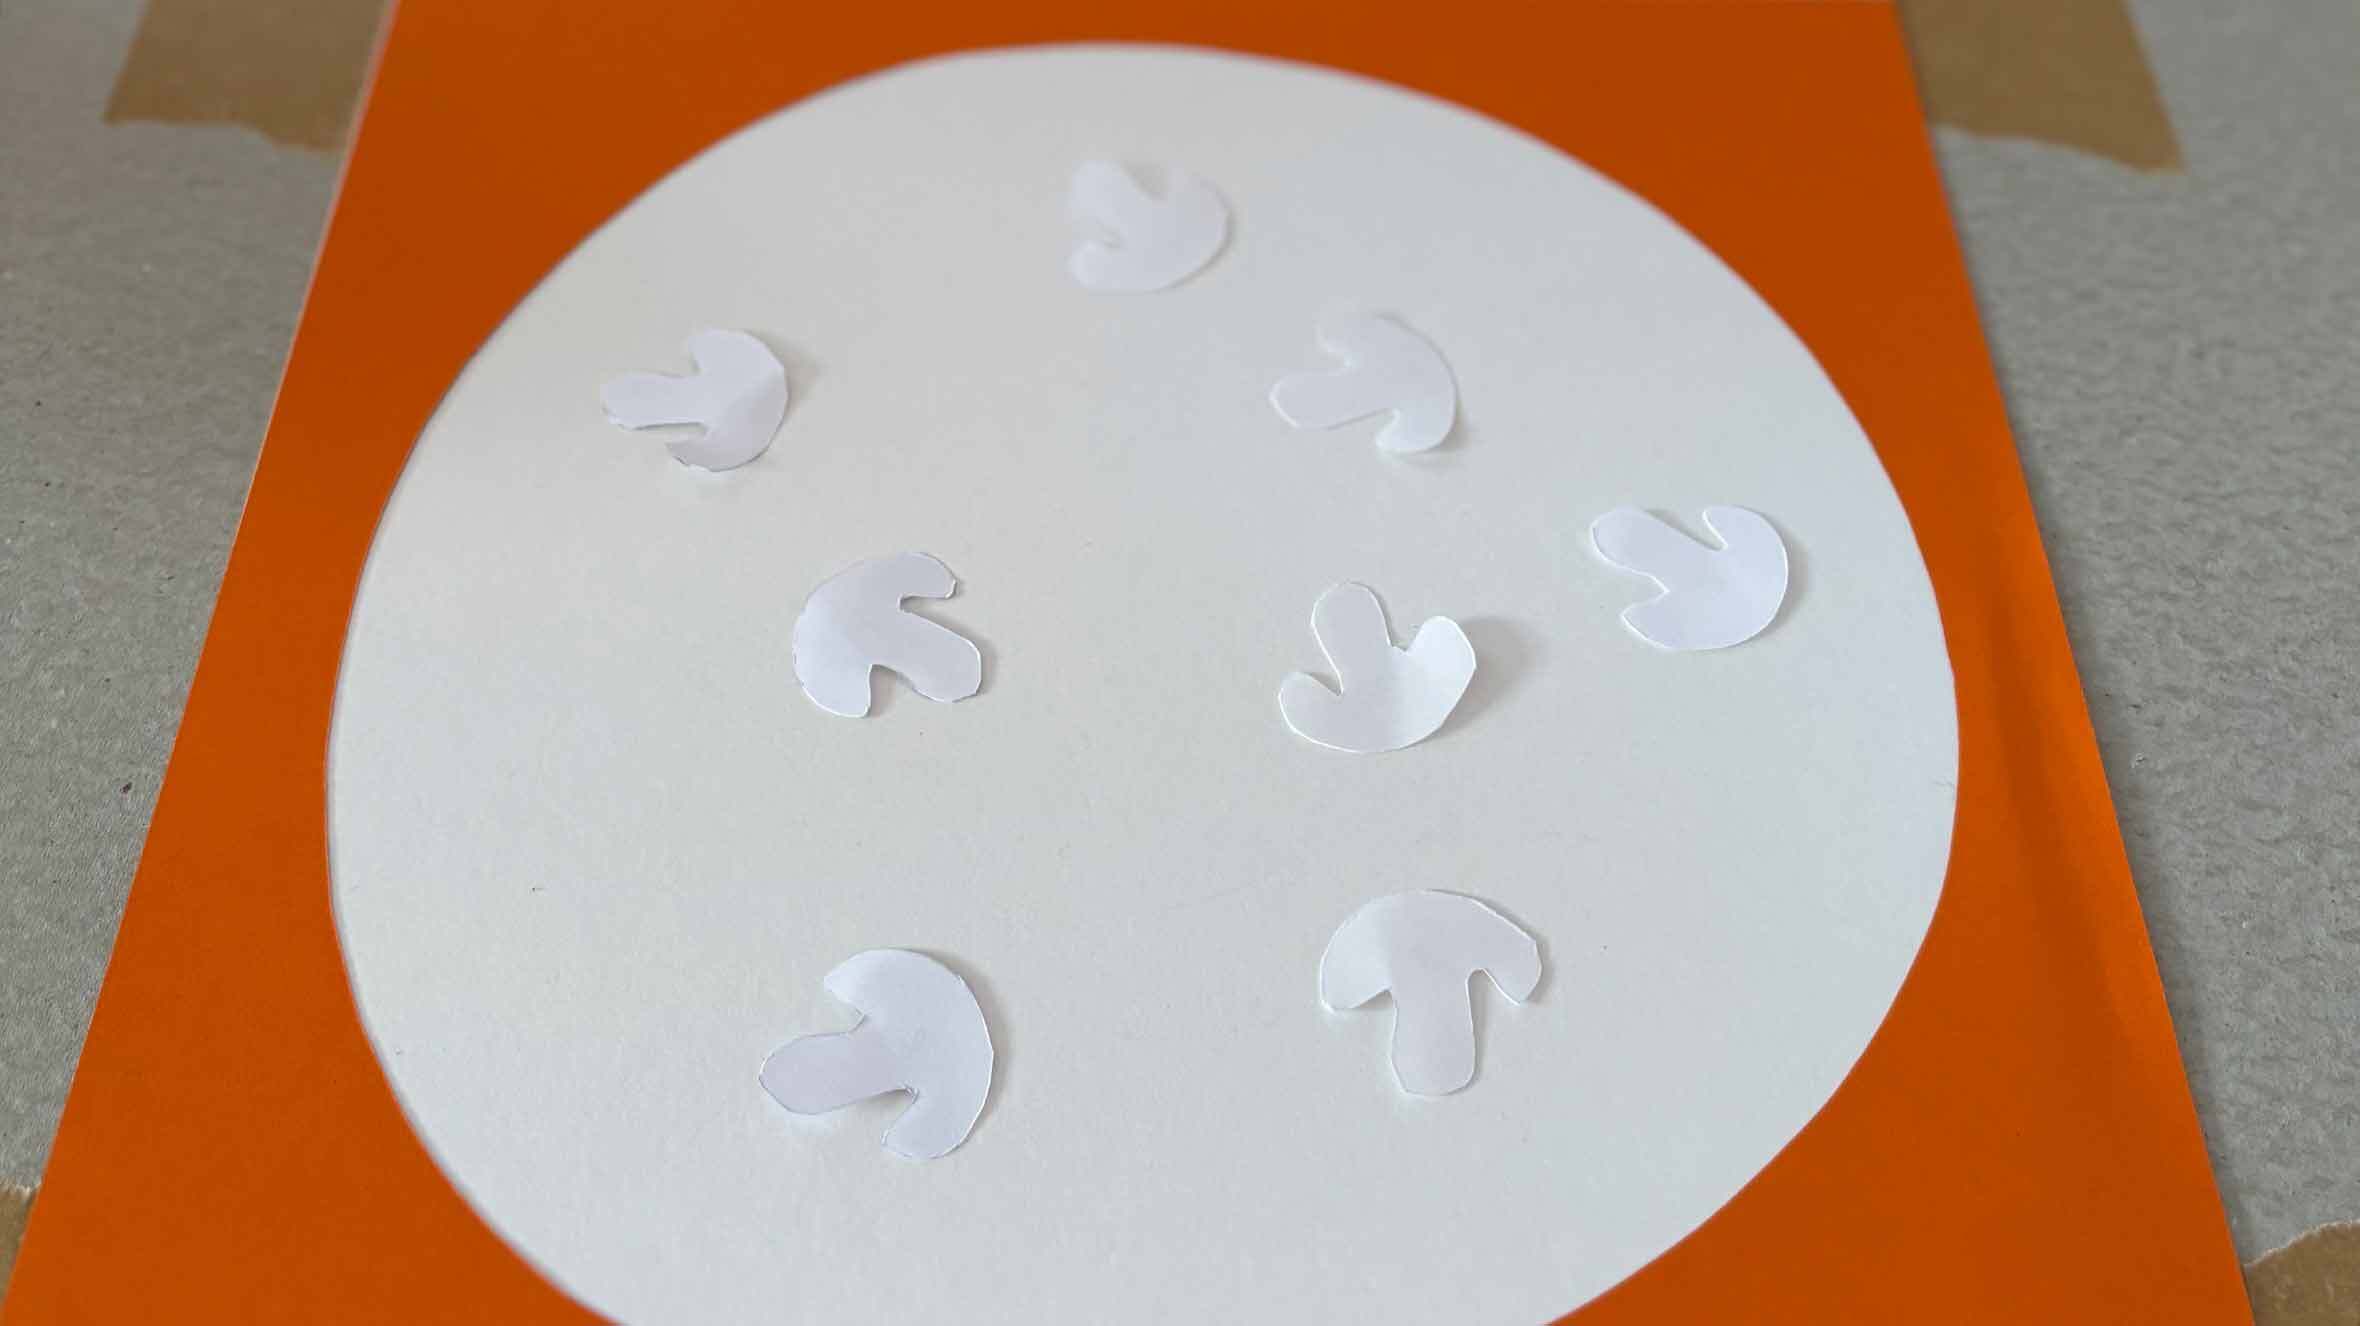
Carefully cut out your mushroom and pepperoni shapes with either a craft knife or scissors. We cut three sheets of paper at a time but if you’re more comfortable doing one that’s fine. This time we are keeping the topping shapes rather than the paper with the shapes cut out of it. You will need lots of mushroom shapes as these are used on each print run.
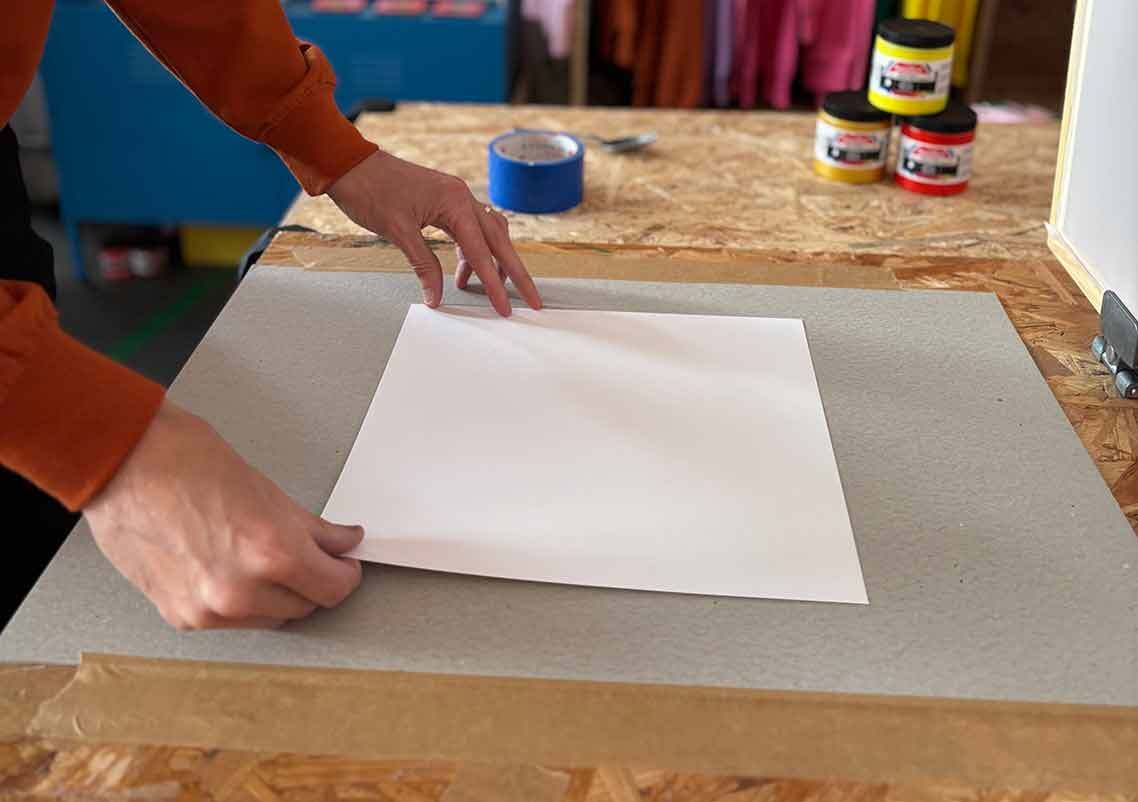
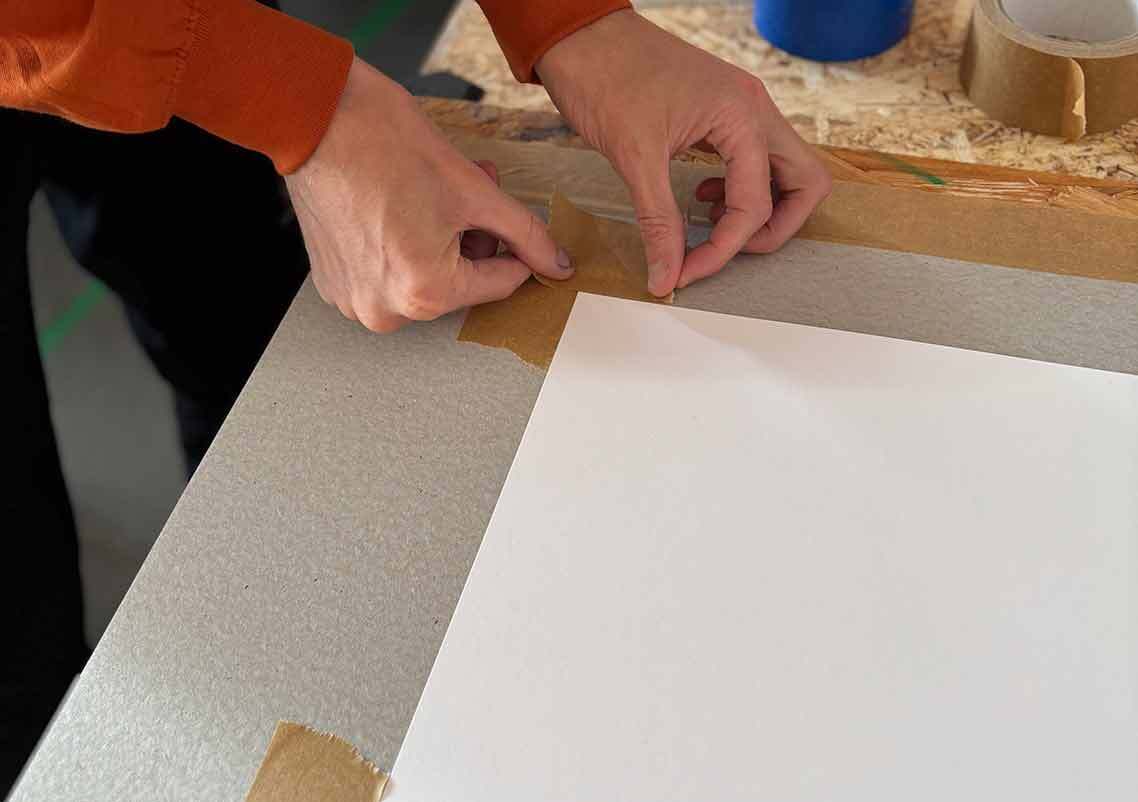
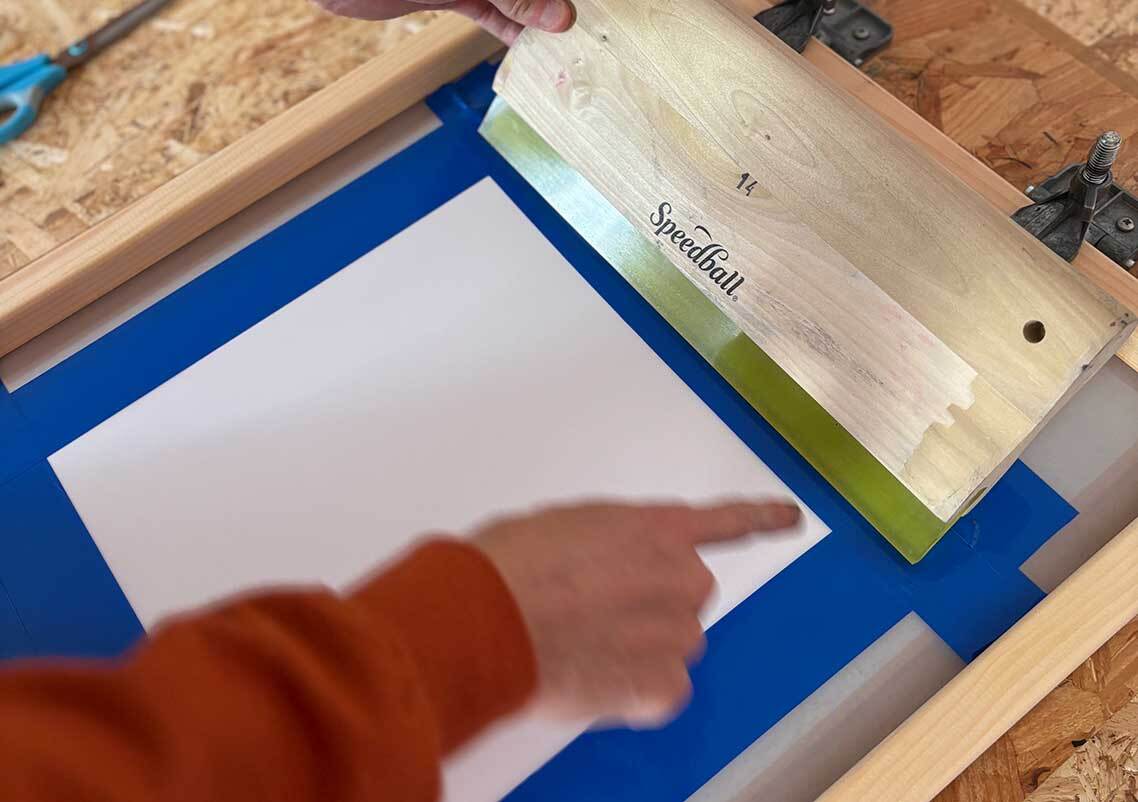
Step 5: Setting up to Print
Now that we have our stencils ready we can set up to print our pizza base! Take your piece of paper and place it on your print board. We mark out where our paper sits with some tape on our board (you could use pencil to mark the corners, we prefer tape though as it does a good job of keeping the paper from slipping around). This way you can easily and quickly align the next piece of paper. We recommend printing a bunch of pizza prints incase inevitably there are any misprints on any of the colours.
Step 6: Taping the Screen Up
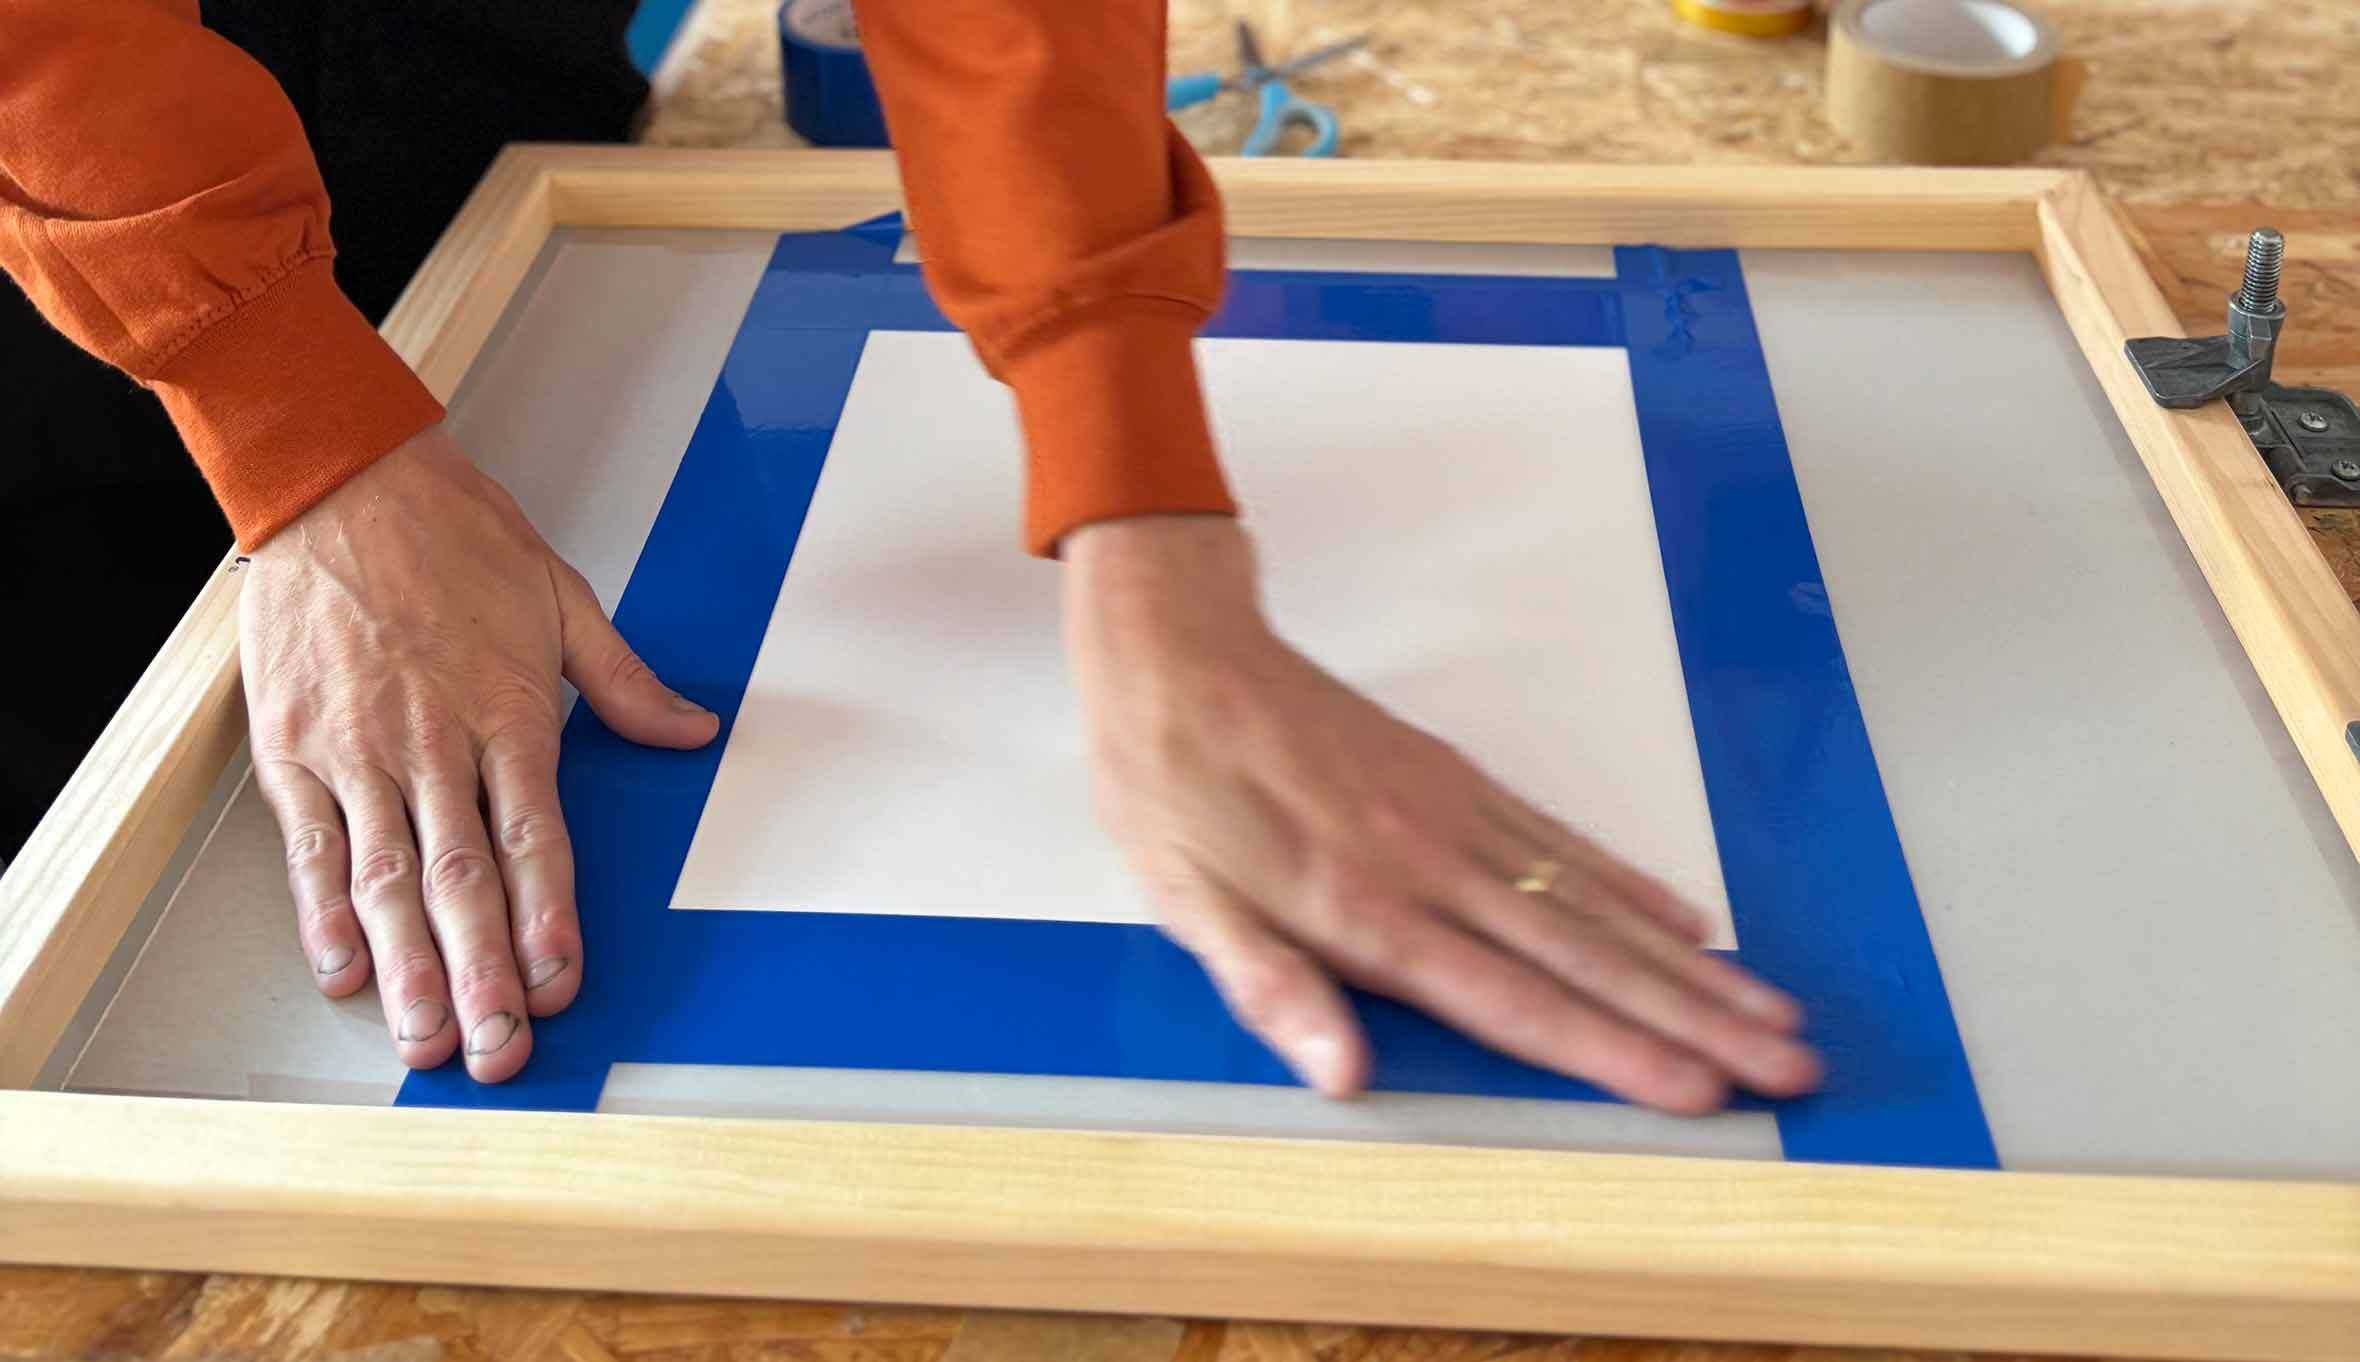
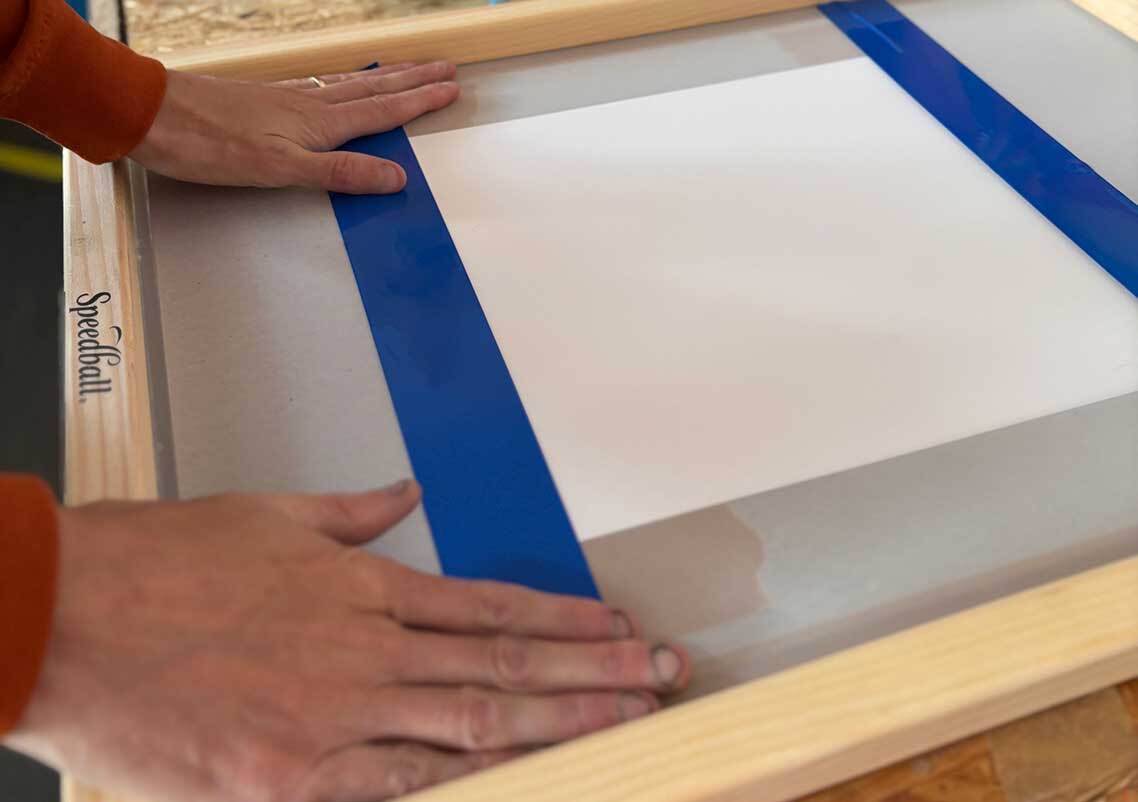
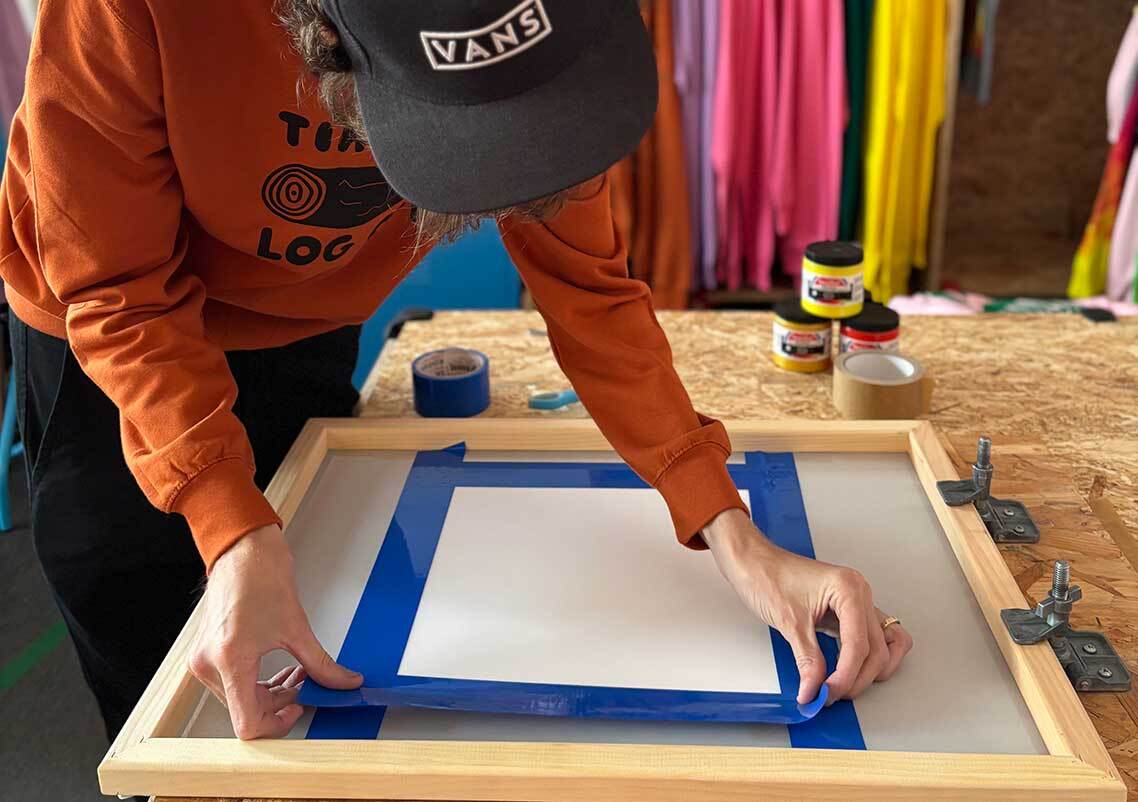
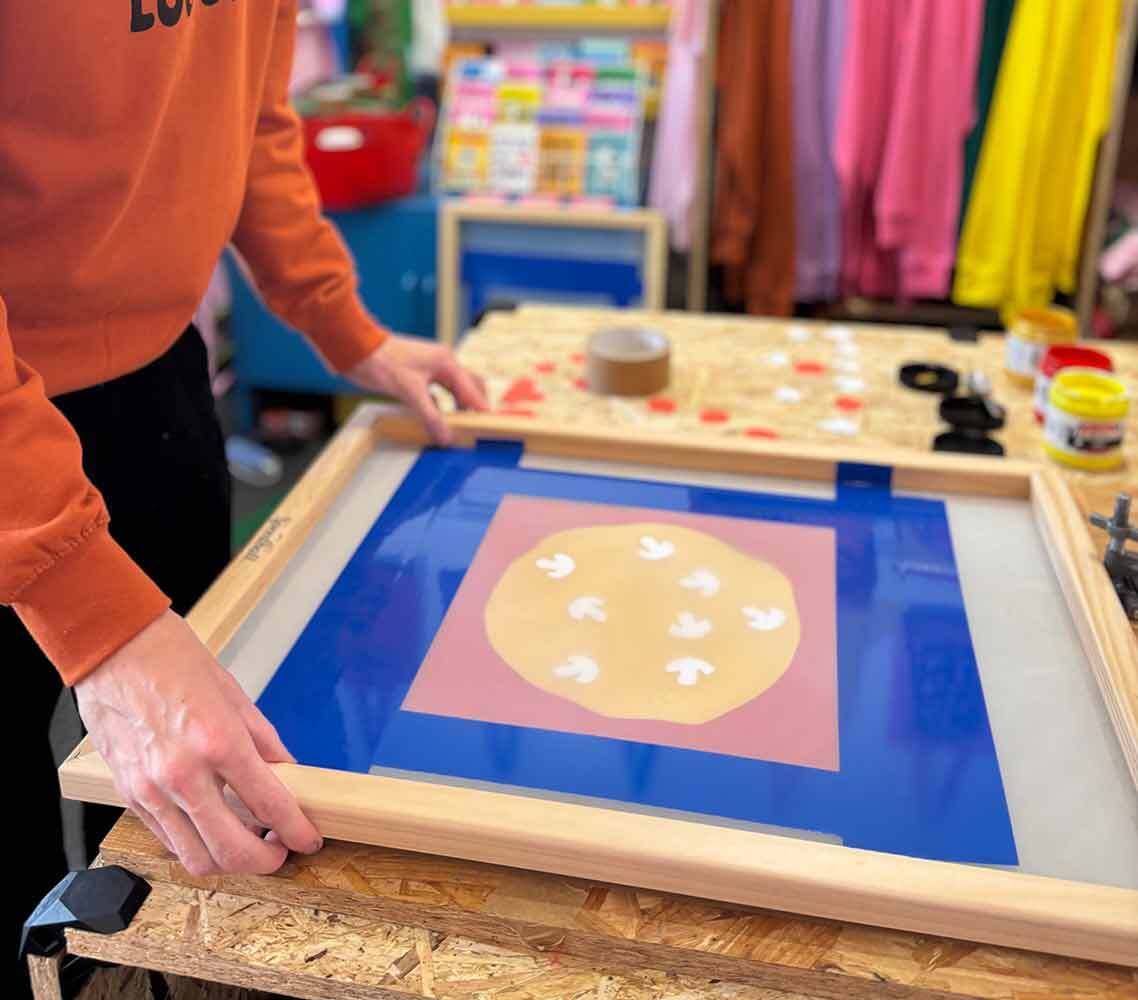
Next you need to tape up your screen really well so no ink will come through outside of your main stencil shape. We are using vinyl tape which is water resistant, so if you are using one screen for this whole project you can leave the tape in place when you wash it.
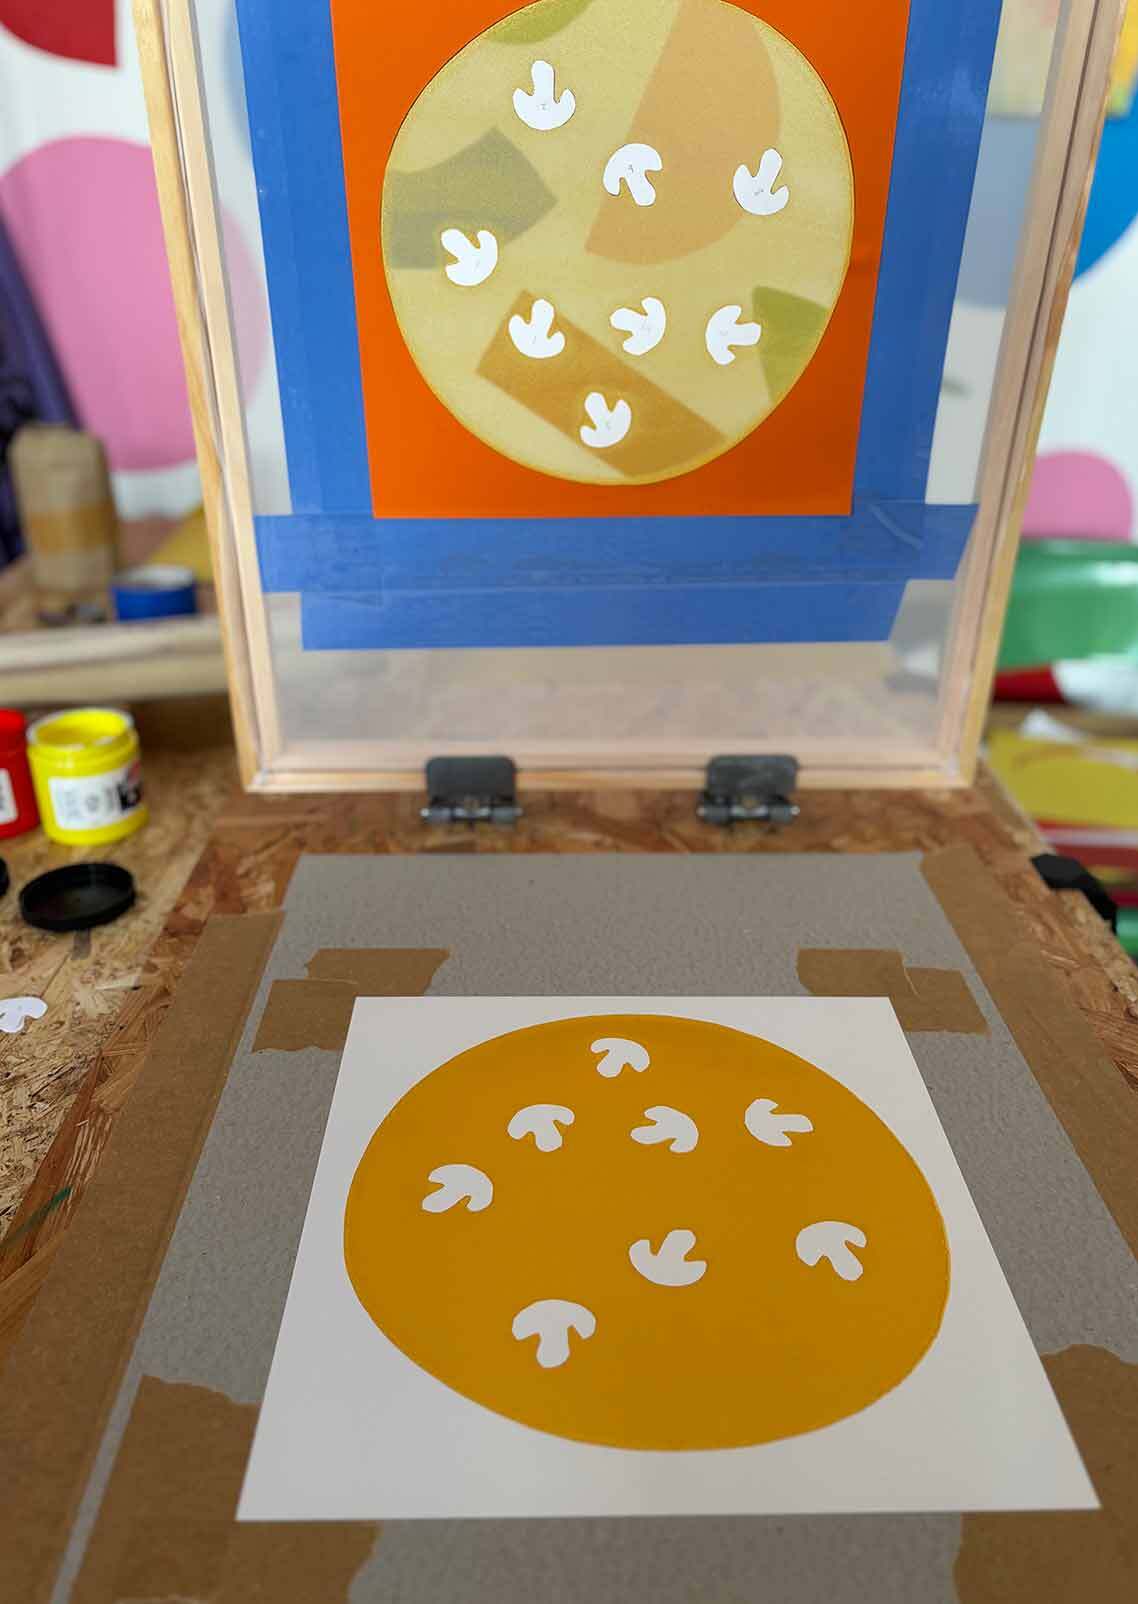
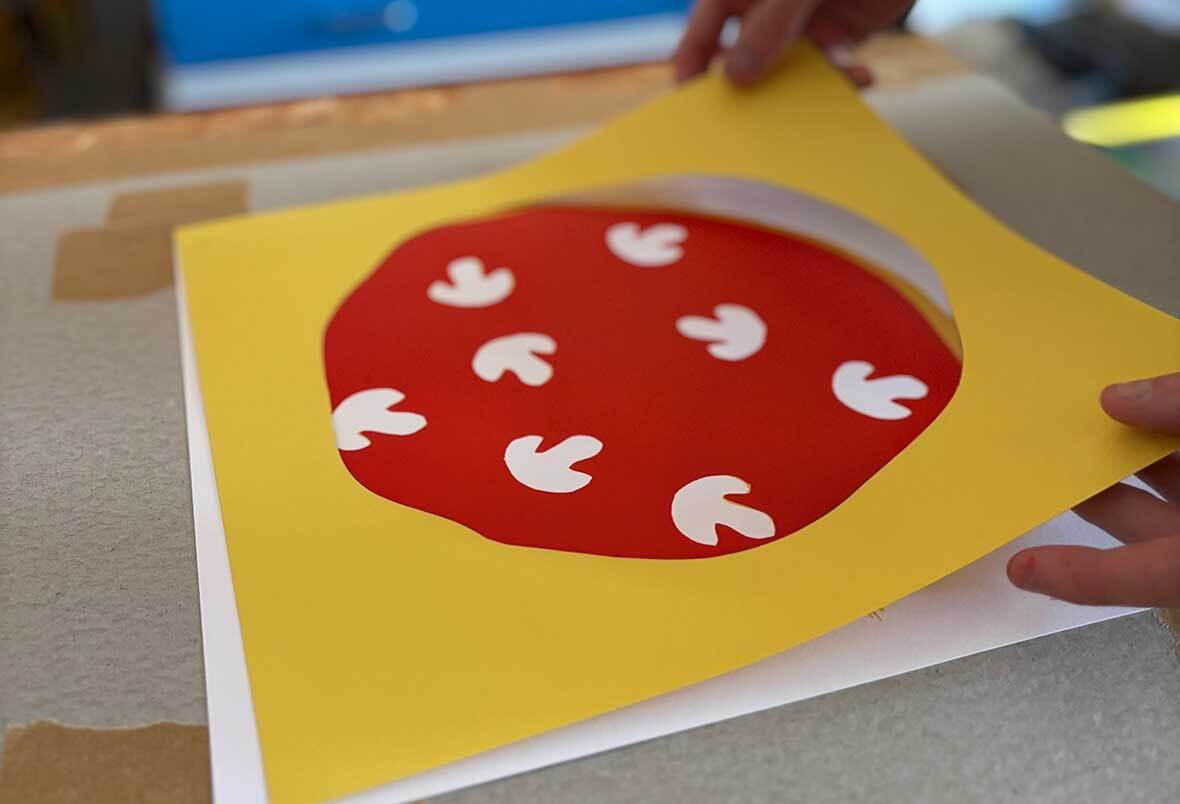
Attach the screen to your hinge clamps so you can tape it in the correct places in relation to where your paper is. Tape right up to where your paper is underneath the screen, ensuring there’s no gaps. As the emulsion would do on a developed screen, for this project the paper of your stencil will block the ink so it will only pass through where your cut shapes are.
Step 7: Planning your Pizza
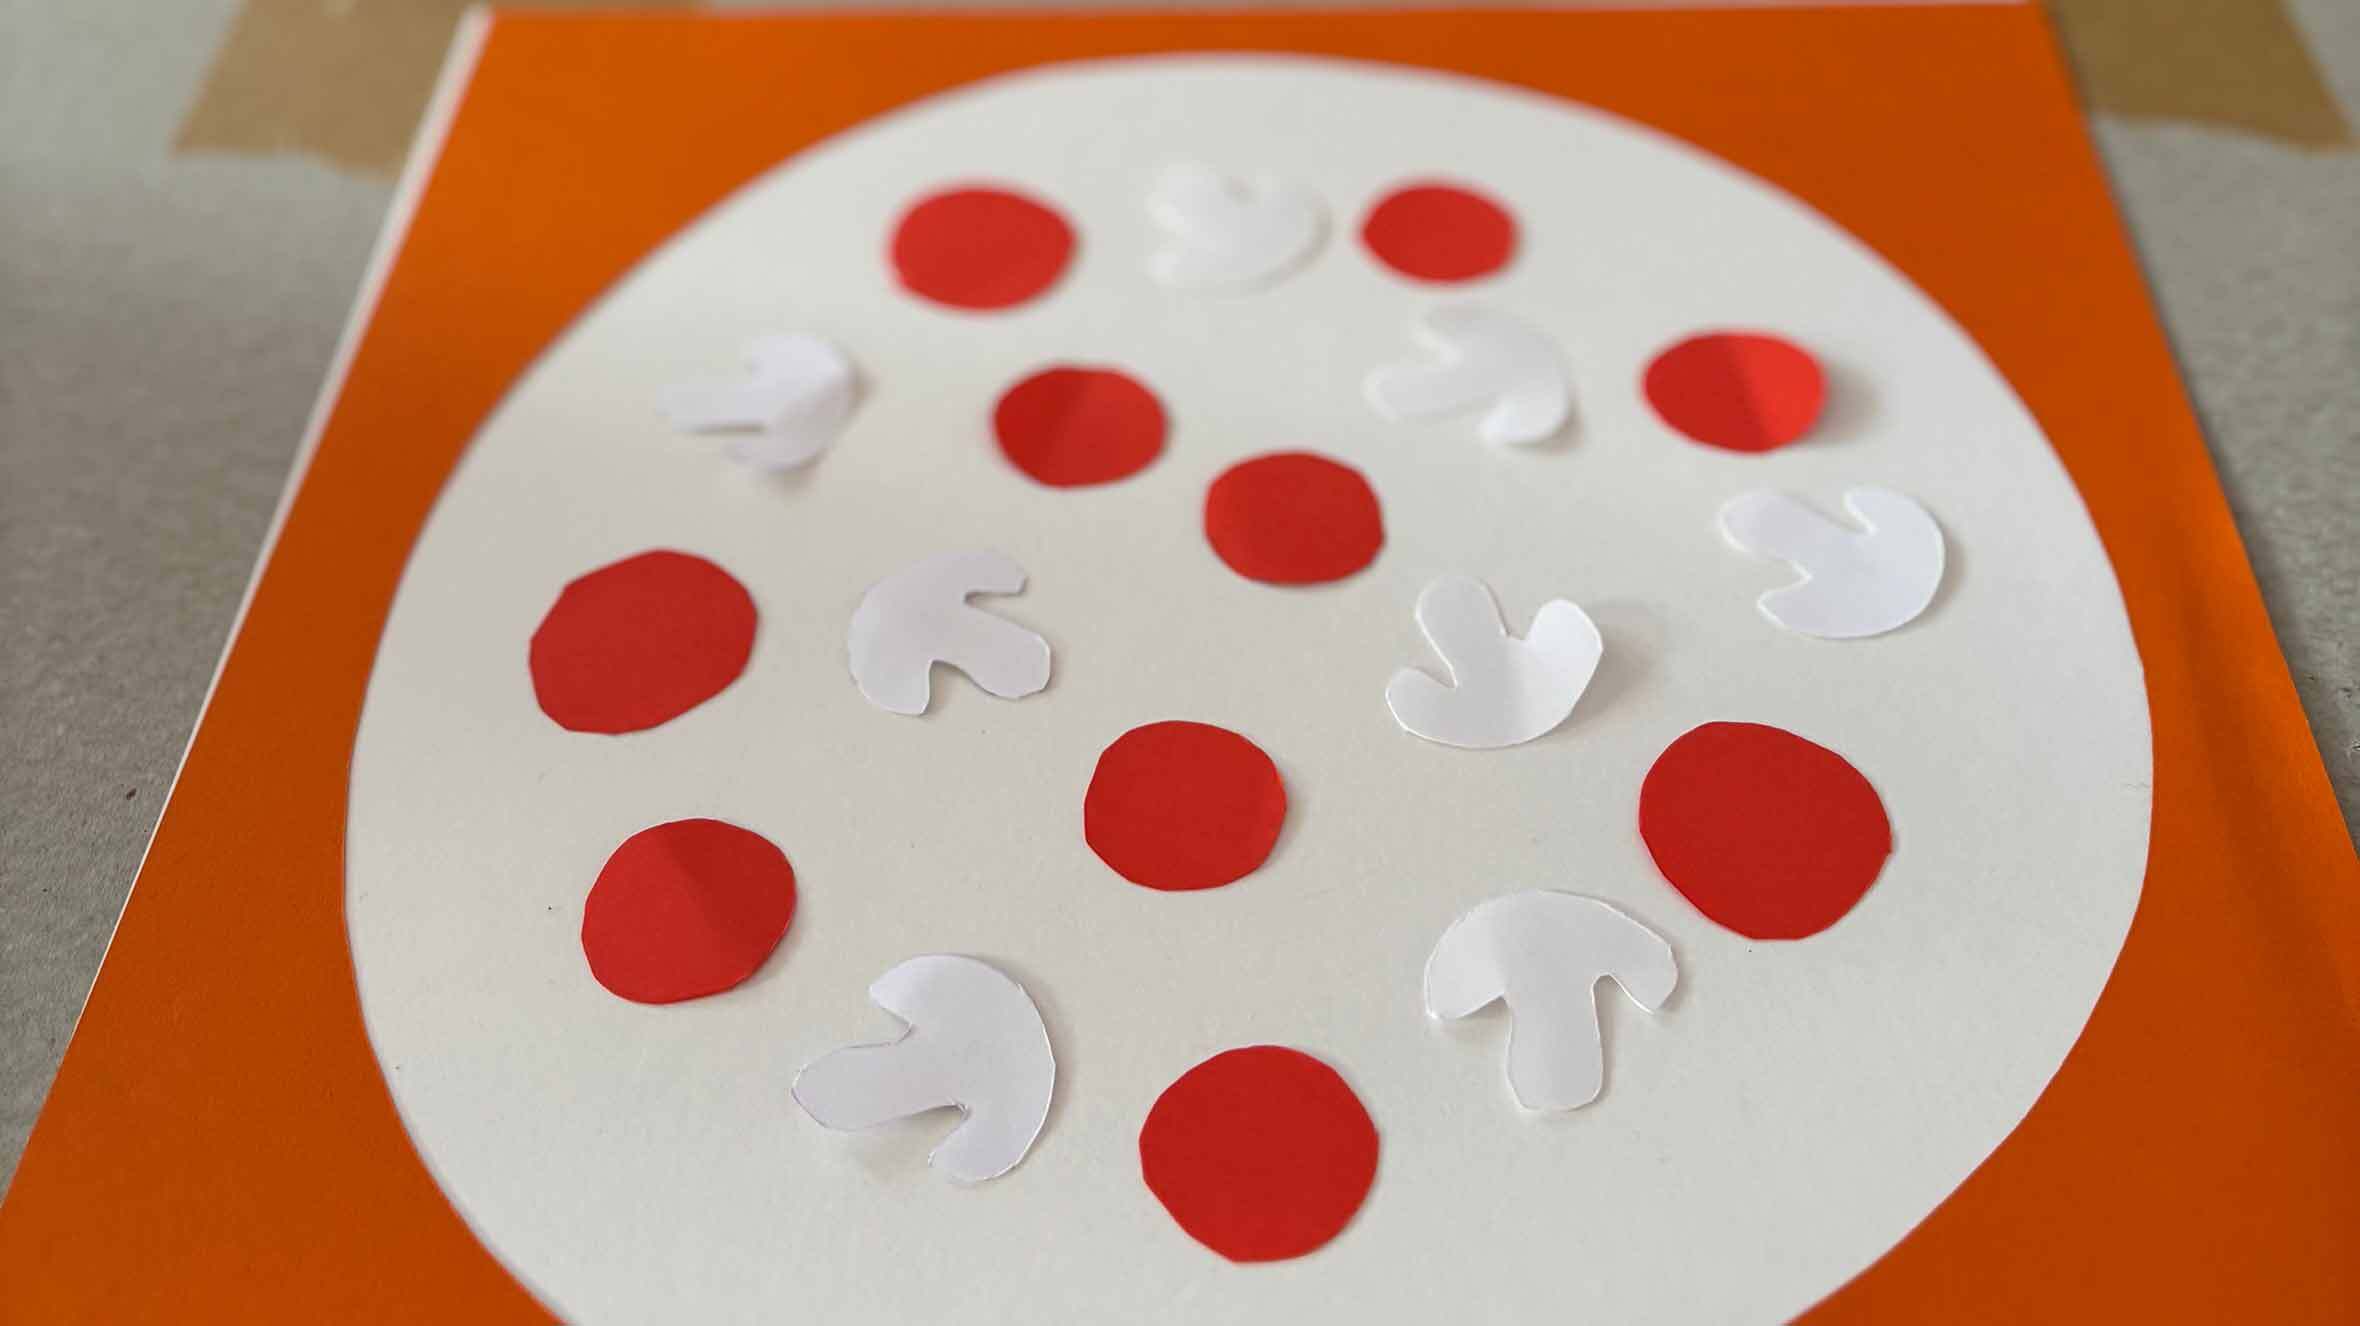
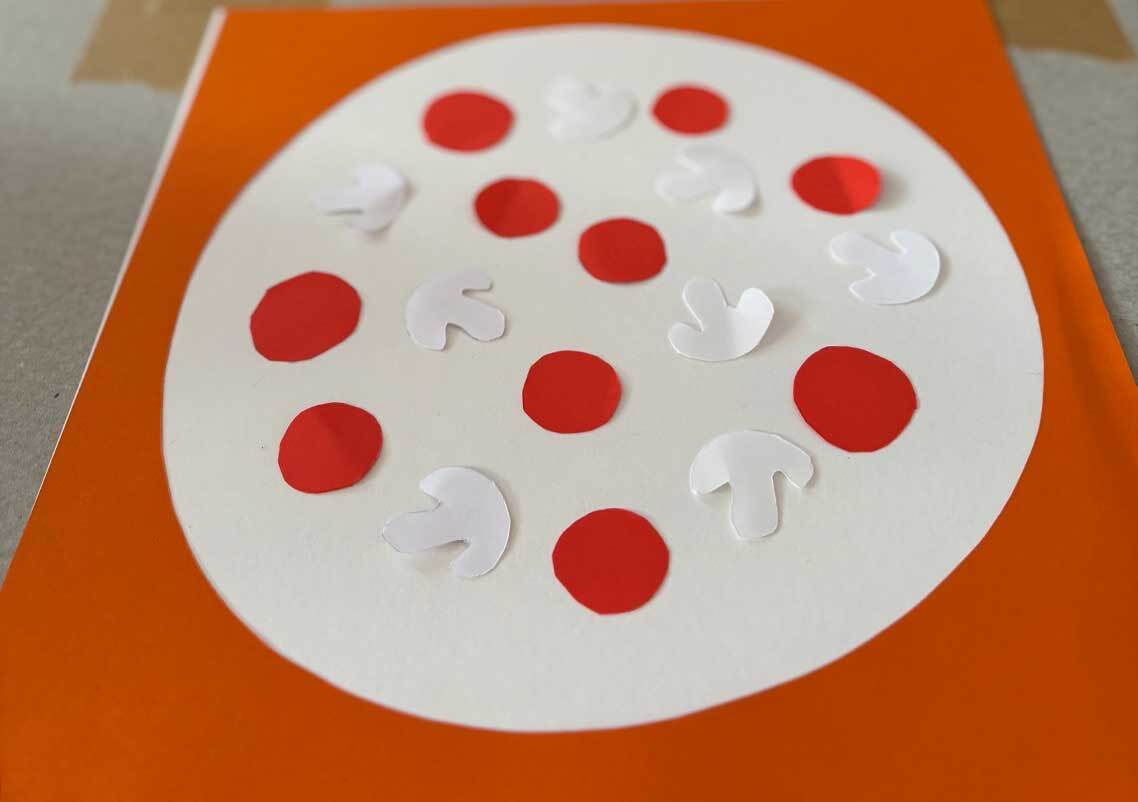
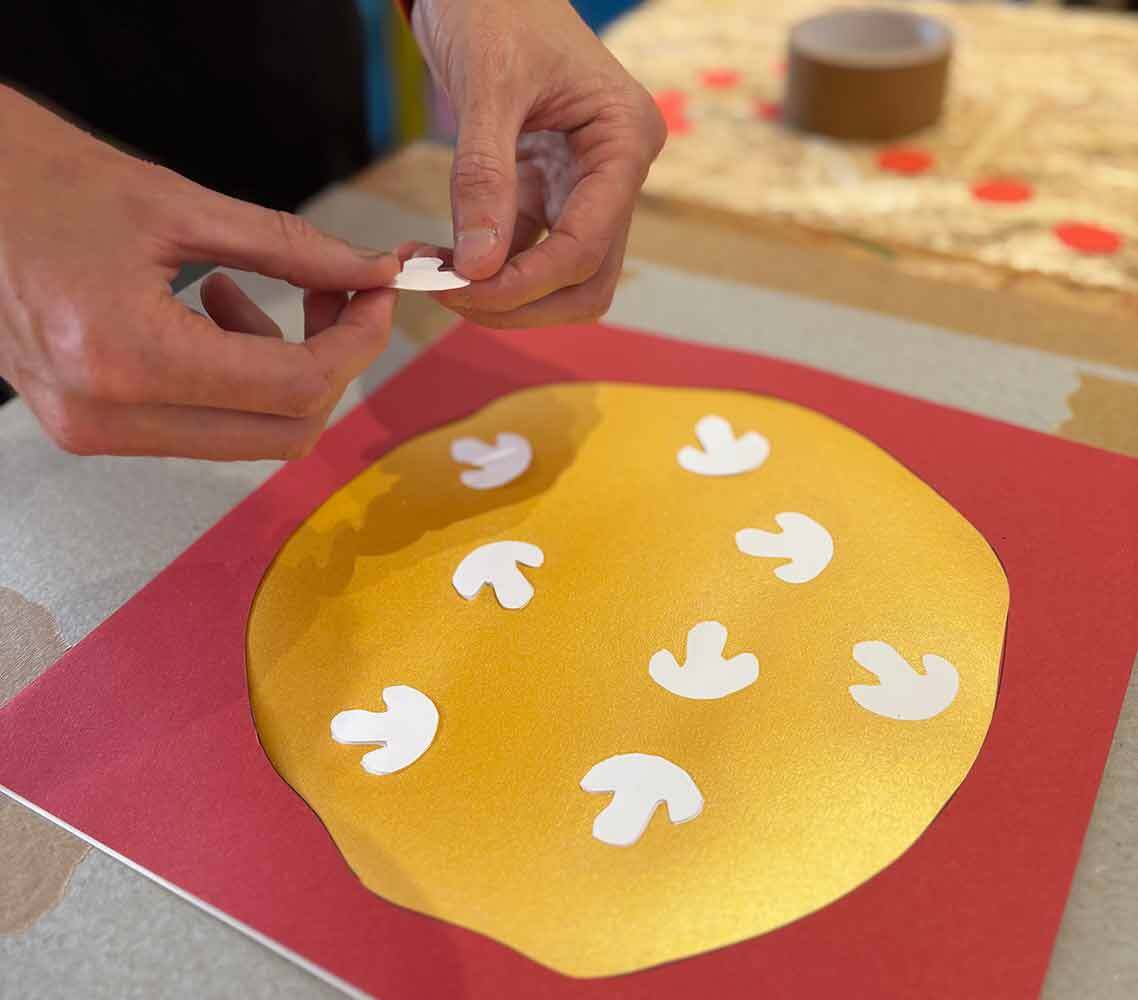
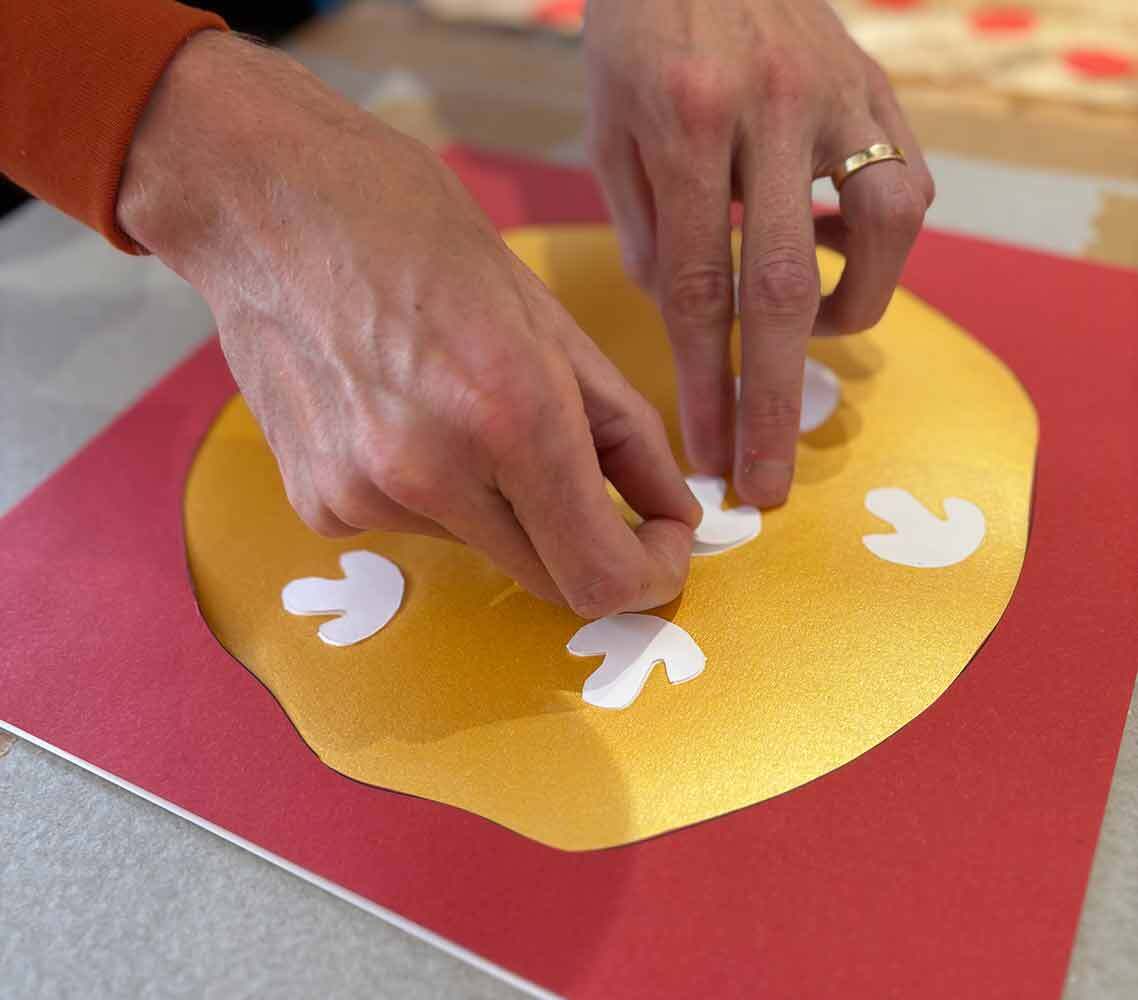
Before printing your first colour, place the pizza base stencil on to your paper. Then place your mushroom AND pepperoni toppings where you would like them to be. Once you are happy with the arrangement, remove JUST the pepperoni pieces. The mushroom pieces will stay in place as we want these to block the ink to take on the white colour of the paper.

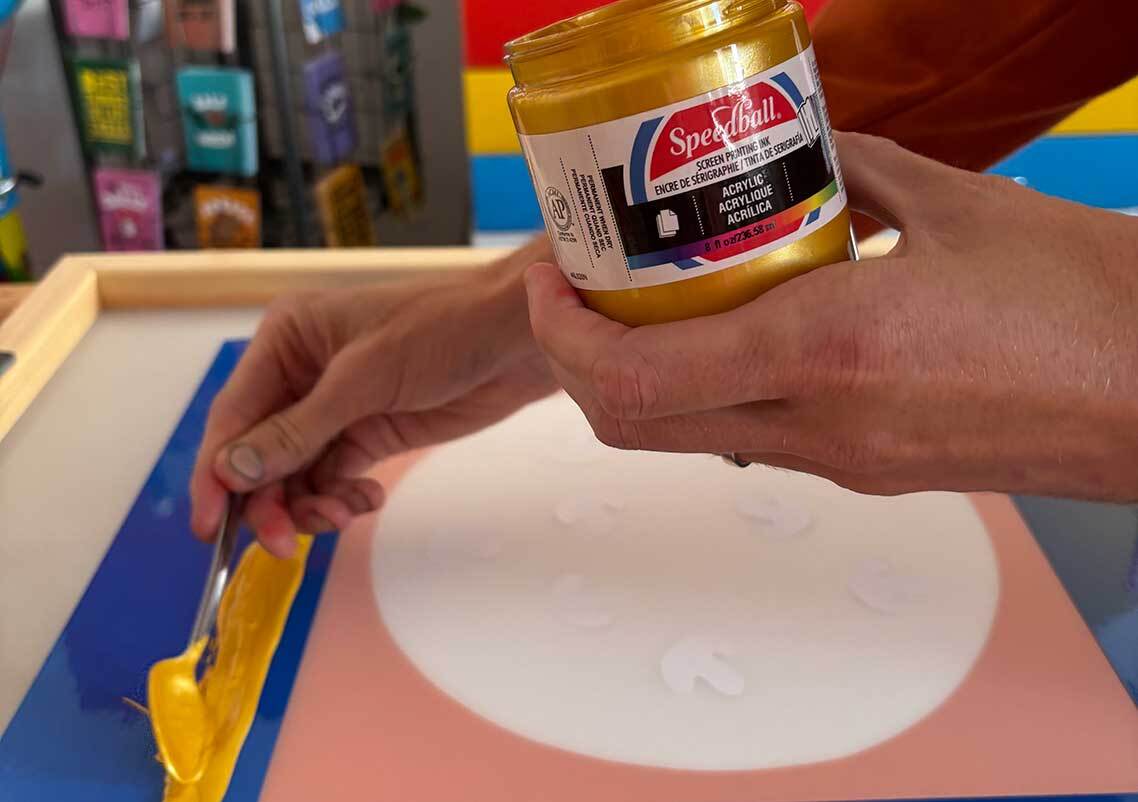
Step 7: Ink Bead
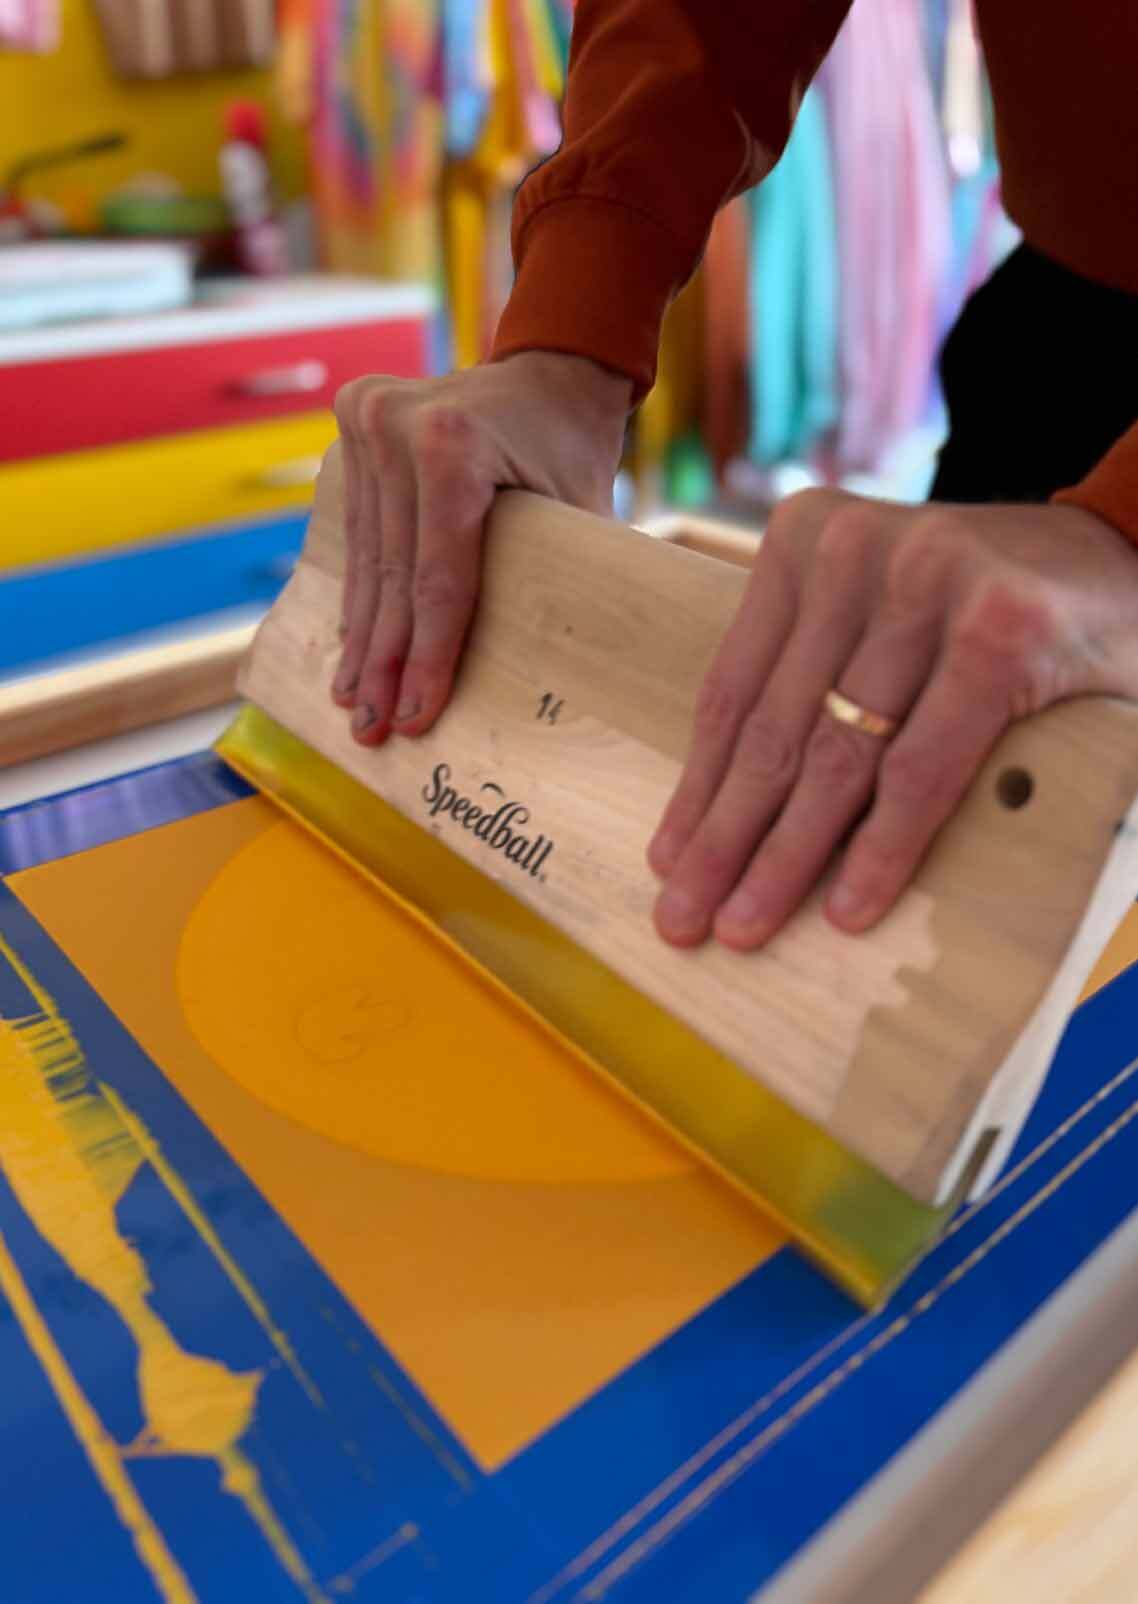
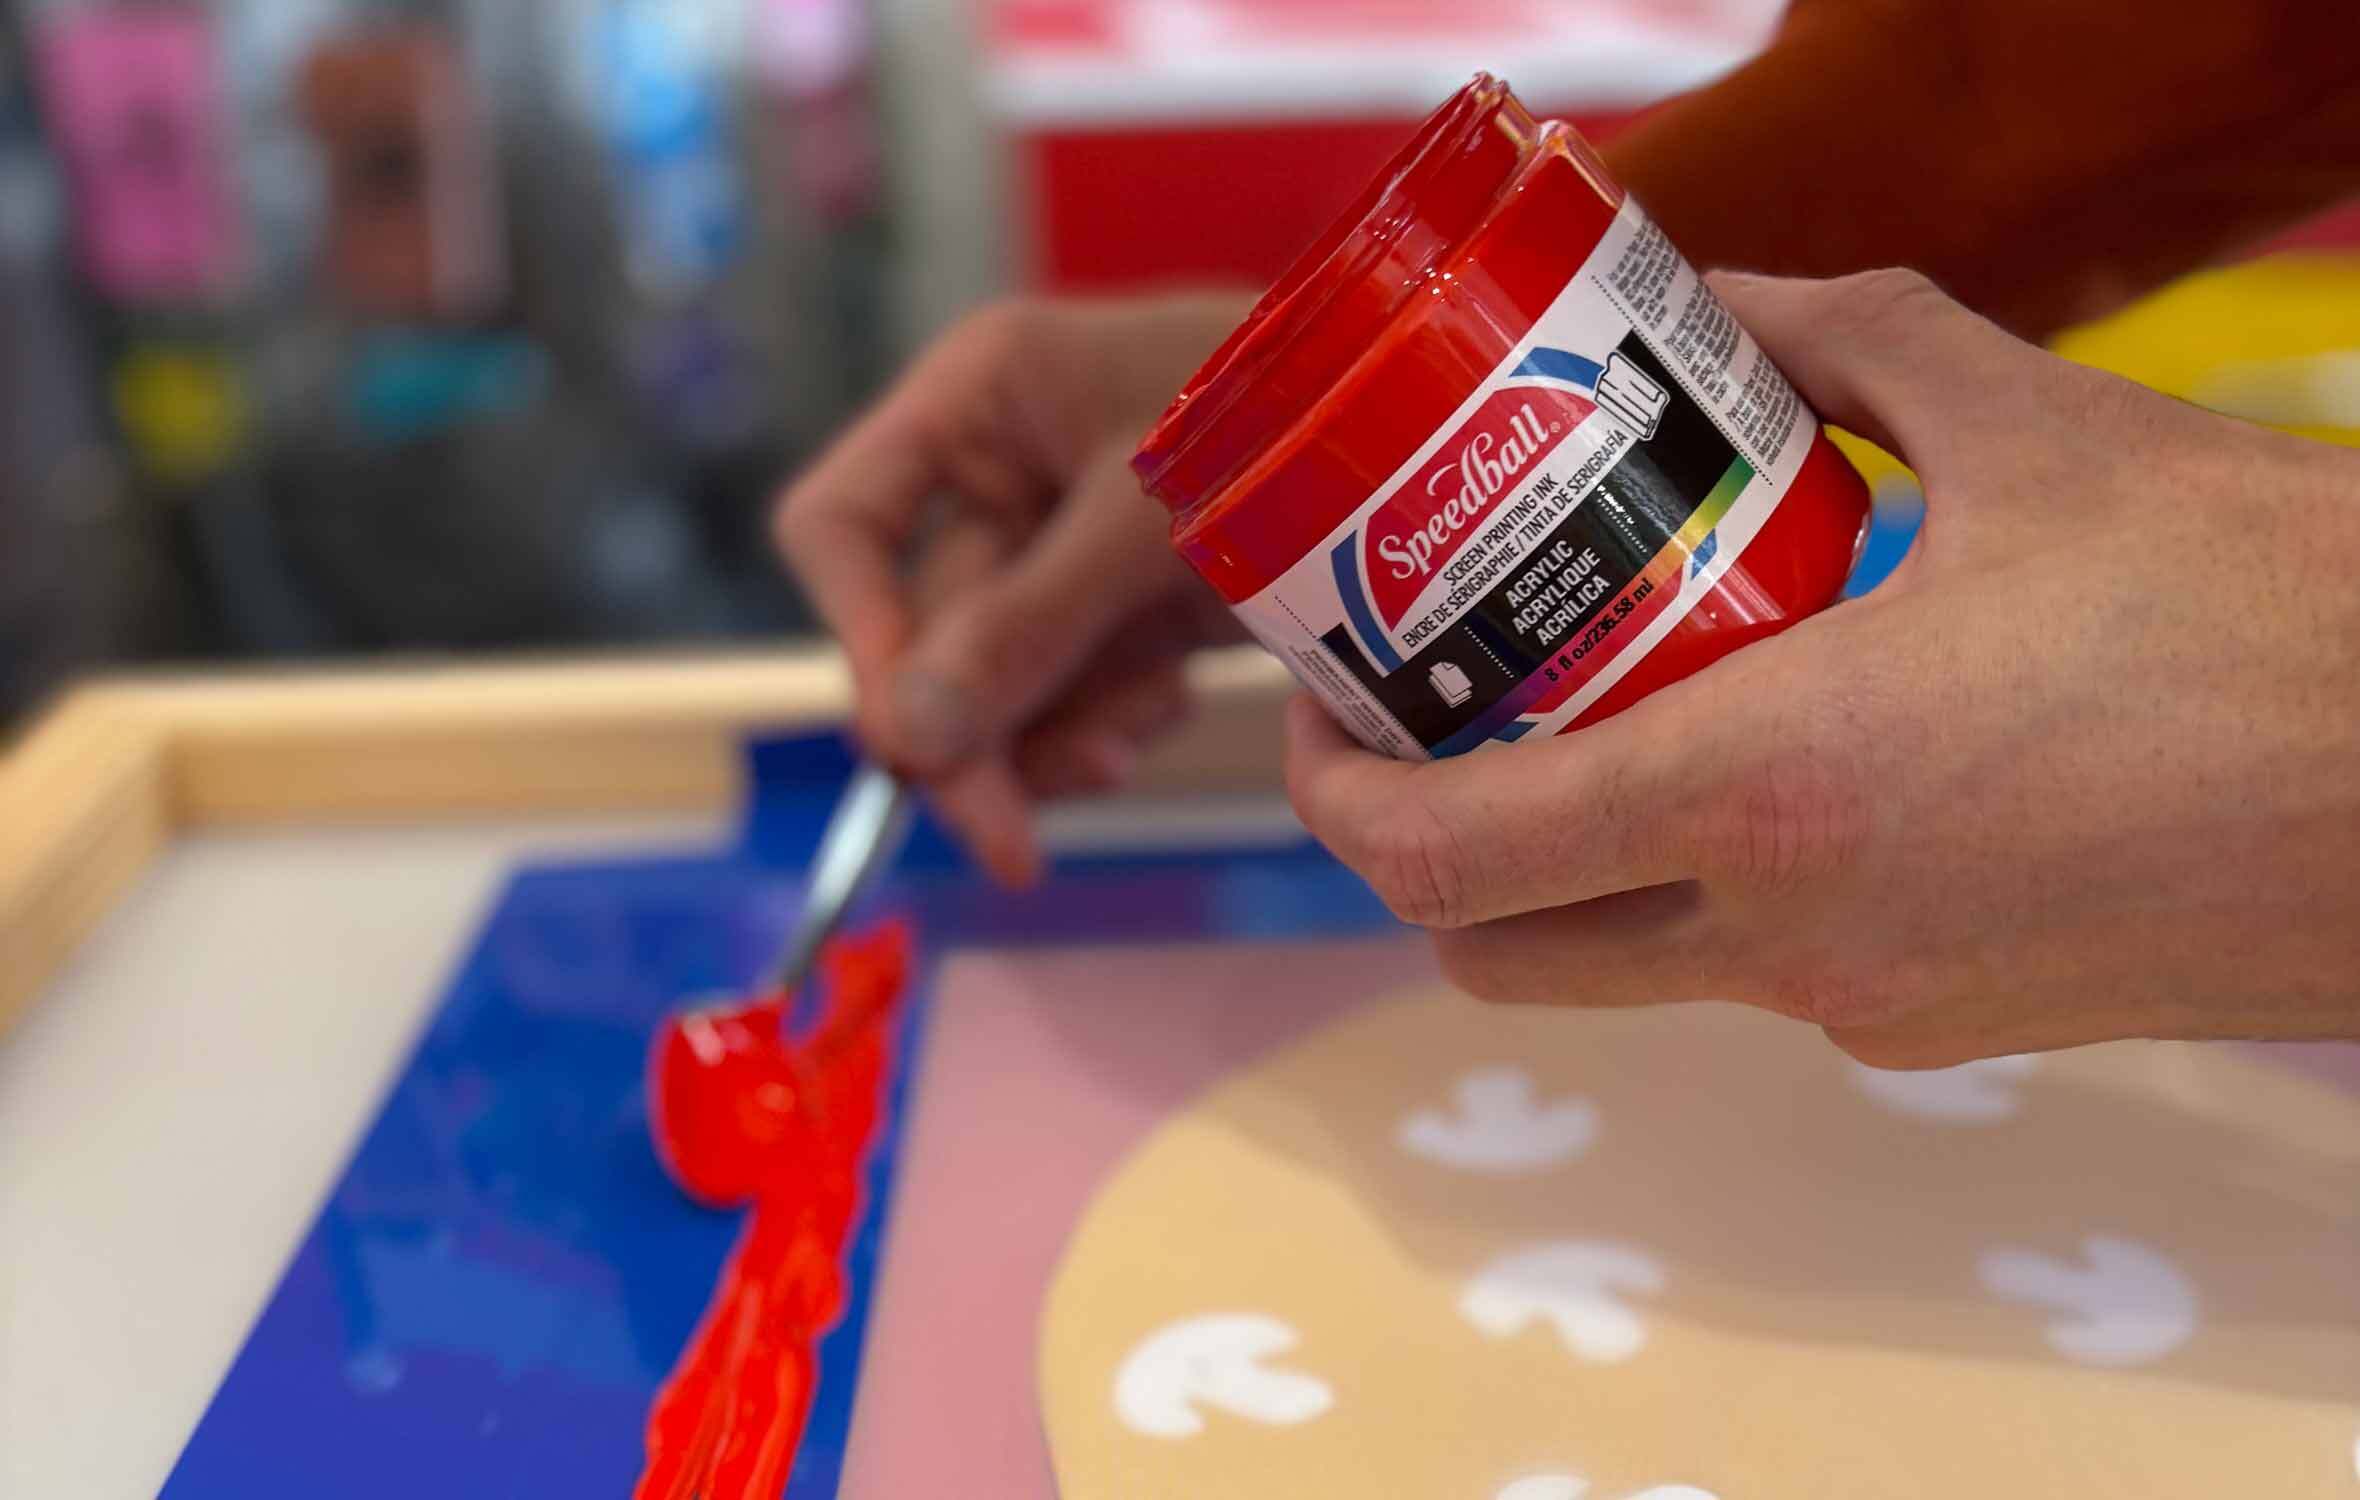
Lower your screen on to your paper which has both your pizza base stencil and your mushroom shapes in place. Take your Speedball Acrylic Gold ink and give it a little stir before creating a generous and even bead across the screen just above your design.

Step 9: Flooding your Design
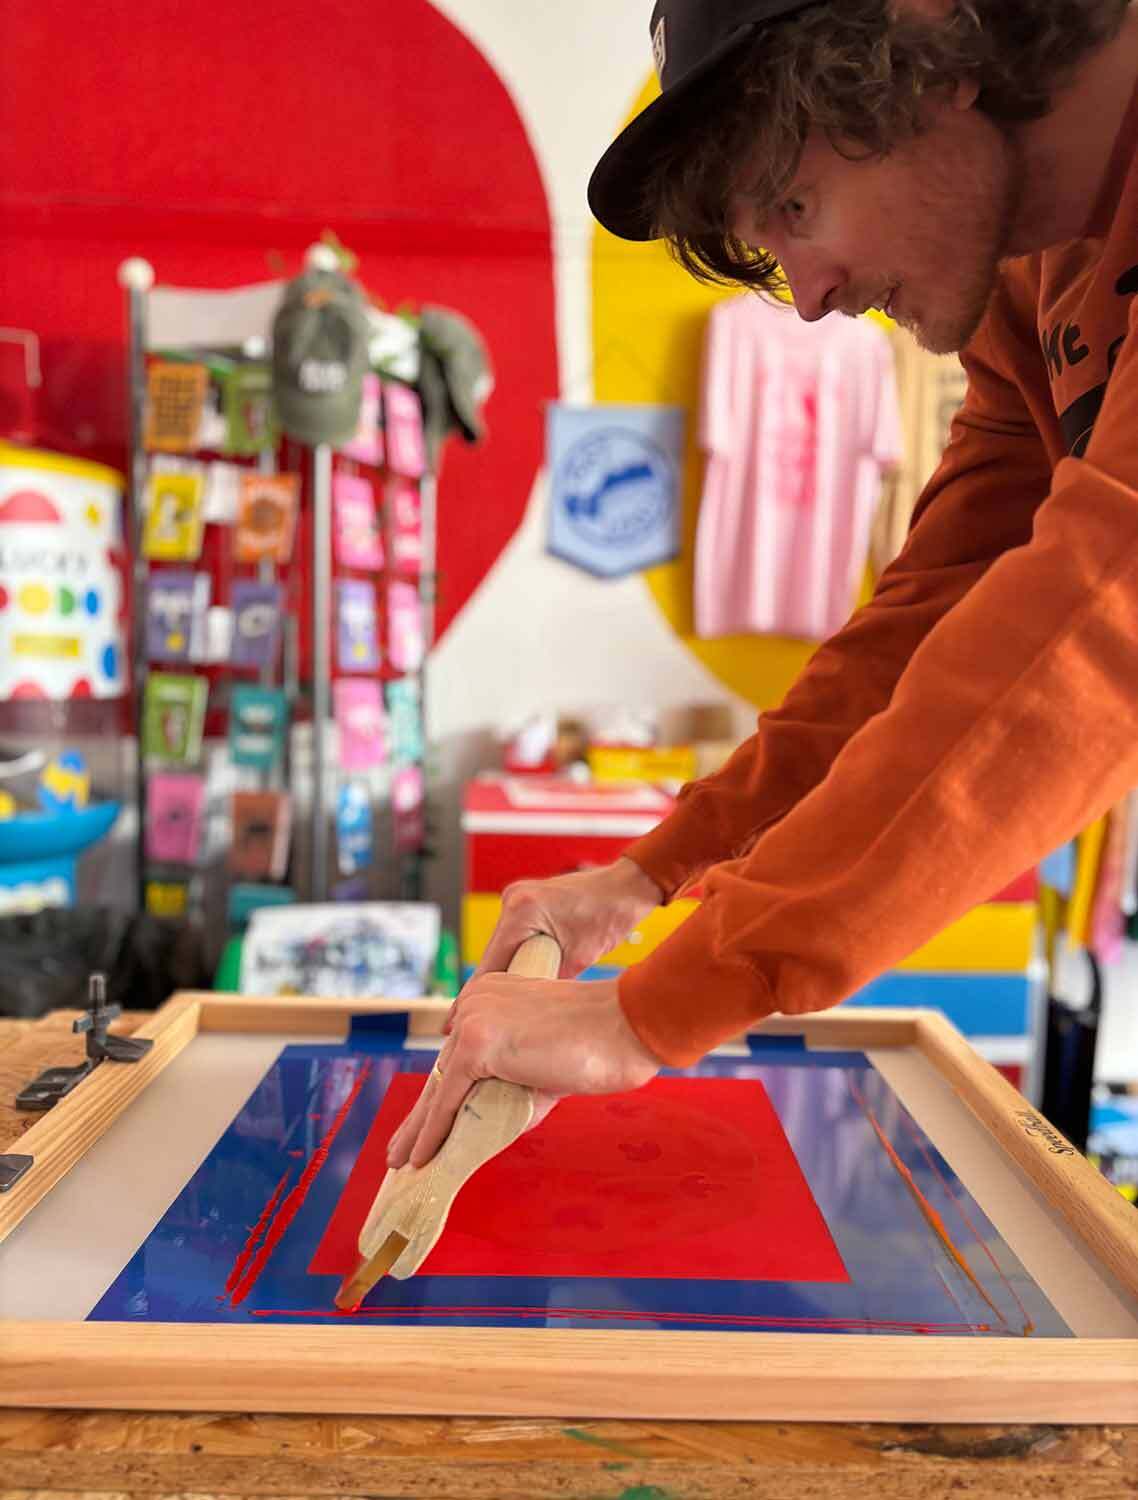
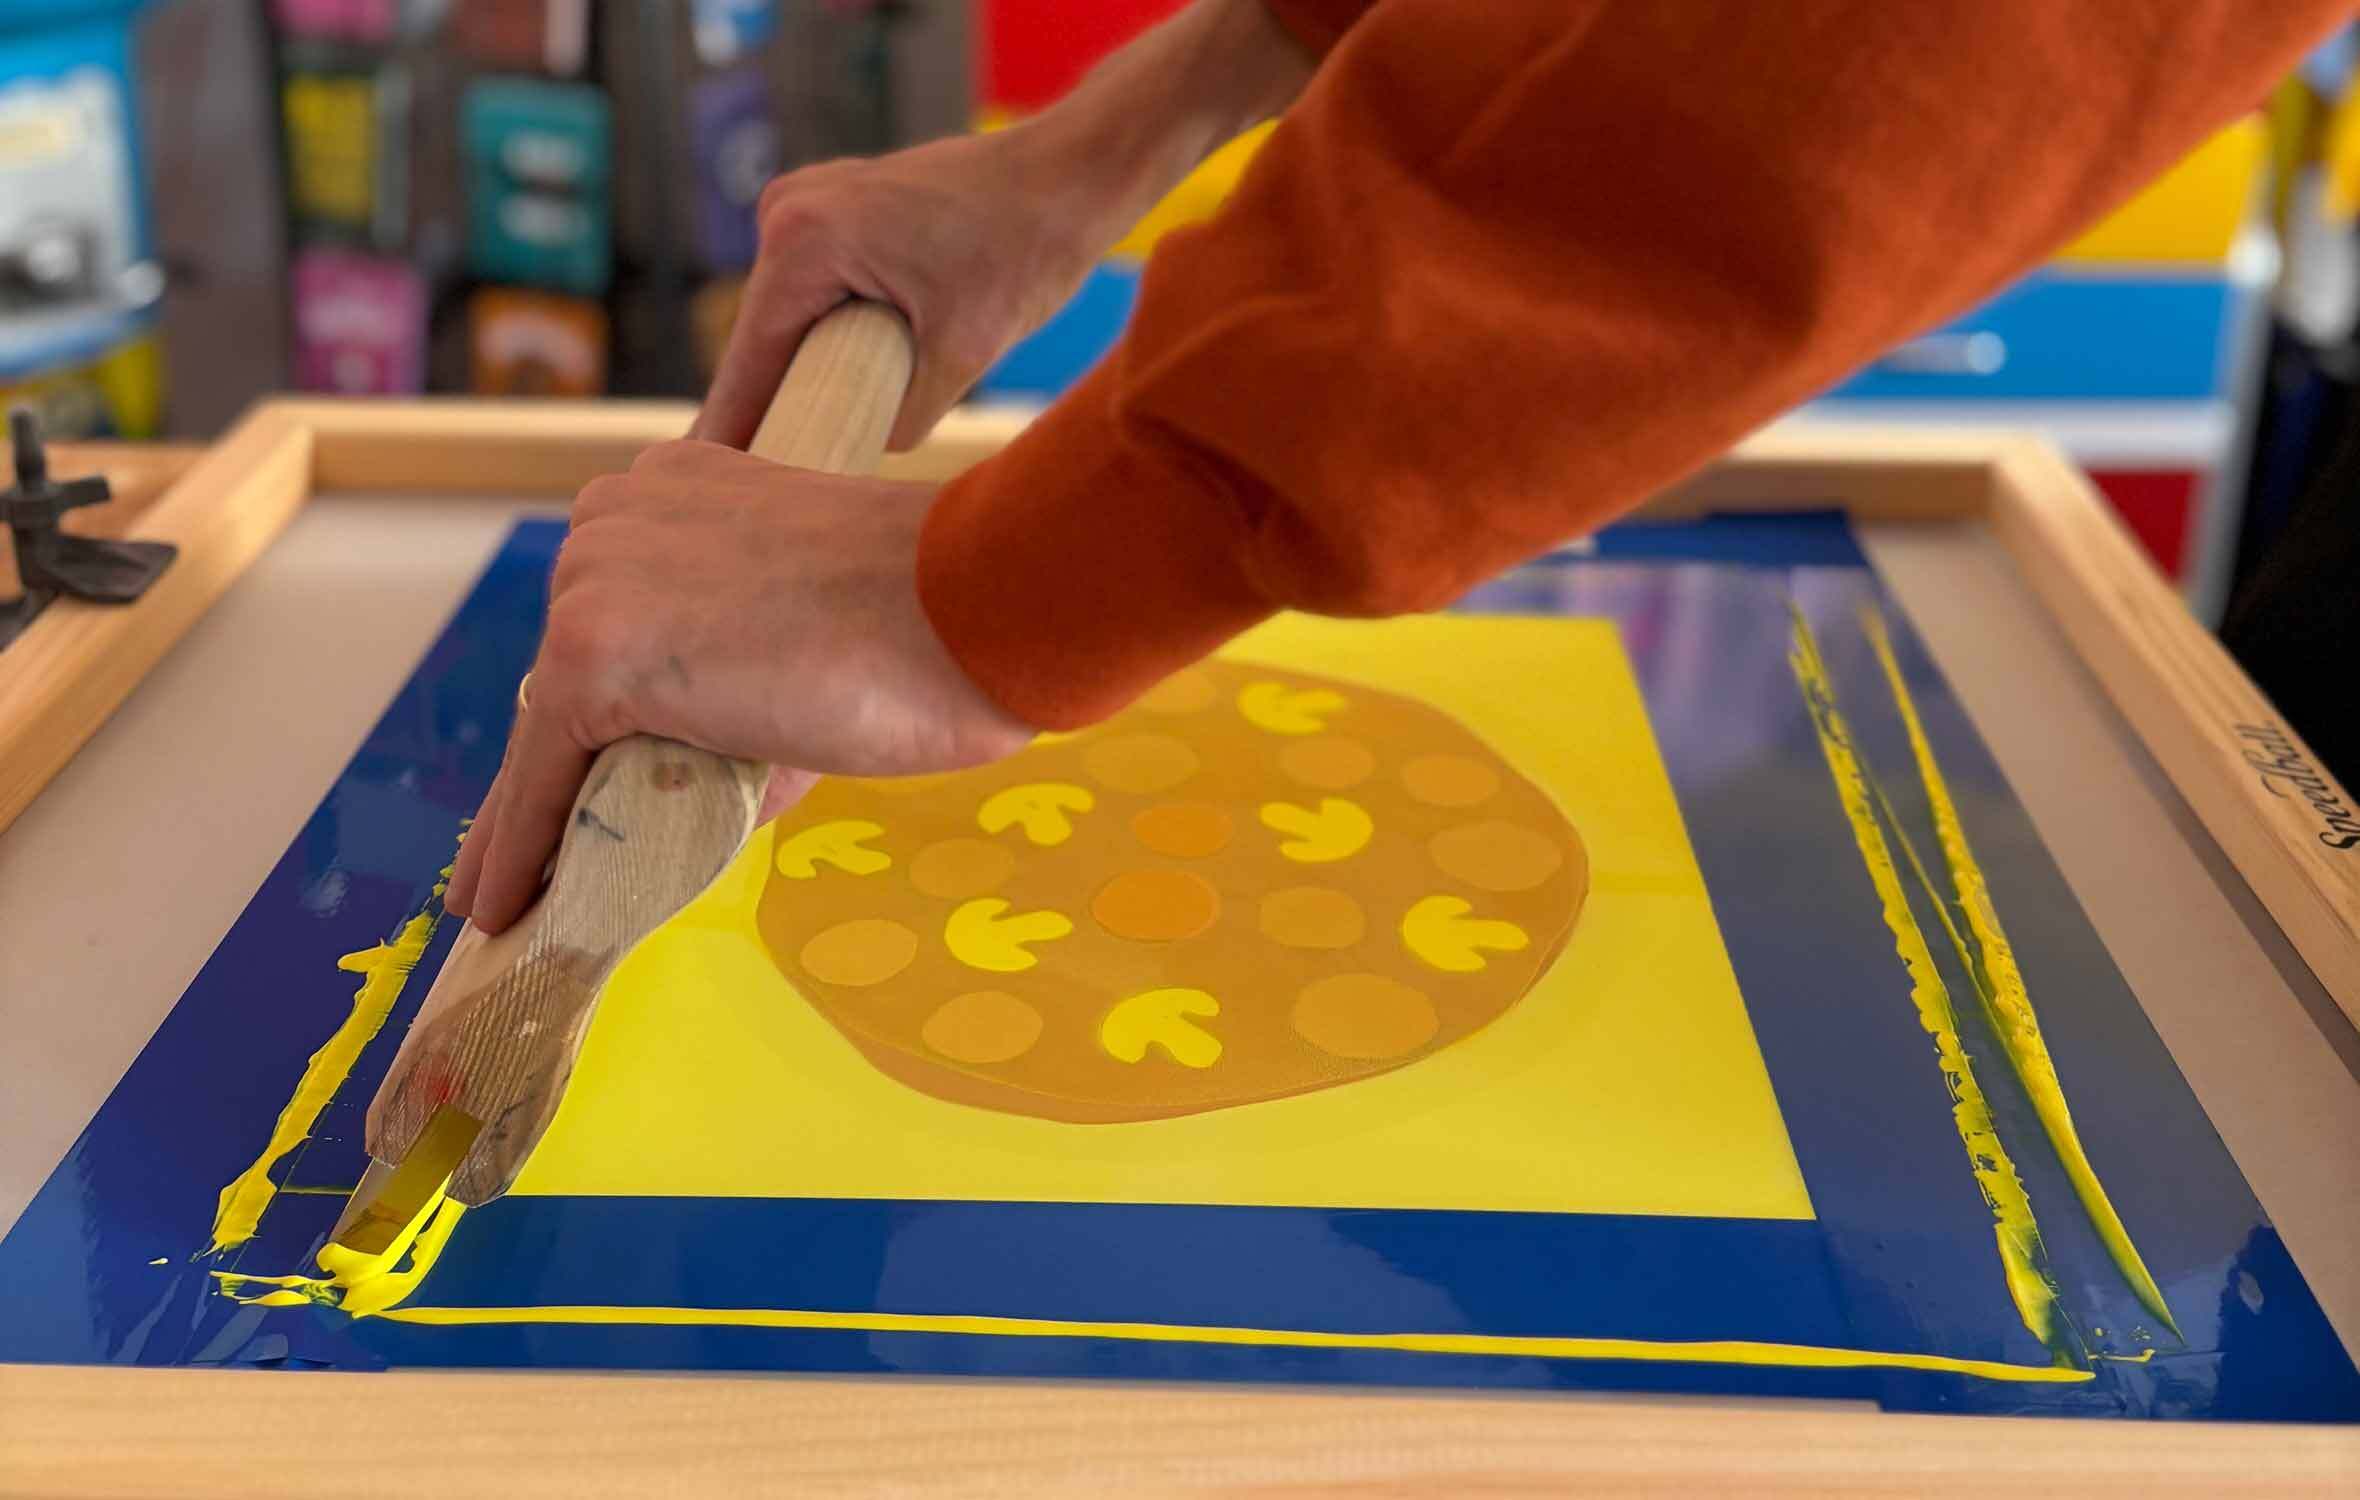
Usually when flooding our design we would lift the screen slightly to avoid contact, however for this project we're embracing the magic of imperfections and when printing with paper stencils we find having the screen already down helps the ink to “pick the stencils up” so they end up attached to the screen. So keeping your screen down take your squeegee and gently and evenly pull the ink down across your entire design, making sure it is all coated with ink. If any parts aren’t coated, repeat the flood, possibly adding more ink if it seems you don’t have enough.
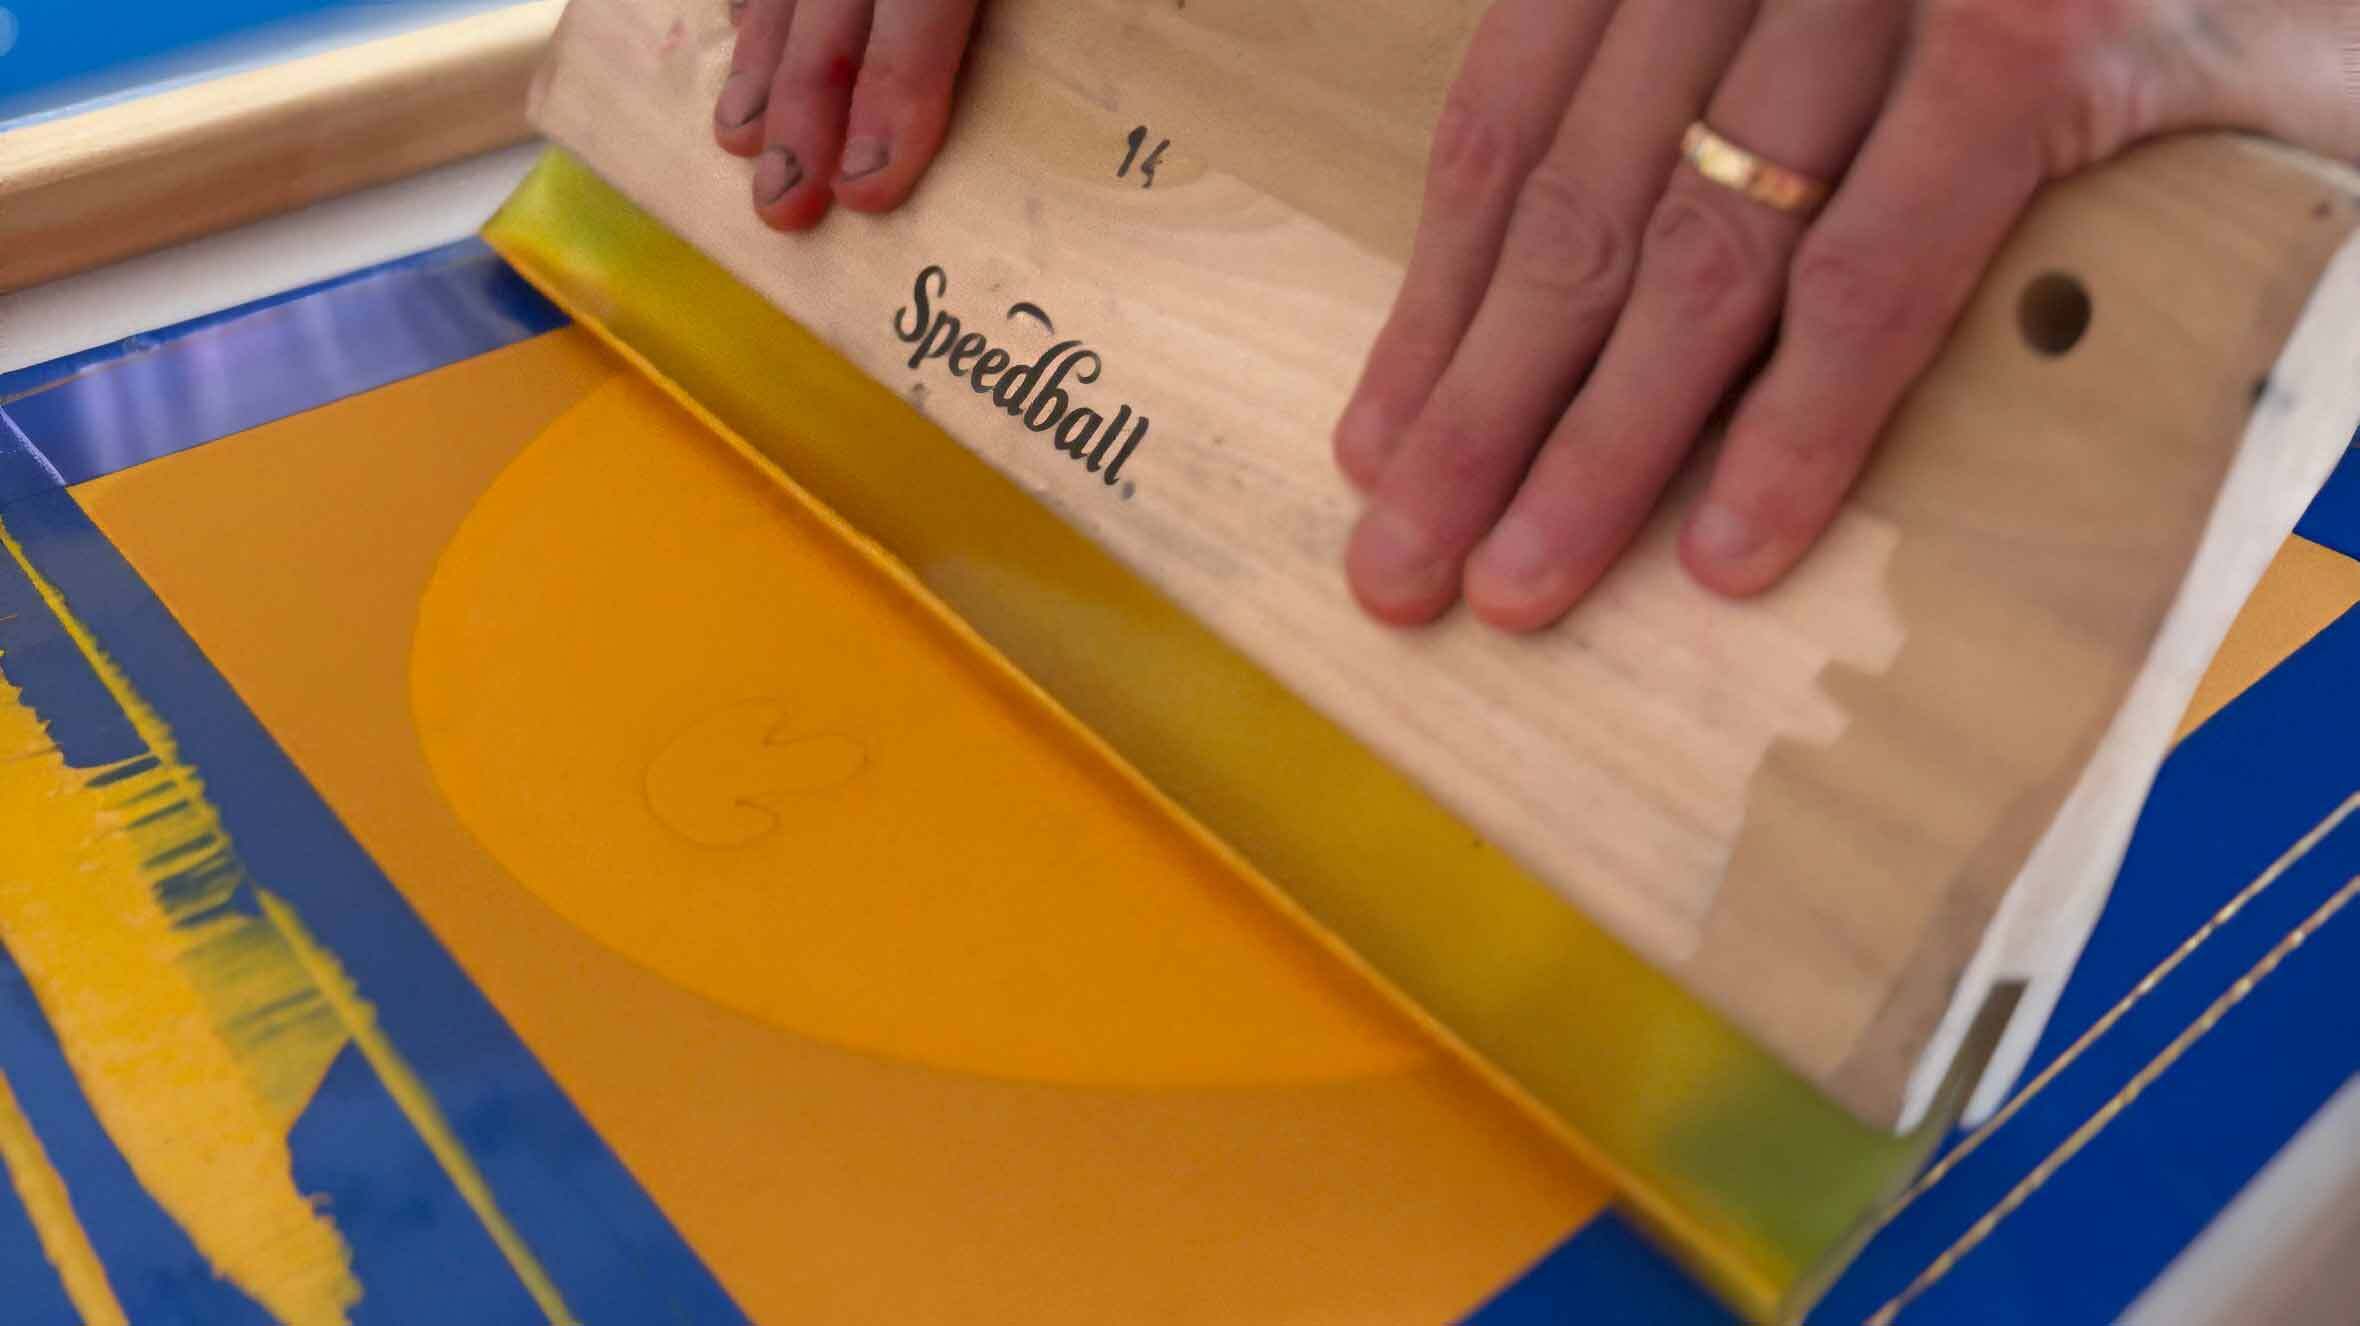
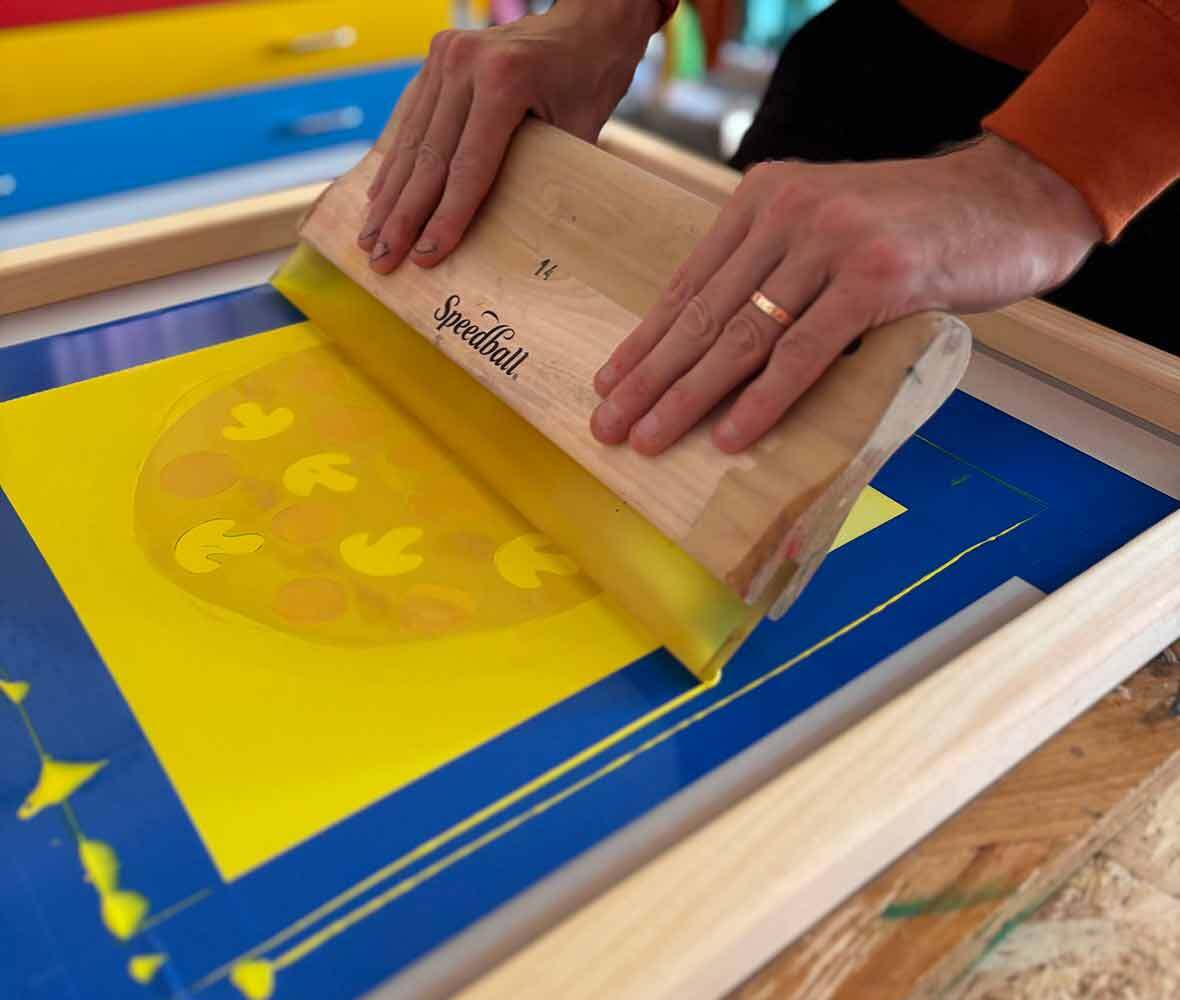
Step 10: Let’s Print a Pizza Base
Now it’s time to print your pizza base, take your squeegee back to the top of the design and this time apply pressure down and pull your squeegee across firmly and smoothly, keeping it at around a 45 degree angle.

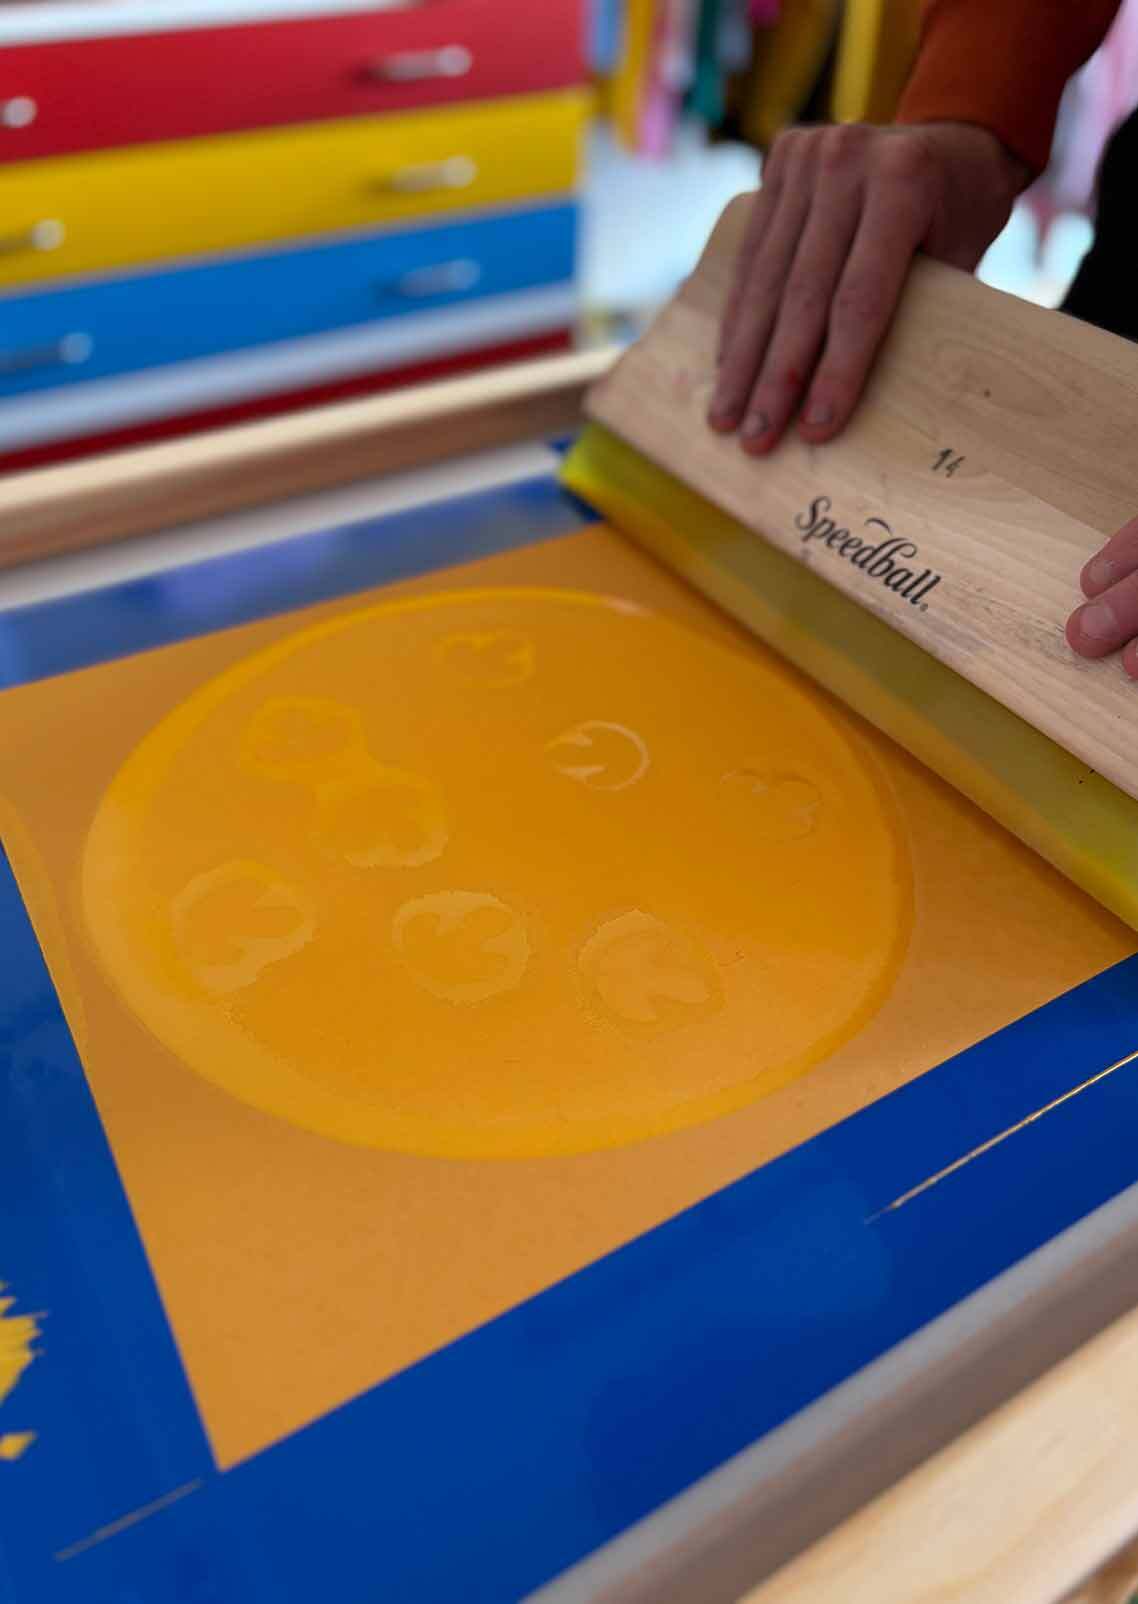
Step 11: The Reveal!
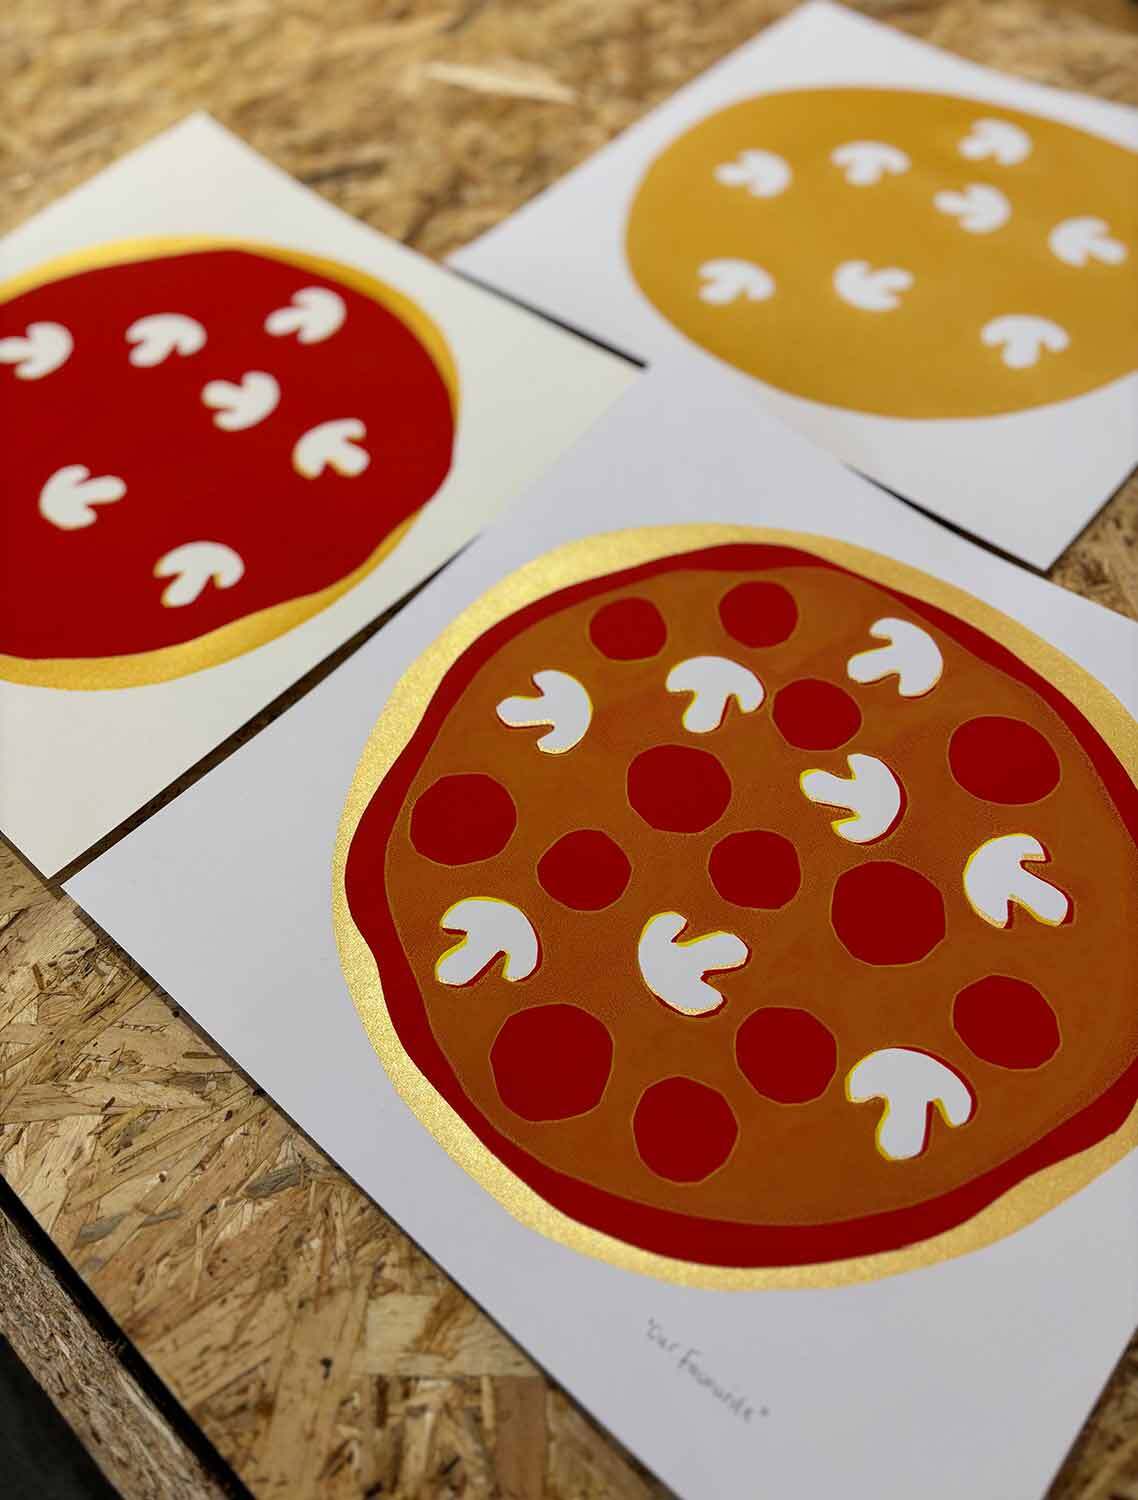
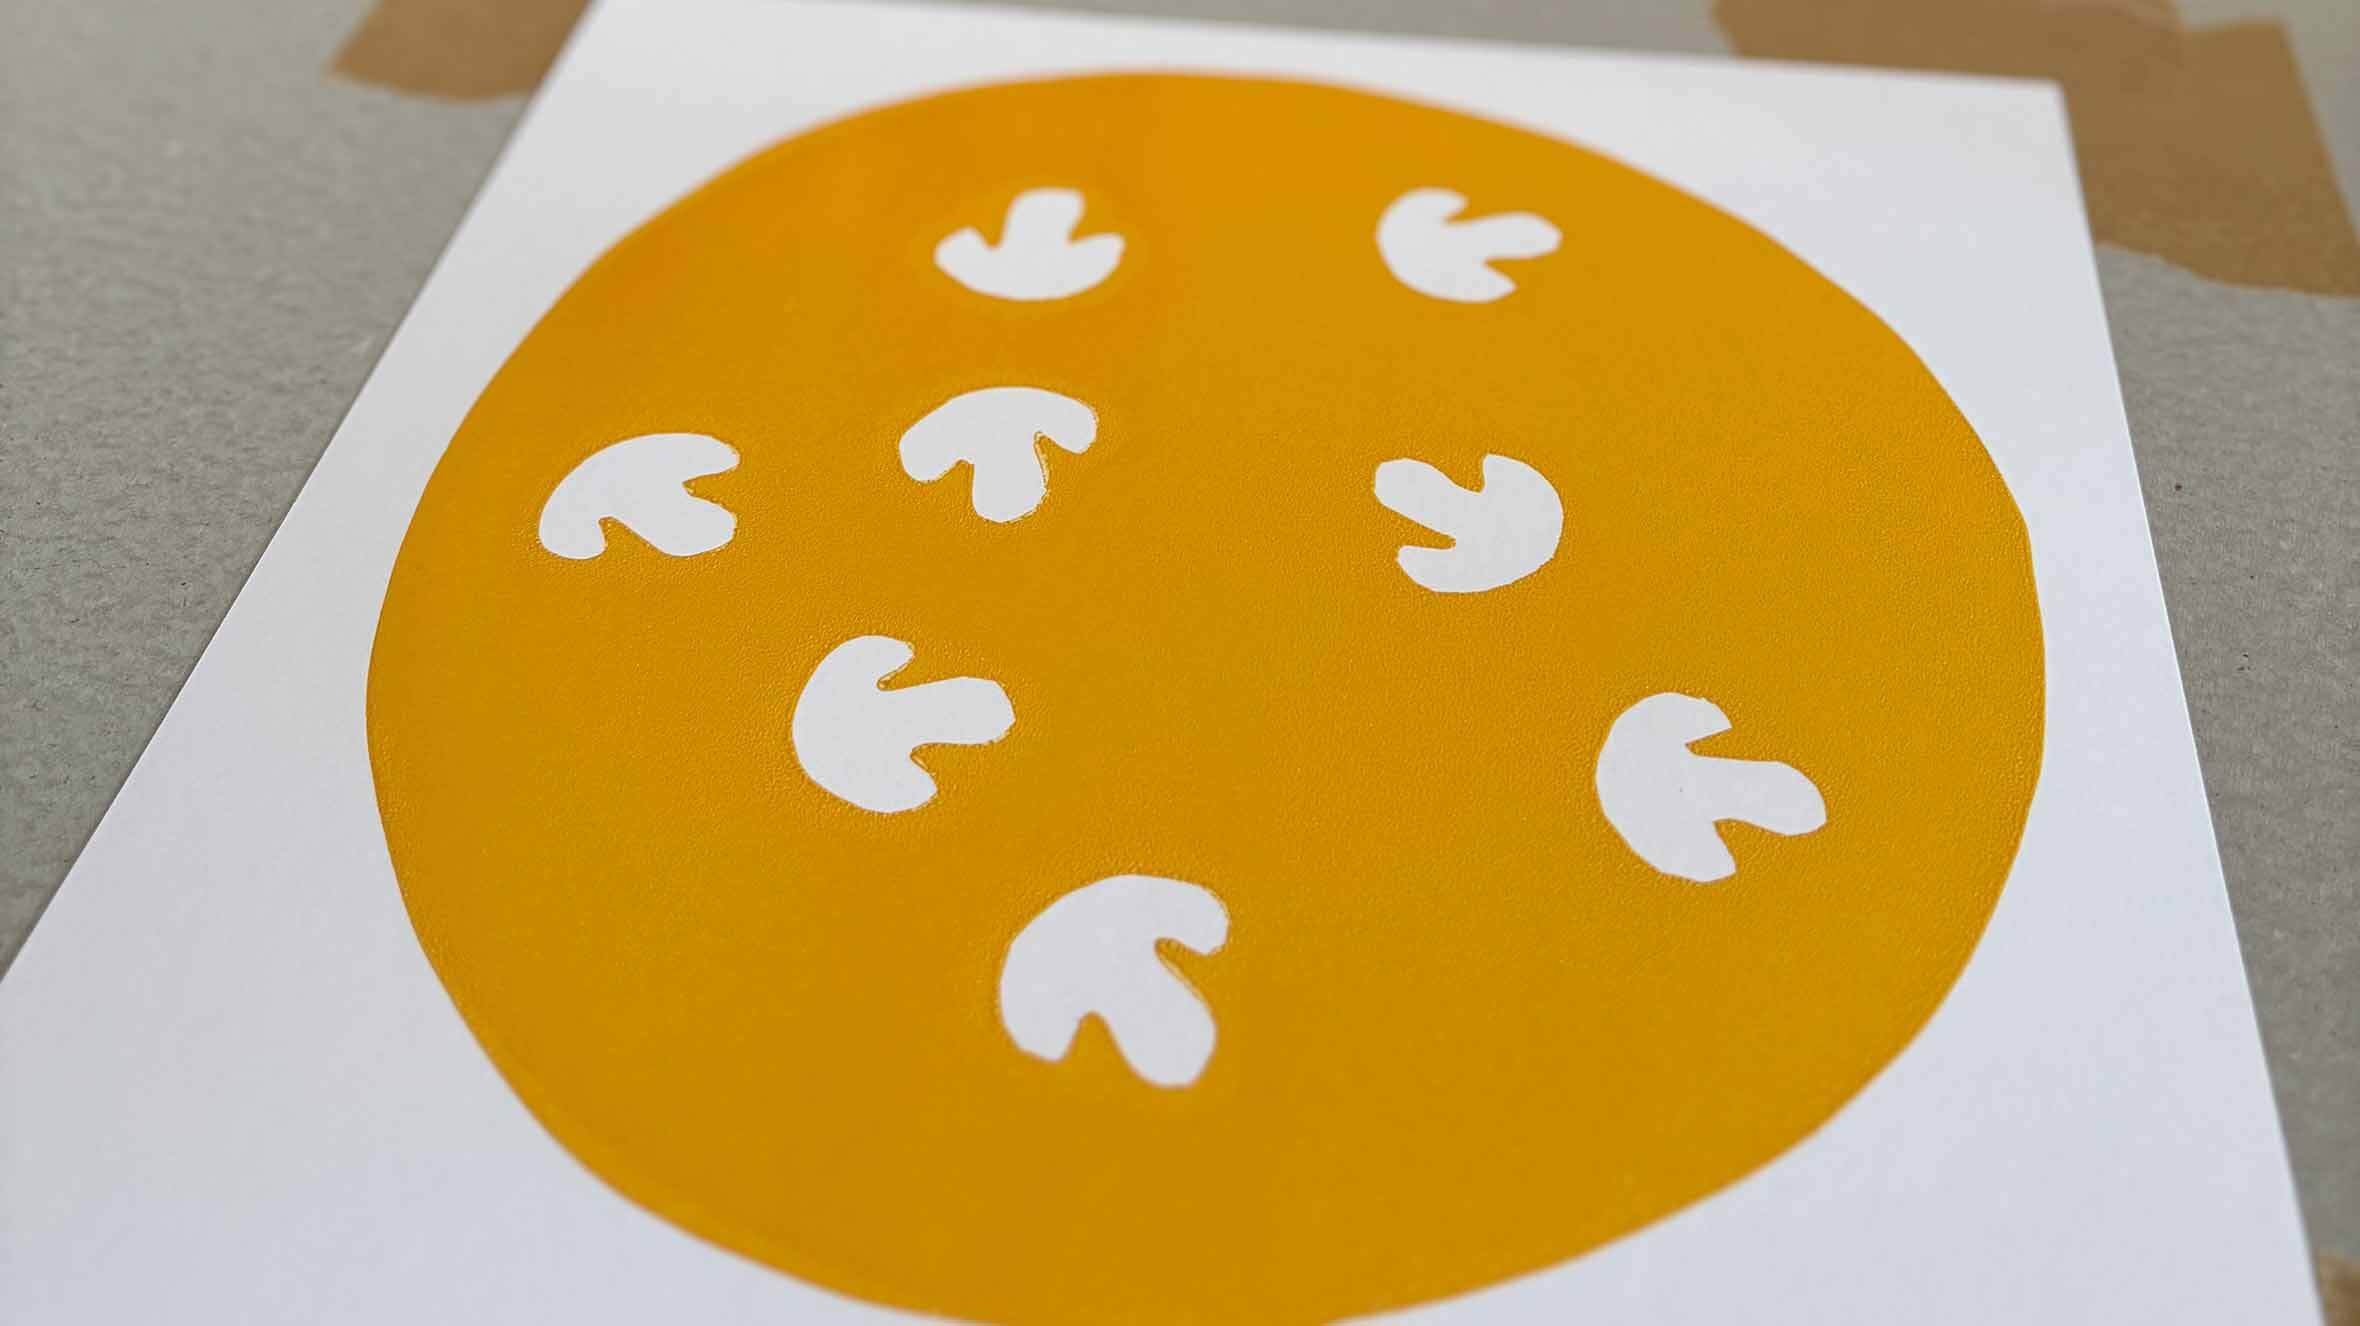
Carefully lift your screen, if your print has stuck to the screen you can gently peel it off. If everything has gone smoothly you will have a golden circle printed on your paper with white mushroom shapes and your circular stencil AND your mushroom shapes will still be stuck to your screen.
TROUBLESHOOTING: If any of your mushroom paper shapes have stayed on your printed pizza base rather than sticking to the screen - don’t panic! Leave them in place and you can gently remove them once the ink if fully dry. When you place your next piece of paper down to print another pizza base you’ll need to place another mushroom shape where it should have been. You should be able to lower the screen to look through it to check this new mushroom shape is landing in the right place.
If your pizza base stencil is coming away from the screen at all, remove it and place another down on top of your next piece of paper ready for printing.
Step 12: Print Extras
Repeat steps 8 to 11 to print a bunch of extra pizza bases incase any “mistakes” happen on any of the colours! Leave your prints to dry naturally or if you have extra screens and want to keep going you can very gently dry them with a heat gun or hair dryer. When they’re dry then put them in a pile all the same way up, this will help you when you print the next colour.
Step 13: Screen Clean
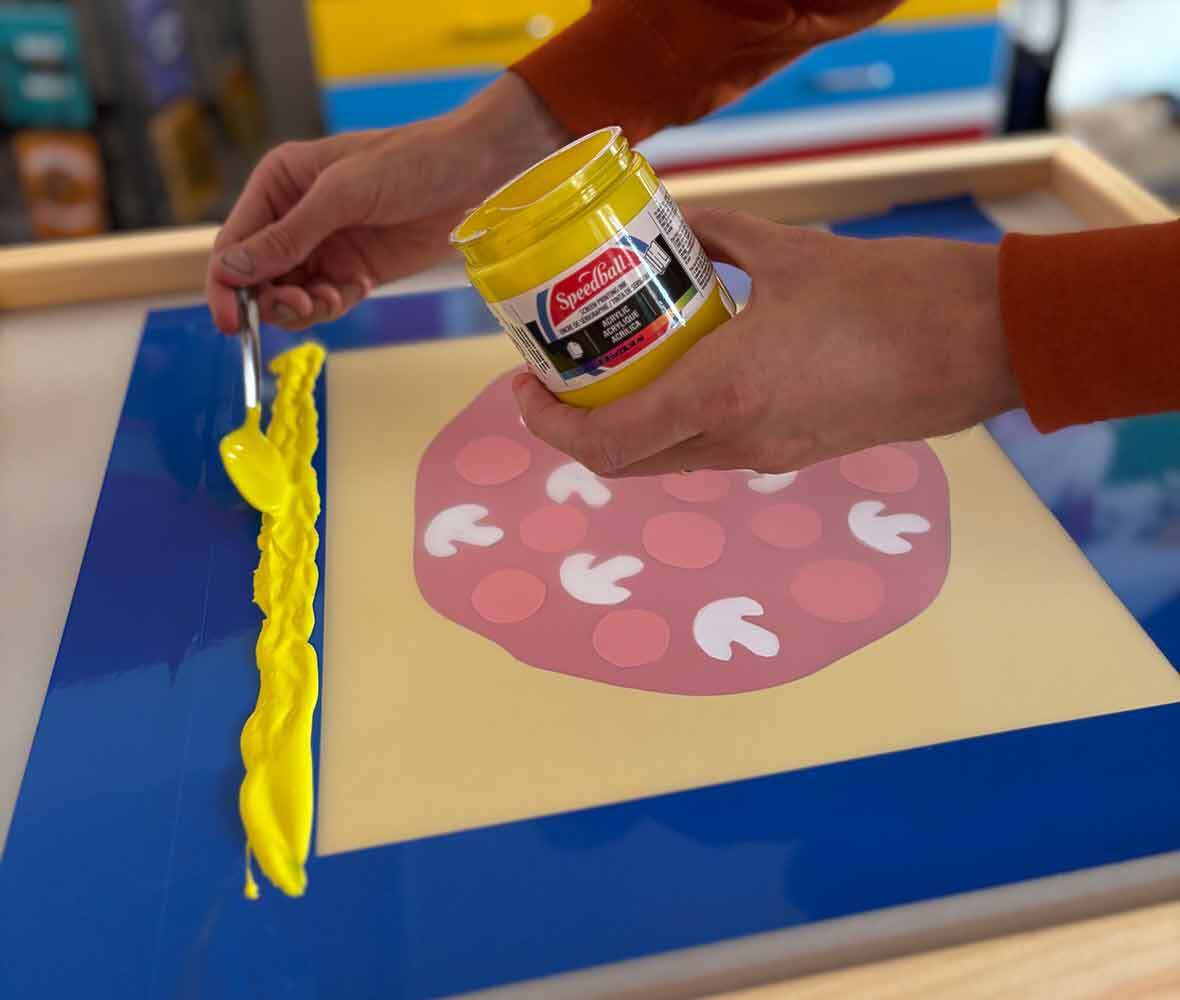
Once you’re happy that you have a few successful golden pizza bases, scoop up any extra ink on the screen back in to the pot. It’s important not to leave the paper shapes or ink to dry on the screen, so using your fingers or some tape, remove all of the inky paper stencils and place these in the bin. You can leave the vinyl tape in place, especially if you are using the same screen for your next colour. Thoroughly wash all of the ink off your screen. If you don’t have a washout booth you can use a shower head or a hose. Hold the screen up to the light to double check for any small amounts of ink not washed out fully. Also wash up your squeegee and spoon as we are done with gold ink now.
Step 14: Prepping the next Colour
It’s tomato sauce time! Place your golden pizza base print back on to your print board. Then place your sauce stencil in place on top of it. Then, a very important step, take your extra mushroom paper shapes and place them on top of your white mushrooms on your pizza base print. These will again block the ink so your mushrooms stay white!
If you are using the same screen as before (now fully dry) you can align the already taped up square to your paper. If using a new screen you will need to repeat Step 6.
Step 15: Let’s print Sauce!
Take your Speedball Acrylic Red ink and repeat Steps 8 to 11 to this time print your yummy red sauce!
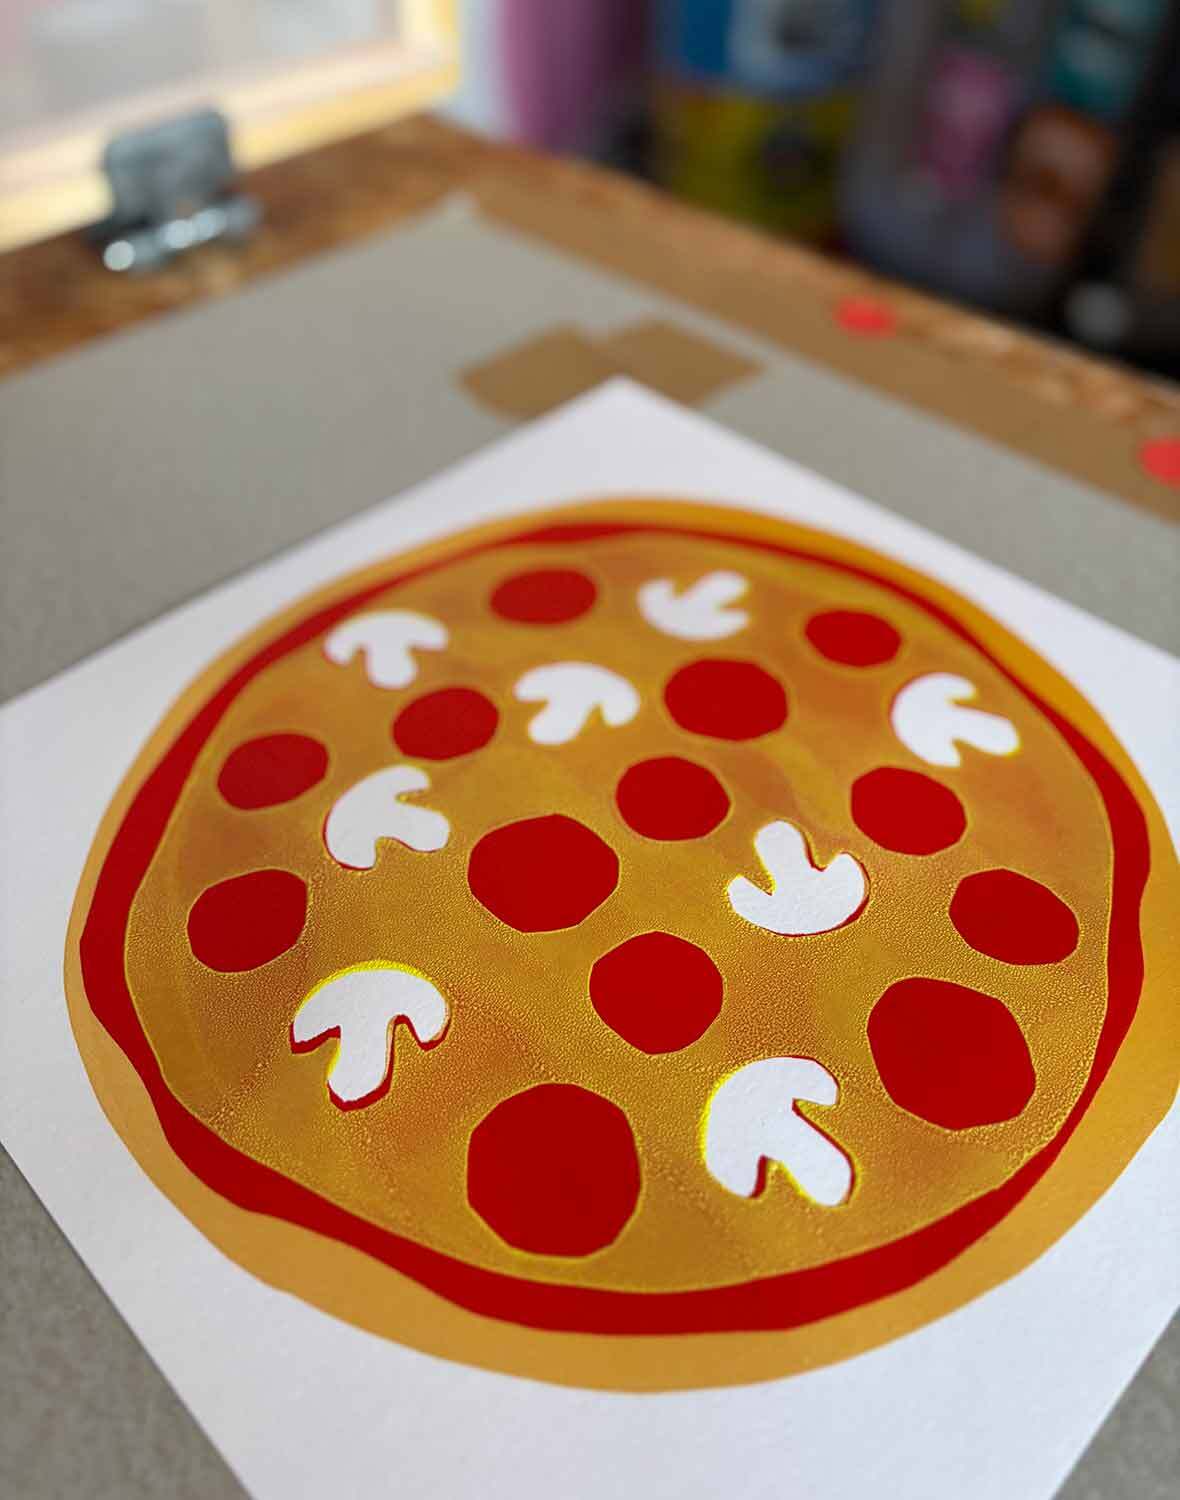
You should then have a print with a golden pizza crust, bright red tomato sauce and white mushrooms. There will likely be some tiny bits of gold around the mushrooms but these little “imperfections” are wonderful and tell the story of how your pizza screenprint has been made. Repeat the tomato sauce printing until you have run out of golden base prints. When these are fully dry put them in a pile all the same way up again.
If you have any issues with the stencil staying stuck to the screen at this stage see the Troubleshooting part of Step 11.

Step 16: Screen Clean
Repeat Step 13, removing the paper stencils and thoroughly cleaning your screen, squeegee and spoon.
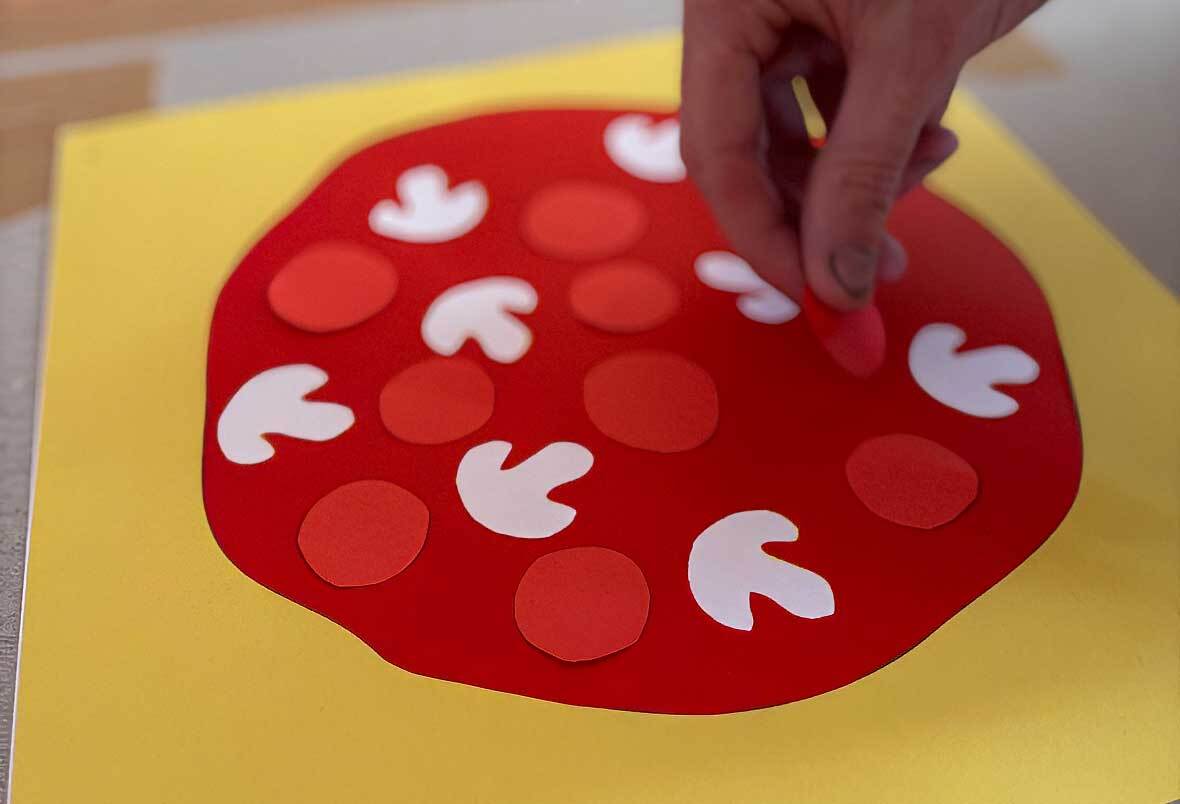
Step 17: Prepping the Last Colour
It’s time for our final colour and for our pizza print to all come together! Place your fully dry pizza base prints with red sauce back on to your print board, aligning it with your tape on the board again.
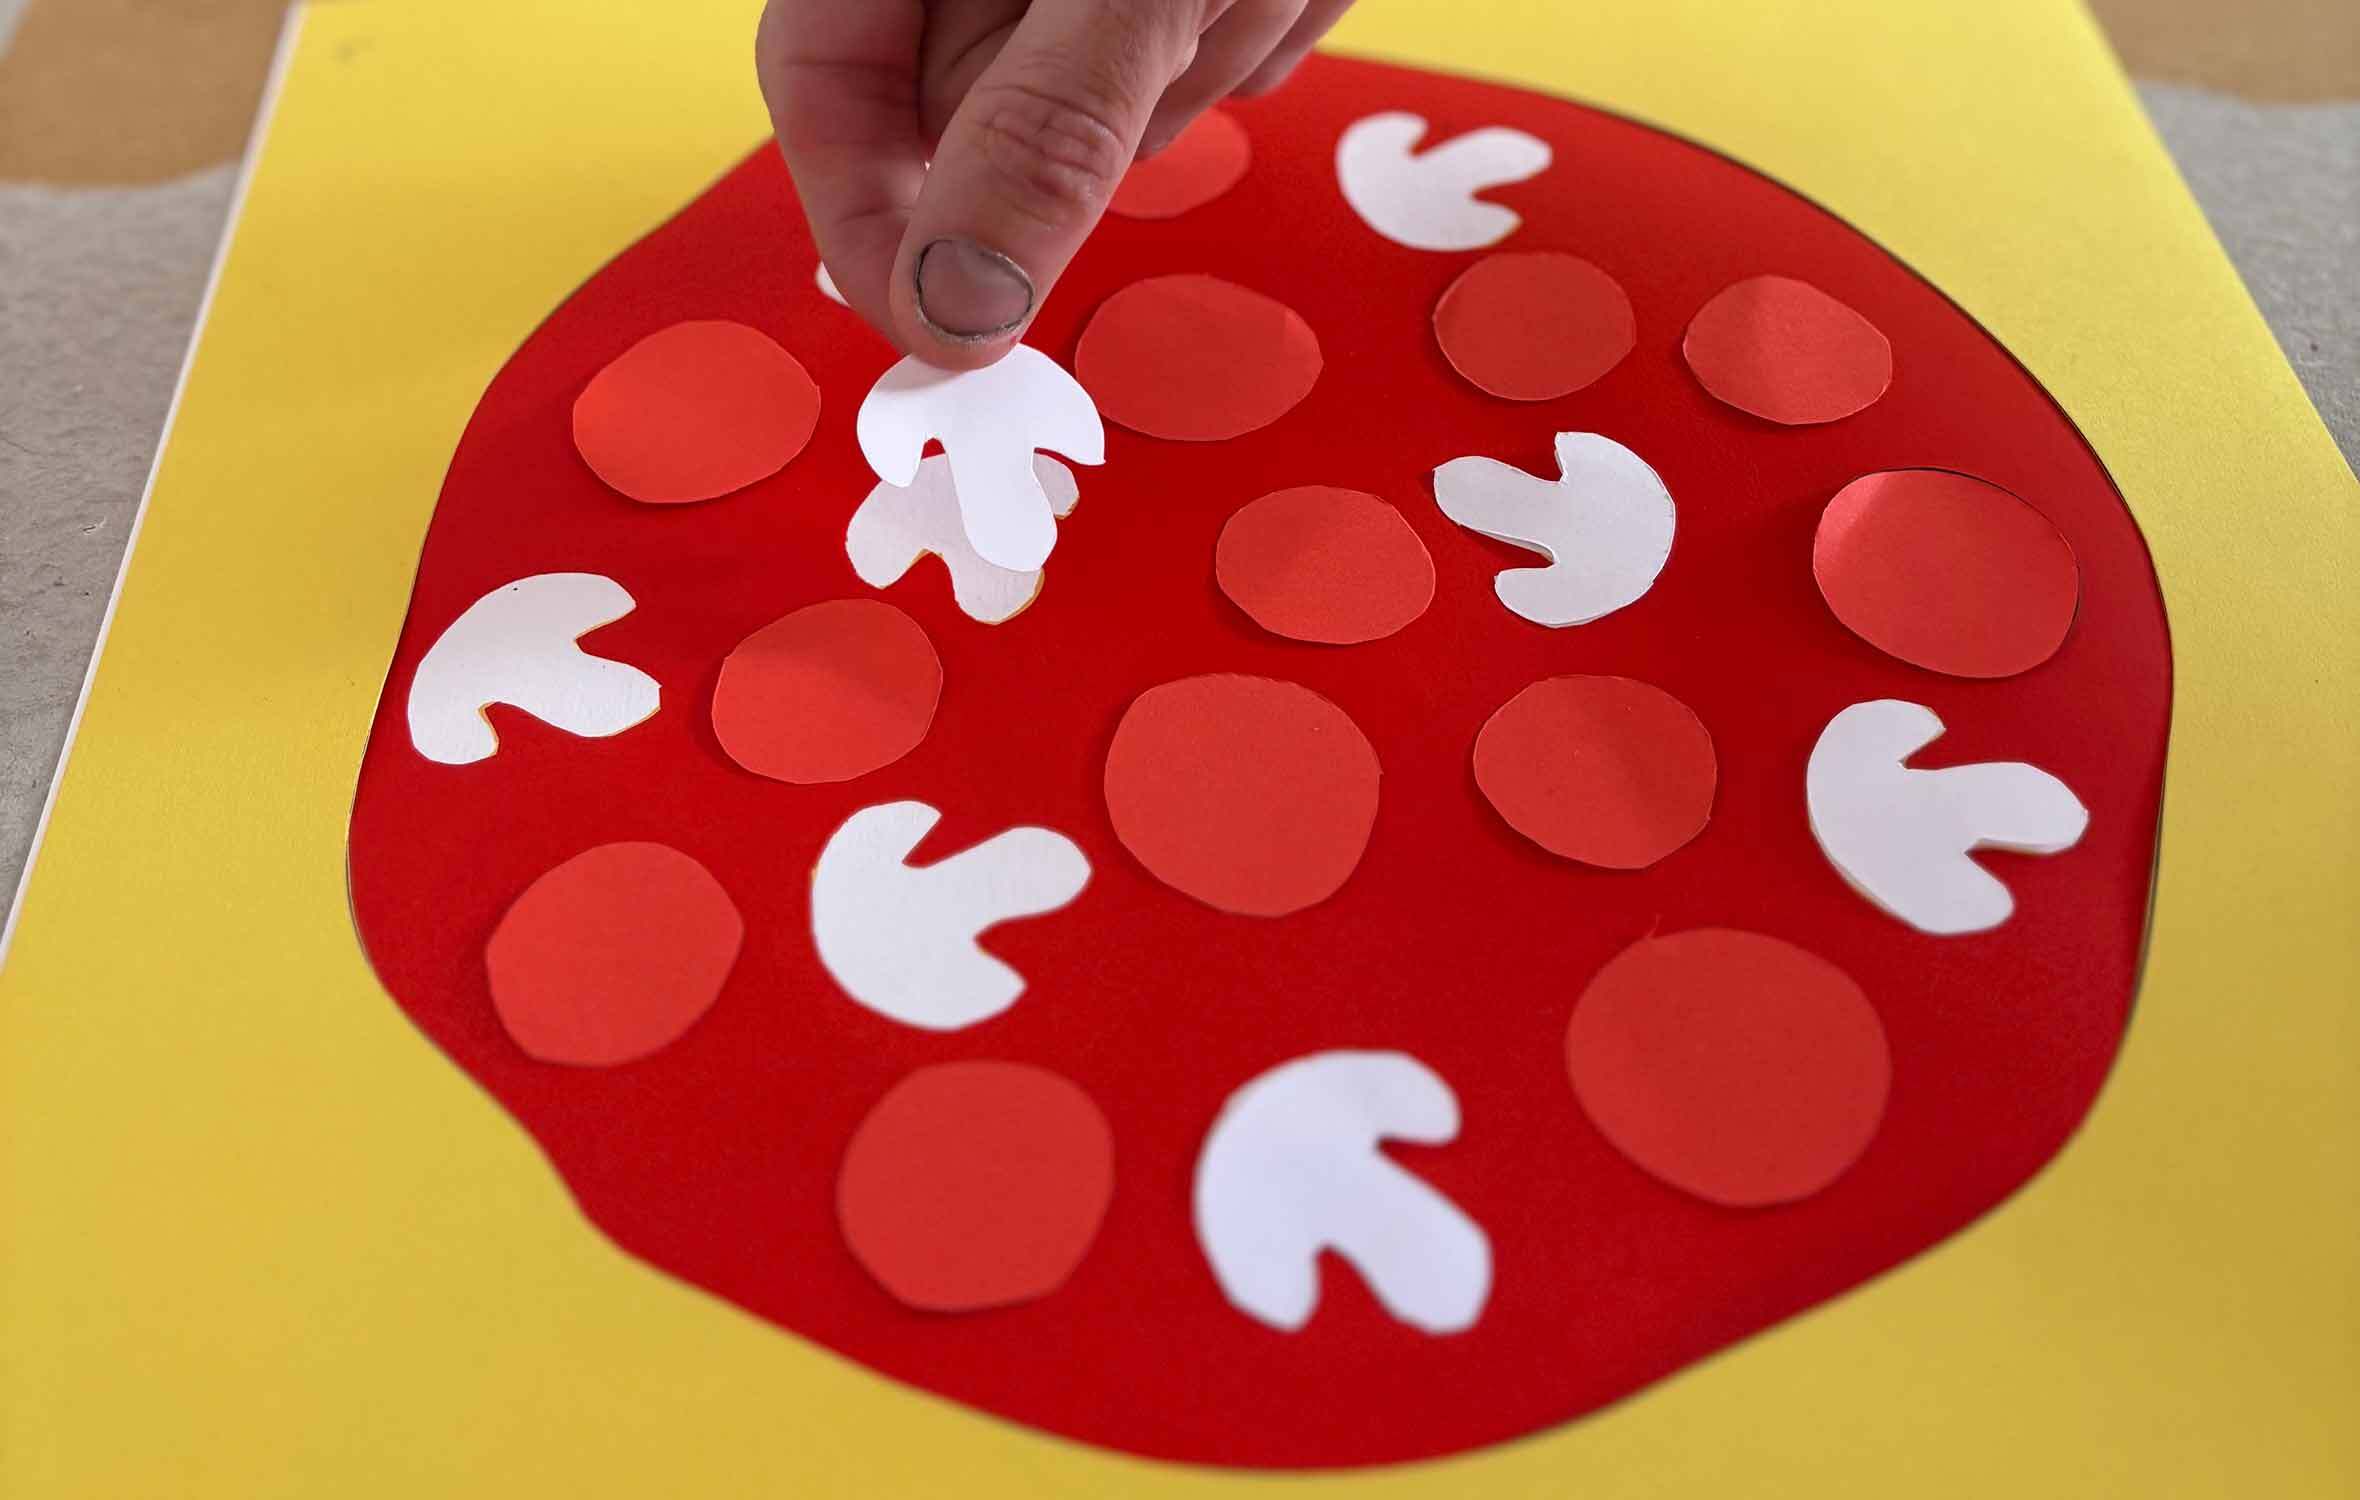
Next place your pepperoni circles on to your pizza, ensuring they all land on top of the red sauce area. These circles will block the yellow “cheese” ink so the pepperoni stays red! Don’t forget to also add in more mushroom shapes, carefully aligning them to all your previous white mushroom shapes so these areas stay white.
Again if you are using the same (now fully dry) screen you can align the taped area with your paper and tighten it in to the hinge clamps. If using a new screen you will need to retape it as in Step 6.
Step 18: Let’s print Cheese!
Take your Speedball Acrylic Yellow ink and repeat Steps 8 to 11 to this time print your mozzarella cheese! This final colour will bring the whole pizza together, leaving pepperoni pieces from the previous red sauce colour AND white mushrooms from your white paper base. Make sure you place each piece of paper down the same way, you can double check by lowering the screen to see that the mushroom shapes are aligning correctly. Print your cheesy topping on to all of your printed pizzas prints! Yum!
Now, if like us you’re a bit of a perfectionist printmaker, this is where you really need to embrace the beautiful imperfections in this process! The yellow layer on top of the red can at first seem a bit washed out and there can be some little bubble like contact marks from the process. For this project, this is all part of the plan… You know what it REALLY looks like? A pizza covered in delicious melted cheese! What we really love about the project is how with the very “lo-fi” technique you are creating a four colour design that celebrates the printing process and embraces unpredictable imperfections along the way.
Step 19: Screen Clean
Repeat Step 13, removing the paper stencils and thoroughly cleaning your screen, squeegee and spoon.

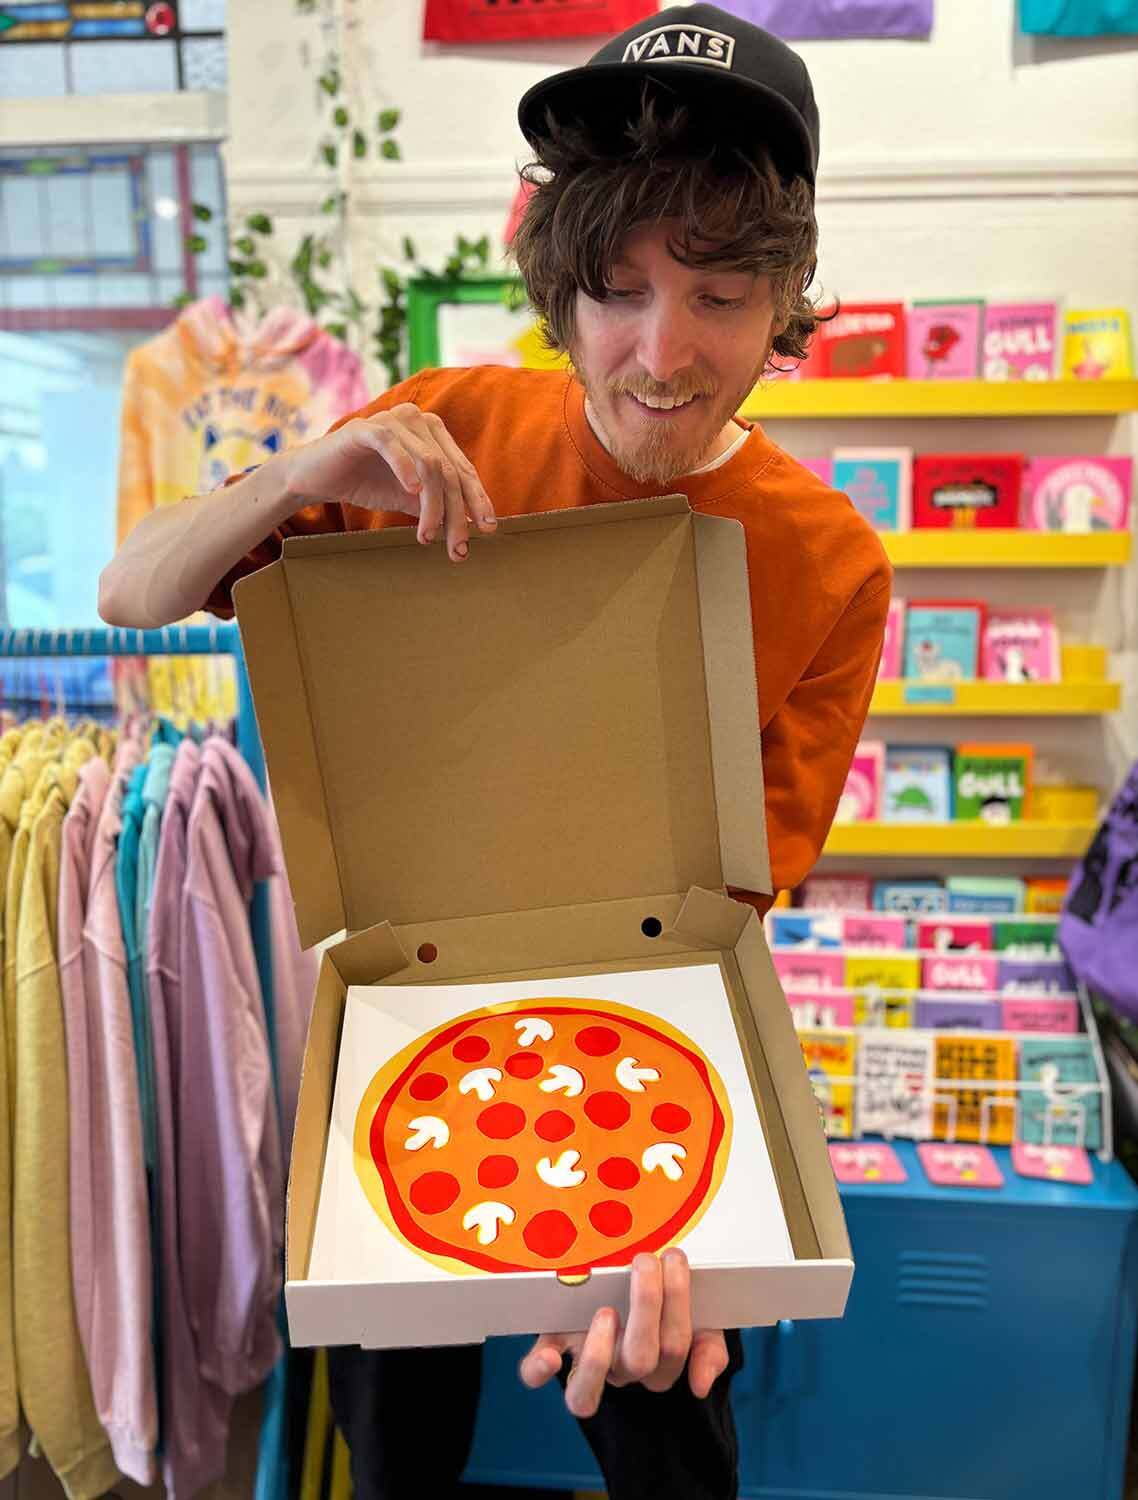
Extras: A Pizza Gift Box
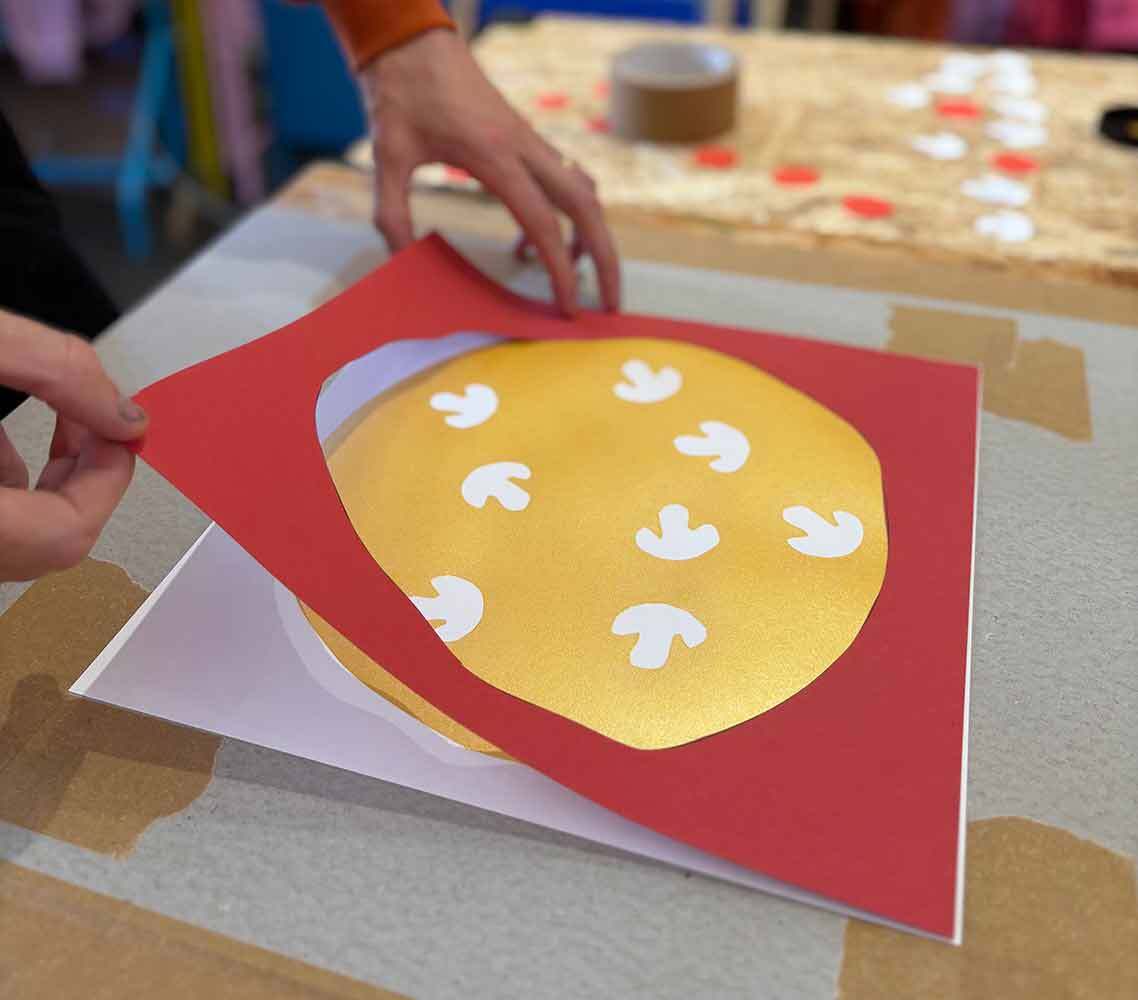
If you’re creating your pizza print as a gift for someone you could design and print up a pizza box using the same simple paper stencil technique. We drew our “Freshly Printed” box design on to thin paper, cut it out with a craft knife and aligned and printed it on to the box lid. A fun way to gift your pizza masterpiece! (just make sure they don’t try to eat it!)
Want More Toppings?
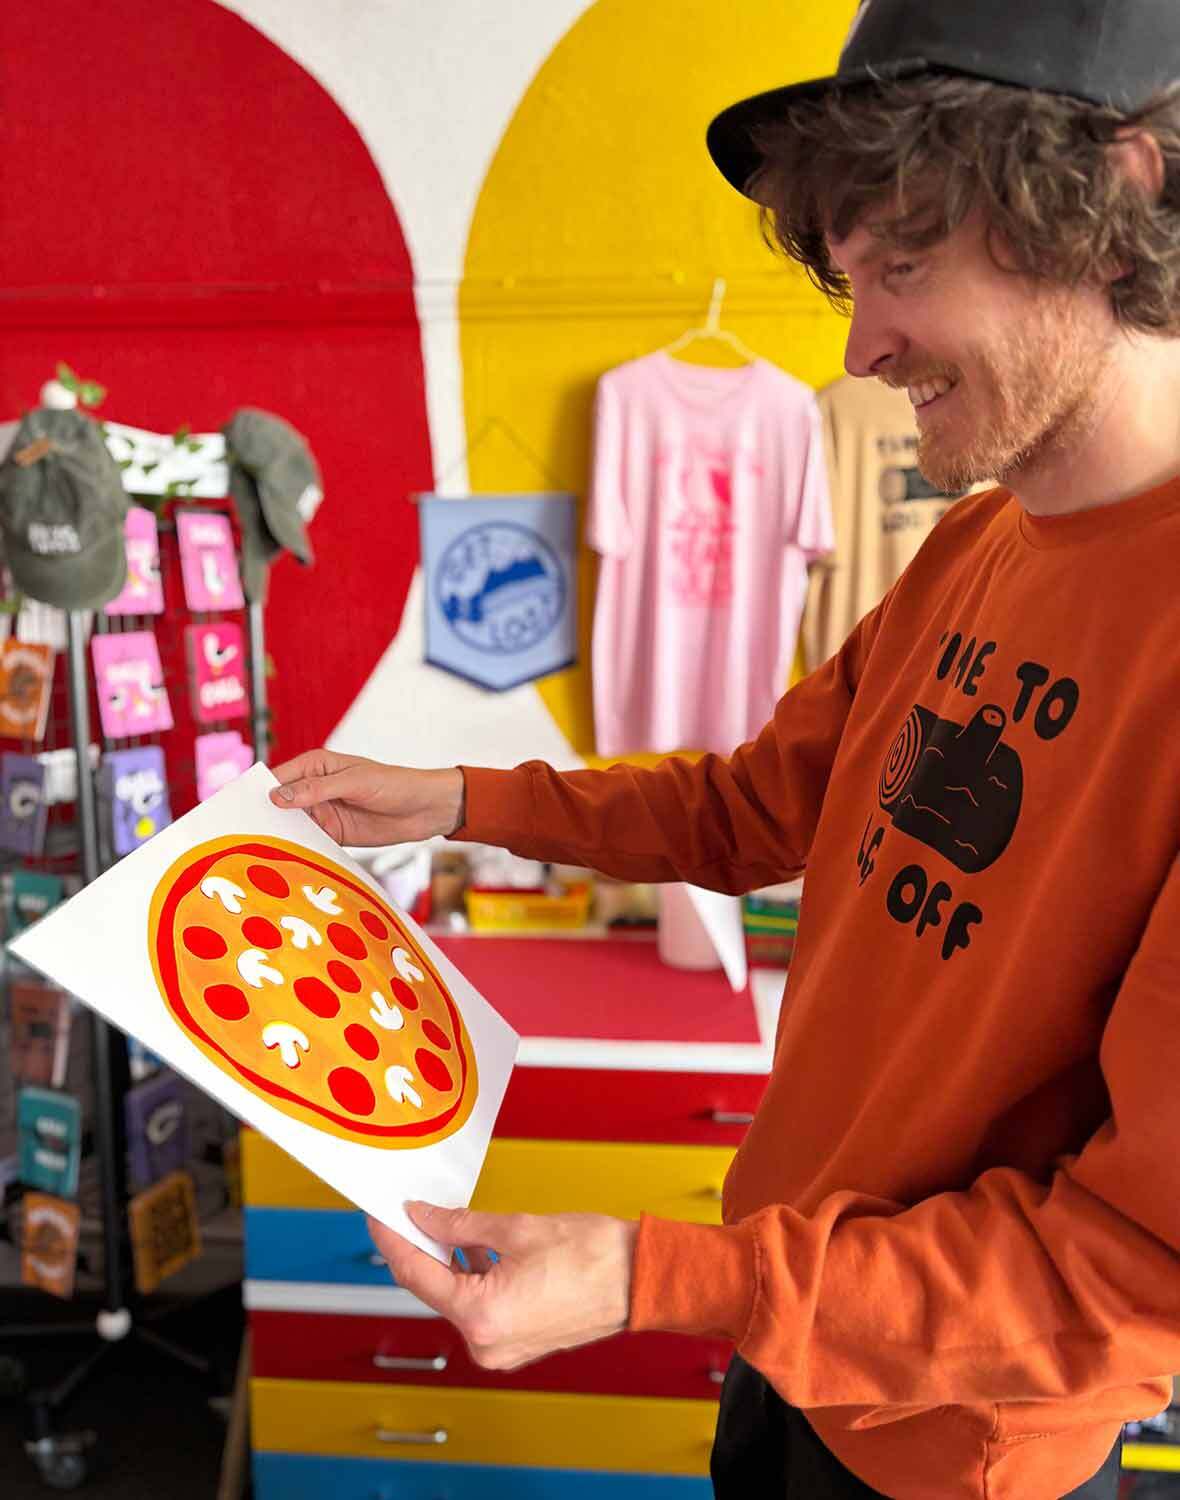
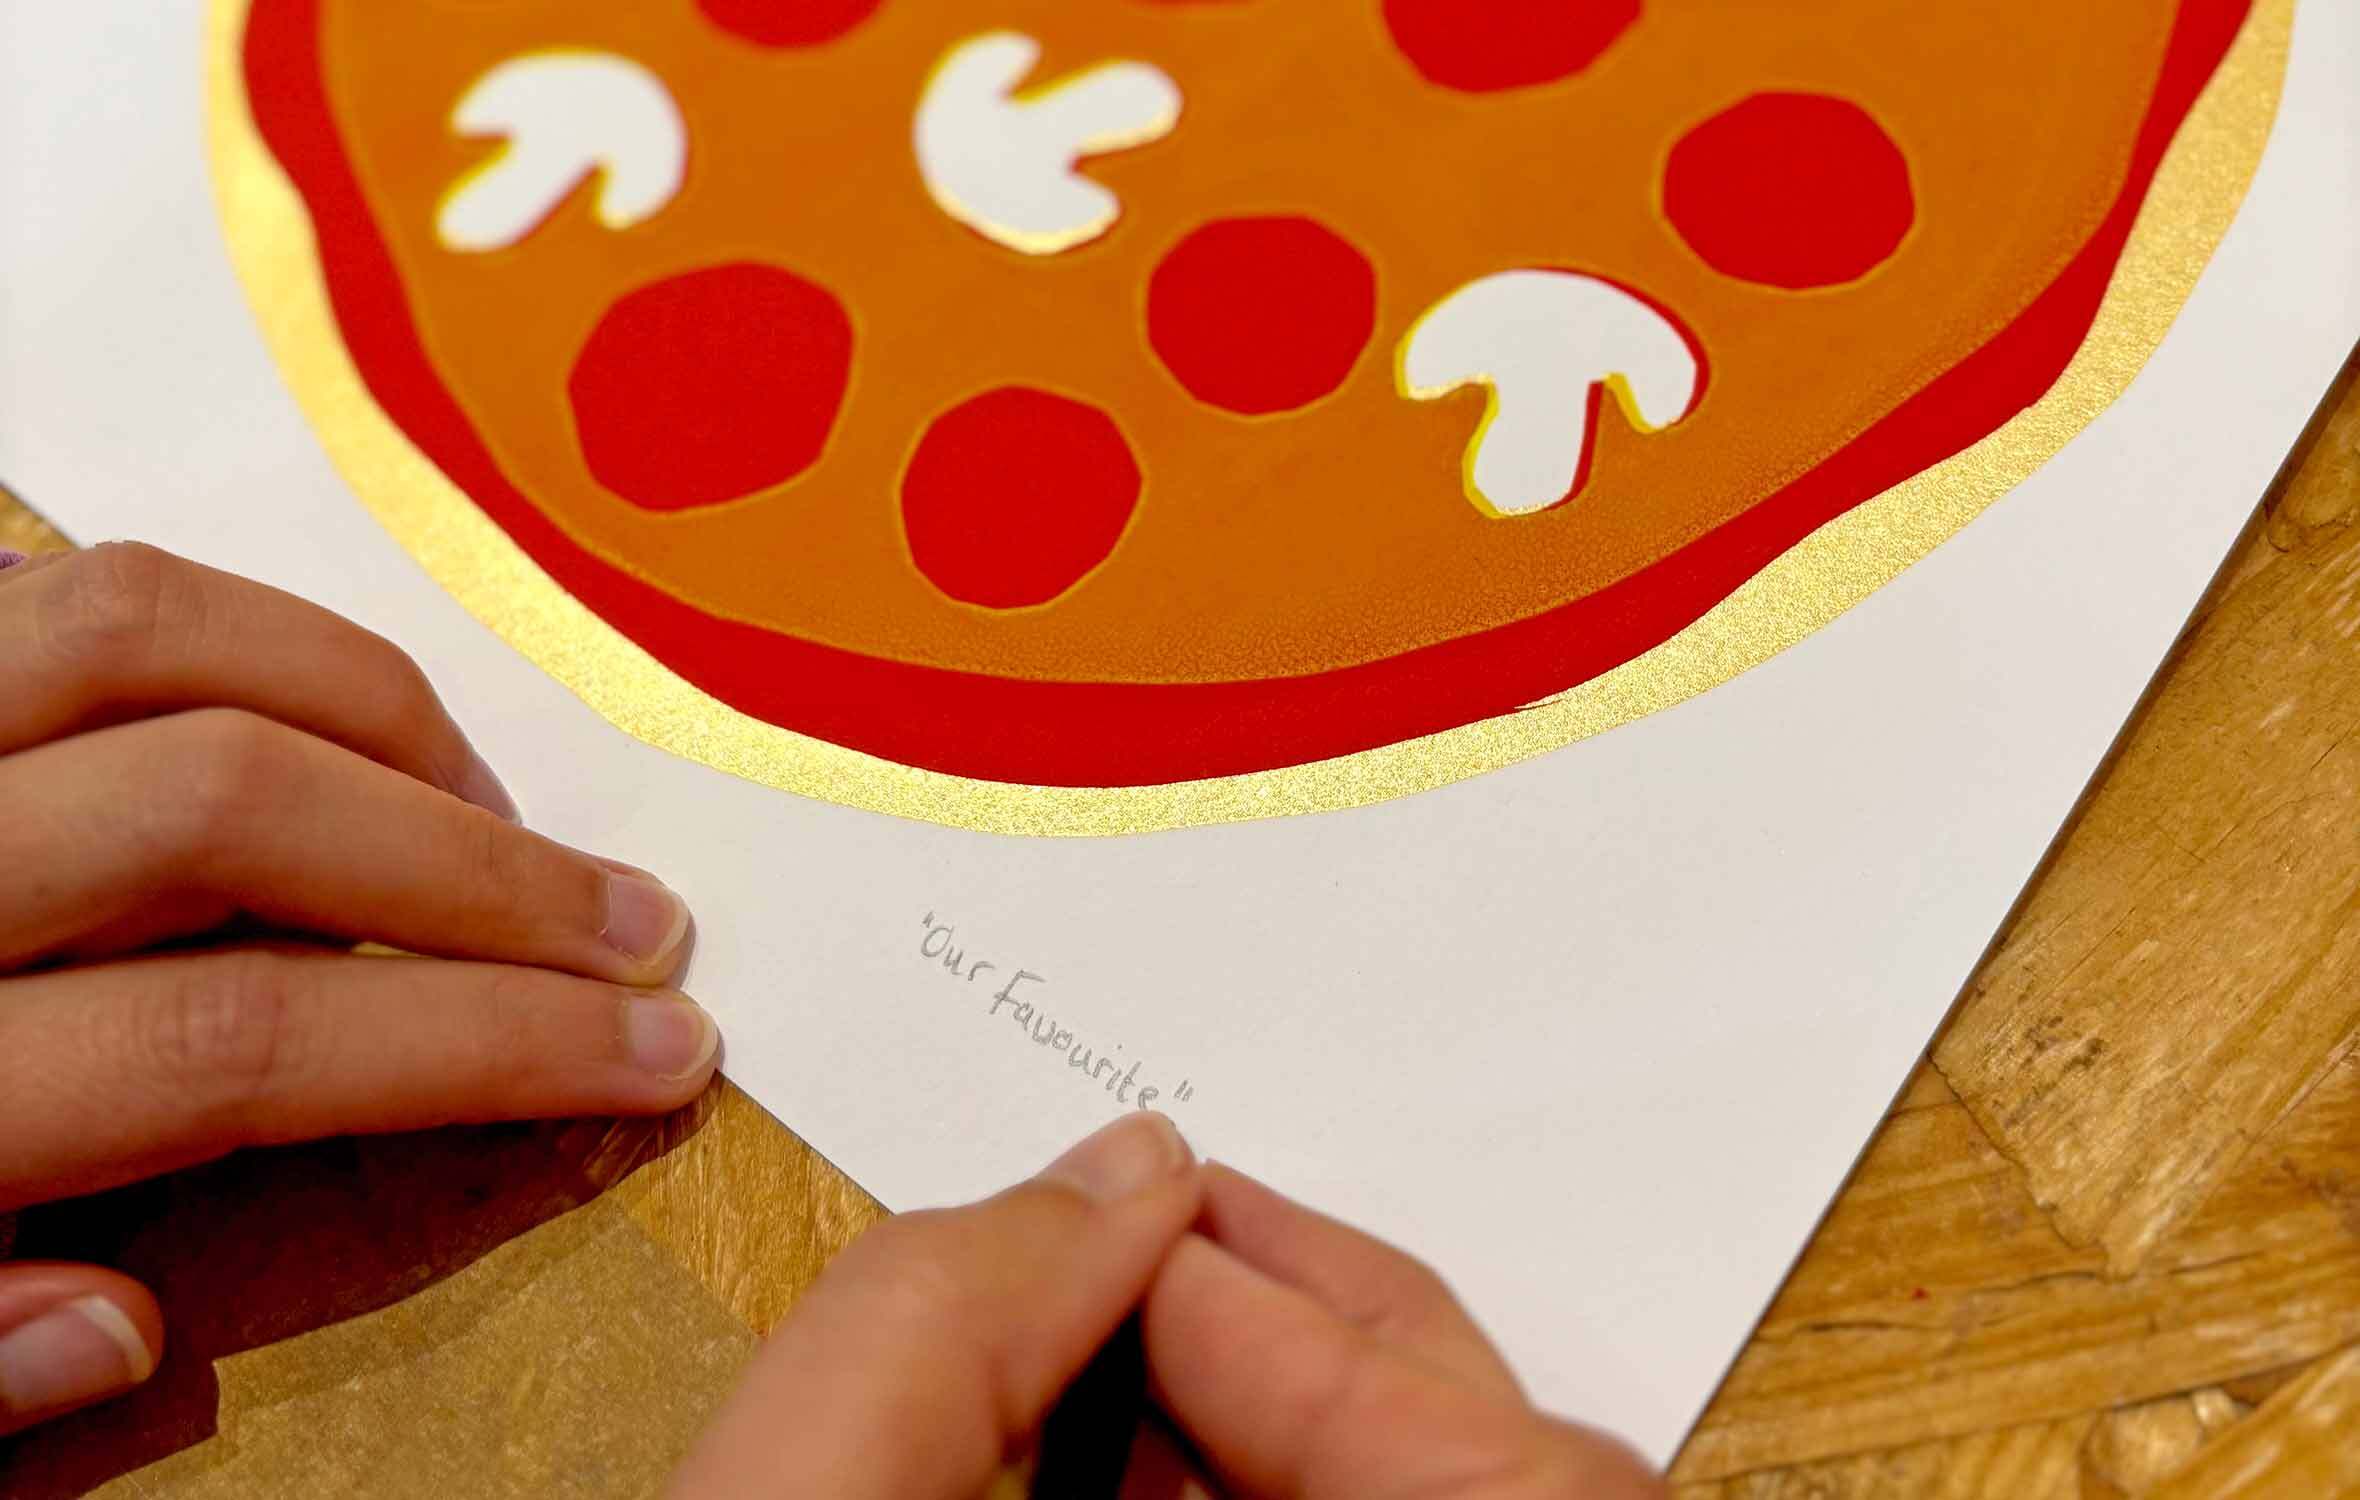
Of course you don’t have to stop there if you don’t want to! Maybe you want to add black olives? Or green pepper? Create your very own pizza design and when it’s finished make sure you title and sign it!